
As the sun streams through the window, brightening up my kitchen, I can't help but feel excitement bubbling up inside me. Today, we're diving into a delightful DIY project called Bubble Painting Art for Kids! This whimsical craft is more than just a fun way to get creative; it's a sensory exploration that transforms ordinary dish soap and vibrant colors into stunning pieces of abstract art. It only takes around 30 minutes, making it the perfect quick activity for a weekend afternoon or a rainy day indoors.
Imagine the sheer joy on your child's face as they blow bubbles over paper, watching the colors dance and swirl to create unique designs. It's a fantastic way to encourage artistic expression and develop fine motor skills, all while having a blast! So, gather your supplies, roll up those sleeves, and get ready to unleash a wave of creativity with this vibrant bubble painting adventure. Let's make some art together!

Why Love Bubble Painting Art for Kids?
Explore a world of creativity: This bubble painting art for kids project is a fantastic way to inspire youthful imagination and artistic flair.
Quick and easy: With just 30 minutes needed, it fits perfectly into any family schedule.
Sensory fun: Mixing colors and making bubbles provides a multi-sensory experience, ensuring kids stay engaged and excited.
Unique outcomes: Each piece of artwork is one-of-a-kind, making every effort feel special.
Perfect for all ages: This activity is not just for kids; adults can join in the fun too, creating lasting memories together.
Great for gifting: The vibrant art pieces can be displayed at home or given as thoughtful gifts to family and friends.
Bubble Painting Art Ingredients
Bring your creativity to life with these essential ingredients!
For the Bubble Solution
- Dish Soap or Tear-Free Baby Wash - Creates those joyful bubbles; any mild soap is a great substitute if you prefer.
- Water - This dilutes the soap for the perfect bubble solution; warm water helps with mixing seamlessly.
- Liquid Watercolors or Food Coloring - Provides the vivid colors for your bubble painting art; natural dyes are an eco-friendly alternative.
For Bubble Making
- Plastic Cups or Small Bowls - Ideal for mixing your colored solutions; any small containers work just as well.
- Straws - Use these for blowing bubbles; choose either reusable or disposable straws based on your preference.
For the Art Surface
- Heavyweight Paper (Watercolor Paper or Cardstock) - Best for painting, this paper prevents curling when wet.
- Aprons or Old T-Shirts - Protects clothing from colorful messes; essential, especially for younger artists.
Gather these ingredients, and you'll be all set to embark on this joyful bubble painting adventure!
How to Make Bubble Painting Art for Kids
-
Mix the Solution: In each plastic cup, combine 2-3 tablespoons of dish soap, 0.25 cup of warm water, and a few drops of liquid watercolors or food coloring. Stir gently to blend without creating bubbles in the mixture.
-
Prepare to Blow: Take a straw and dip it into your colorful mixture, ensuring it's fully submerged to soak up the colors. This is where the fun truly begins!
-
Create Bubbles: Blow gently through the straw, forming bubbles that rise above the rim of the cup. Keep it playful-encourage kids to try and blow bigger bubbles!
-
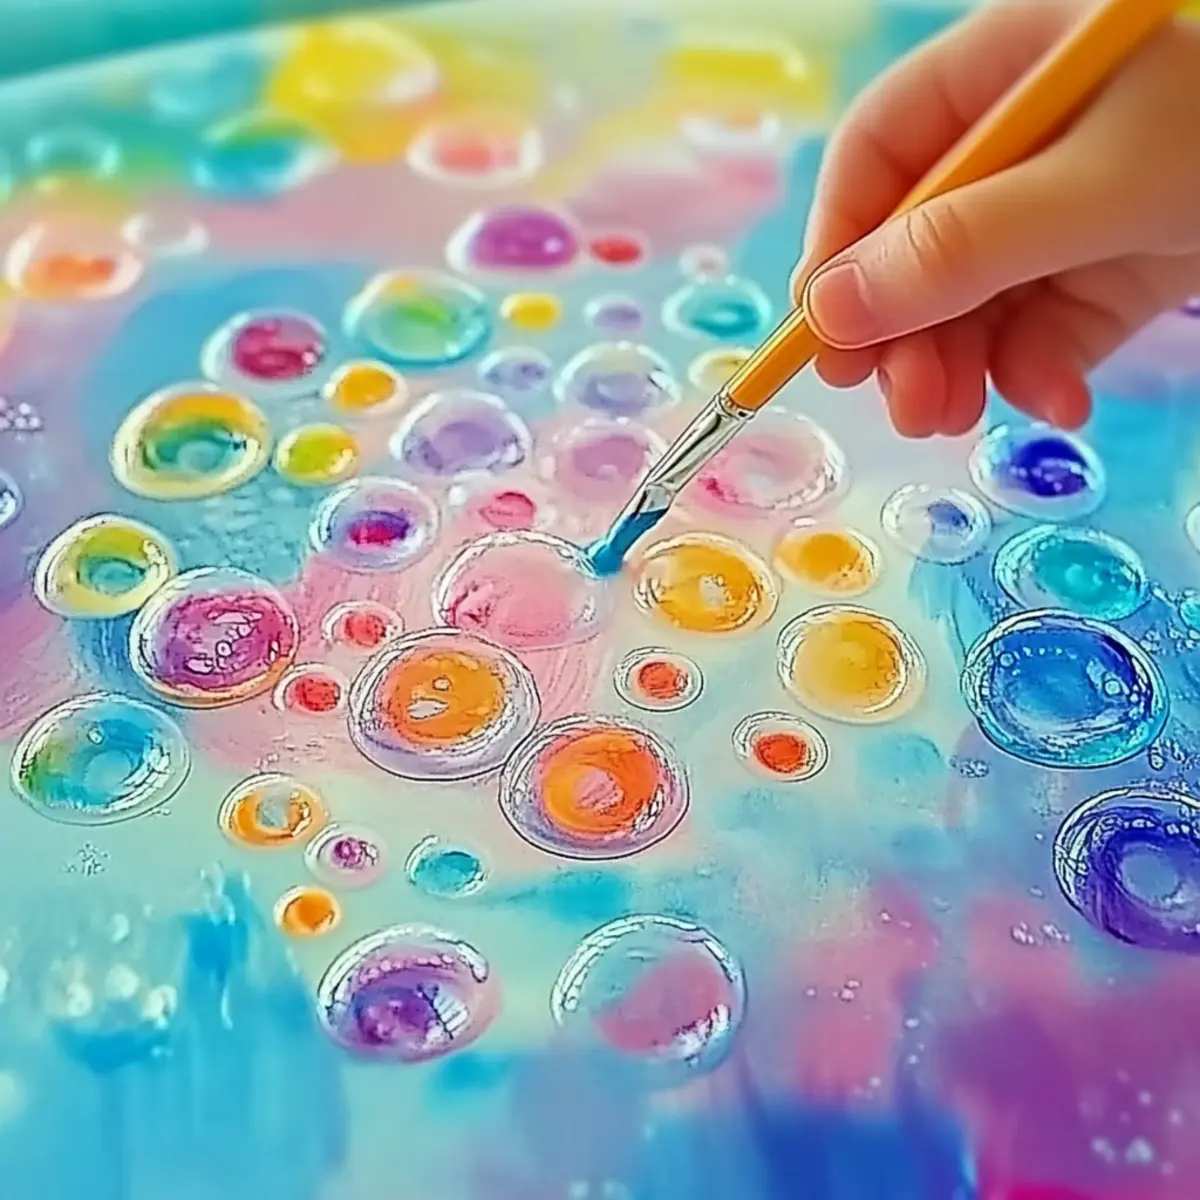
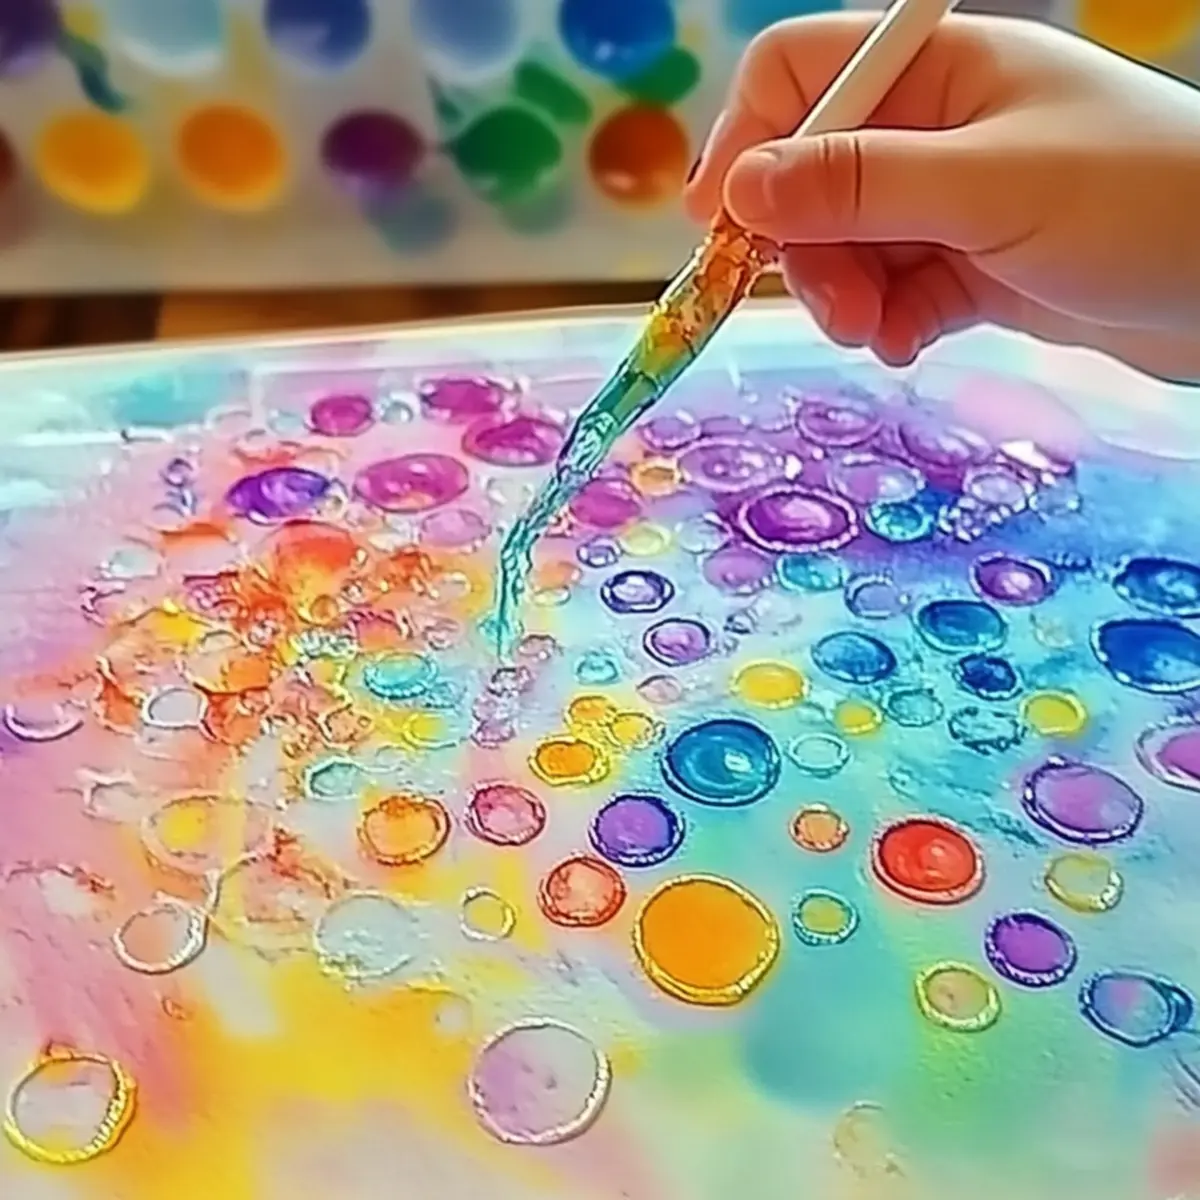
Make Your Masterpiece: Position your heavyweight paper beneath the bubbling straw and allow the bubbles to overflow, creating beautiful, colorful prints on the paper's surface.
-
Dry and Admire: Once done, set the paper aside to dry completely. The vibrant prints will reveal unique textures and designs that are sure to surprise and delight!
-
Showcase the Artwork: Once dried, find a special spot to display your bubble painting or frame them as thoughtful gifts. Each piece is a little treasure, full of creativity!
Optional: Add a splash of glitter before the paint dries for an extra sparkle!
Exact quantities are listed in the recipe card below.
What to Serve with Bubble Painting Art for Kids?
Creating wonderful bubble paintings is only the beginning of your family's artistic adventure! After crafting these vibrant masterpieces, why not add a sprinkle of fun and creativity with some delightful snack options?
-
Colorful Fruit Kabobs: These rainbow-hued skewers are not only healthy but also visually appealing, just like your bubble art! Kids can enjoy a sweet treat while admiring their creations.
-
Veggie Platter & Hummus: Crunchy veggies paired with flavorful hummus provide a pleasant crunch, keeping the creative energy going. Encourage kids to get creative by making fun shapes with the veggies!
-
Mini Sandwiches: Whimsical shapes cut from whole-grain bread can be a hit, with fillings like cheese or turkey. These fun bites keep everyone energized for more artistic fun!
-
Sparkling Fruit Spritzers: A refreshing drink made from sparkling water and a splash of juice will keep your family hydrated. The bubbles mimic the excitement of bubble painting, making it a themed hit!
-
DIY Ice Cream Sundae Bar: Allow kids to top their ice cream with colorful toppings like sprinkles, chocolate syrup, and fruit. It's a sweet way to celebrate their creative achievements!
-
Art-Themed Cookies: Bake or decorate cookies shaped like palettes, paints, or brushes. These treats provide a tasty activity that ties back to the bubble painting experience, combining art and indulgence.
Helpful Tricks for Bubble Painting Art
-
Use Warm Water: Mix your dish soap with warm water for a smoother blend, ensuring an easier bubble-making process without lumps.
-
Check Paper Type: For best results, always use heavyweight paper; it prevents curling and allows for vibrant color transfer when creating your bubble painting art.
-
Blow Gently: Encourage kids to blow gently through the straw to create bubbles without overwhelming the mixture; this prevents the colors from mixing too quickly.
-
Supervise Closely: Keep an eye on younger children while using straws to ensure safety and prevent any accidental inhalation or spills in their excitement.
-
Get Creative: Use different shapes or textures of paper to see how they affect the final design, adding an interesting twist to your bubble painting art!
How to Store and Freeze Bubble Painting Art for Kids
-
Drying Time: Allow the bubble paintings to dry completely in a safe, flat area away from direct sunlight for about 24 hours to preserve the colors and textures.
-
Display: Once dry, showcase your vibrant creations on a wall or shelf to keep the memories alive. Frame them for a more polished look or gift them to family and friends.
-
Storage Conditions: For long-term preservation, store the artwork in a flat box or portfolio to prevent bending and curling. Keep in a cool, dry place for up to 6 months.
-
Reusing Materials: If you wish to recreate the bubble painting experience, save the remaining bubble solution in a sealed container in the fridge for up to a week for another fun crafting session!
Make Ahead Options
These Bubble Painting Art for Kids activities are perfect for busy home cooks looking to save time and maximize creativity! You can prepare the bubble solution and store it in the refrigerator for up to 24 hours. Simply mix 2-3 tablespoons of dish soap, 0.25 cup of warm water, and your choice of liquid watercolors or food coloring in separate containers. Make sure to seal them tightly to maintain their quality. When you're ready to dive into art, just give the mixture a gentle stir to rehydrate and get those colors vibrant again. With these make-ahead options, you'll have more time to enjoy a fun-filled craft session with your kids-perfect for spontaneous rainy days!
Bubble Painting Variations
Dive deeper into the joy of bubble painting art for kids by exploring these creative variations that will spark even more imagination!
Make this delightful craft your own with exciting twists and substitutes that enhance the fun while keeping the essence intact.
-
Natural Dyes: Substitute liquid watercolors with homemade natural dyes from fruits or vegetables. They offer vibrant shades and a fun way to explore color-making!
-
Textured Papers: Experiment with different paper types, like textured watercolor paper, for unique effects. The surface will add delightful depth to your designs.
-
Foam Soap: Use foaming or whipped soaps for a different bubbling experience. This not only adds a frothy texture but can create fun patterns too.
-
Scented Bubbles: Add a few drops of essential oils to the soap mixture for sensory enrichment. Kids will love blowing bubbles that smell as amazing as they look!
-
Bubble Blow Tools: Instead of straws, try using bubble wands for a twist. They can produce exciting bubble shapes, offering a new take on traditional painting.
-
Sparkle Dust: Before the paint dries, sprinkle edible glitter on the artwork for a dazzling finish. Kids adore that extra sparkle and shine in their creations!
-
Mini Prints: Use smaller pieces of paper or cardboard for mini artworks. This allows for quick creations and gives kids an opportunity to create a gallery of their mini masterpieces.
-
Layers of Color: After the first layer dries, add more bubbles using different colors. Layering creates more depth and gives each piece a truly unique look!
Let each variation inspire a new adventure into creativity-happy painting!
Bubble Painting Art for Kids Recipe FAQs
What type of paper works best for bubble painting?
Using heavyweight paper, like watercolor paper or cardstock, is essential for bubble painting. This type of paper prevents curling when wet and ensures the colors transfer beautifully, creating vibrant and unique prints. I recommend experimenting with different textures for added depth!
How do I store the finished bubble paintings?
Once your bubble paintings are completely dry, store them flat in a protective box or portfolio to prevent bending. Keep them in a cool, dry place, and they can last up to 6 months! You can also frame them or display them on a shelf to enjoy your kids' creative masterpieces.
Can I reuse leftover bubble solution?
Absolutely! If you have extra bubble solution, simply transfer it to a sealed container and store it in the fridge. It should last for up to a week. This means you can enjoy another bubble painting session later in the week without starting from scratch!
What if my bubbles aren't forming well?
If you're not getting good bubbles, first ensure your soap is mixed well with water. Use warm water for a smoother blend. Also, check if you're blowing gently as too much force can pop the bubbles before they overflow onto the paper. It's a fun trial-and-error experience!
Are there any dietary concerns for this activity?
While there are no dietary concerns for bubble painting, always supervise young children closely with any craft supplies. Make sure they don't put straws or materials in their mouths. If using food coloring, opt for non-toxic or natural alternatives to avoid any potential allergies.
Can I use homemade natural dyes instead of food coloring?
Yes! If you're looking to make the project even more eco-friendly, you can create homemade natural dyes using fruits and vegetables like beet juice for red and spinach for green. These substitutes provide lovely colors while being safe and non-toxic for kids.
Whimsical Bubble Painting Art for Kids: A Fun DIY Adventure
Equipment
- Plastic Cups or Small Bowls
- Straws
- Heavyweight Paper (Watercolor Paper or Cardstock)
Ingredients
For the Bubble Solution
- 2-3 tablespoons Dish Soap or Tear-Free Baby Wash Any mild soap is a great substitute.
- 0.25 cup Warm Water Helps with mixing seamlessly.
- a few drops Liquid Watercolors or Food Coloring Natural dyes are an eco-friendly alternative.
For Bubble Making
- Plastic Cups or Small Bowls Any small containers work just as well.
- Straws Choose either reusable or disposable.
For the Art Surface
- Heavyweight Paper (Watercolor Paper or Cardstock) Prevents curling when wet.
- Aprons or Old T-Shirts Essential to protect clothing from mess.
Instructions
How to Make Bubble Painting Art for Kids
- In each plastic cup, combine 2-3 tablespoons of dish soap, 0.25 cup of warm water, and a few drops of liquid watercolors or food coloring. Stir gently to blend without creating bubbles in the mixture.
- Take a straw and dip it into your colorful mixture, ensuring it’s fully submerged to soak up the colors.
- Blow gently through the straw, forming bubbles that rise above the rim of the cup.
- Position your heavyweight paper beneath the bubbling straw and allow the bubbles to overflow, creating beautiful prints on the paper’s surface.
- Once done, set the paper aside to dry completely.
- Once dried, find a special spot to display your bubble painting or frame them as thoughtful gifts.


Leave a Reply