
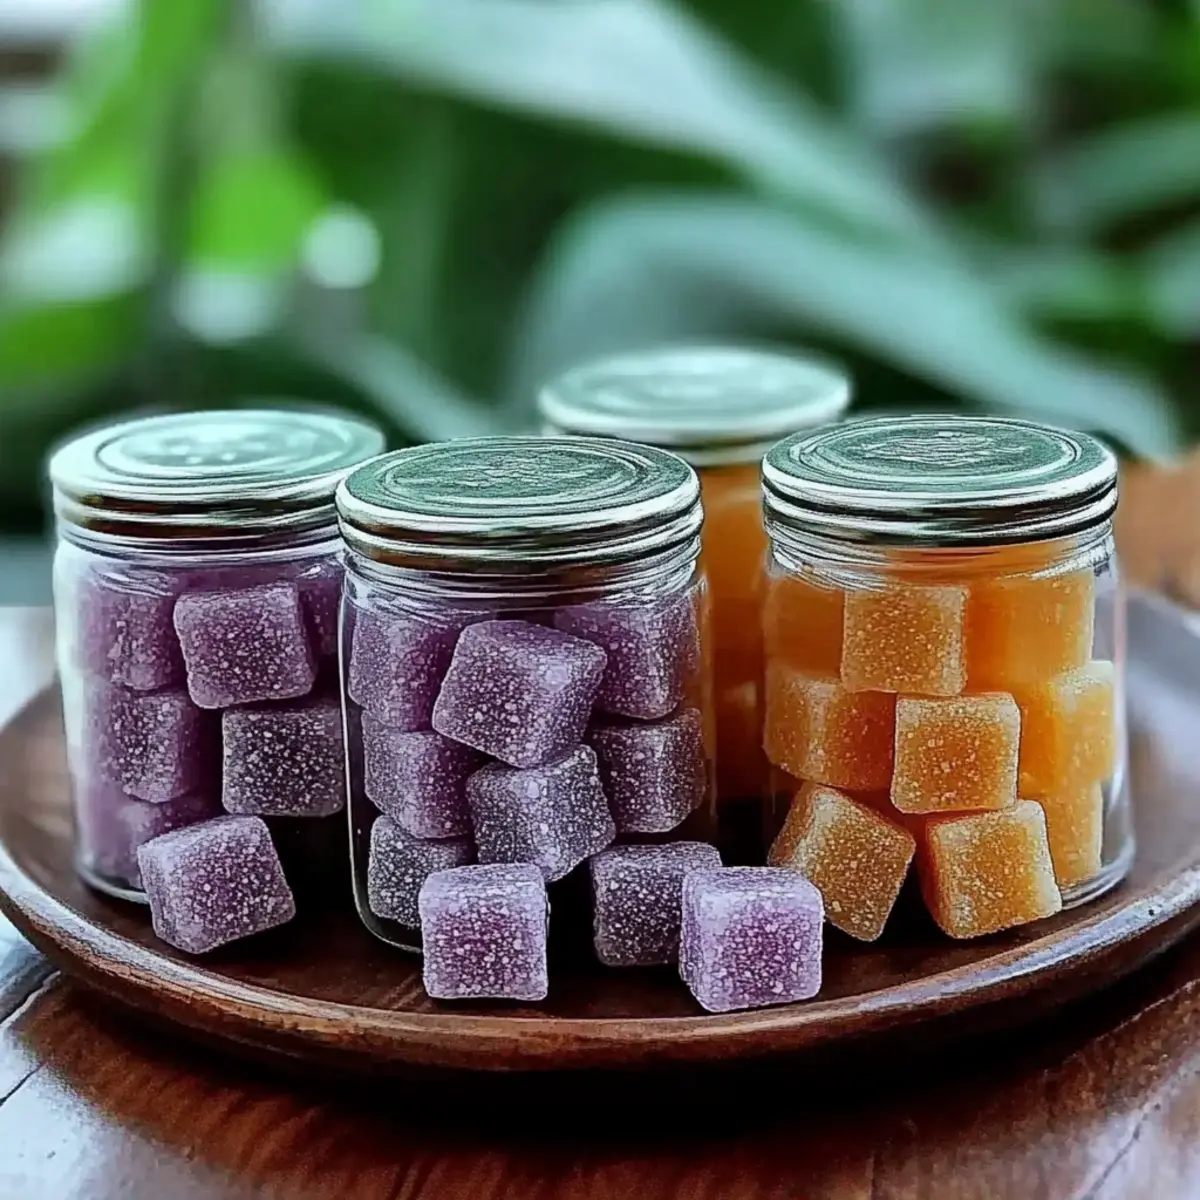
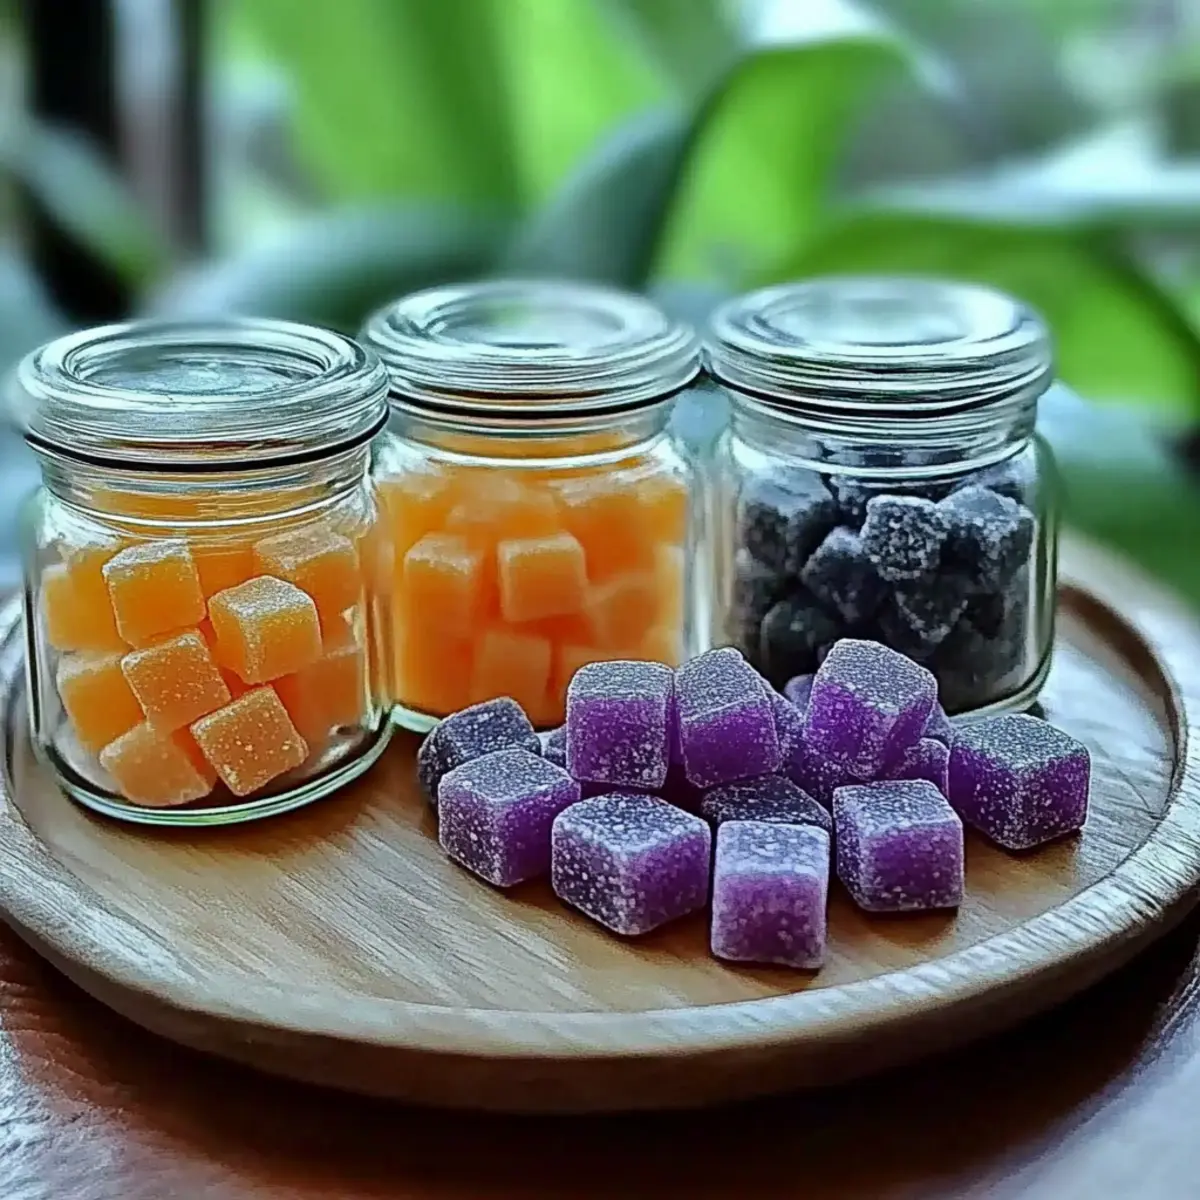
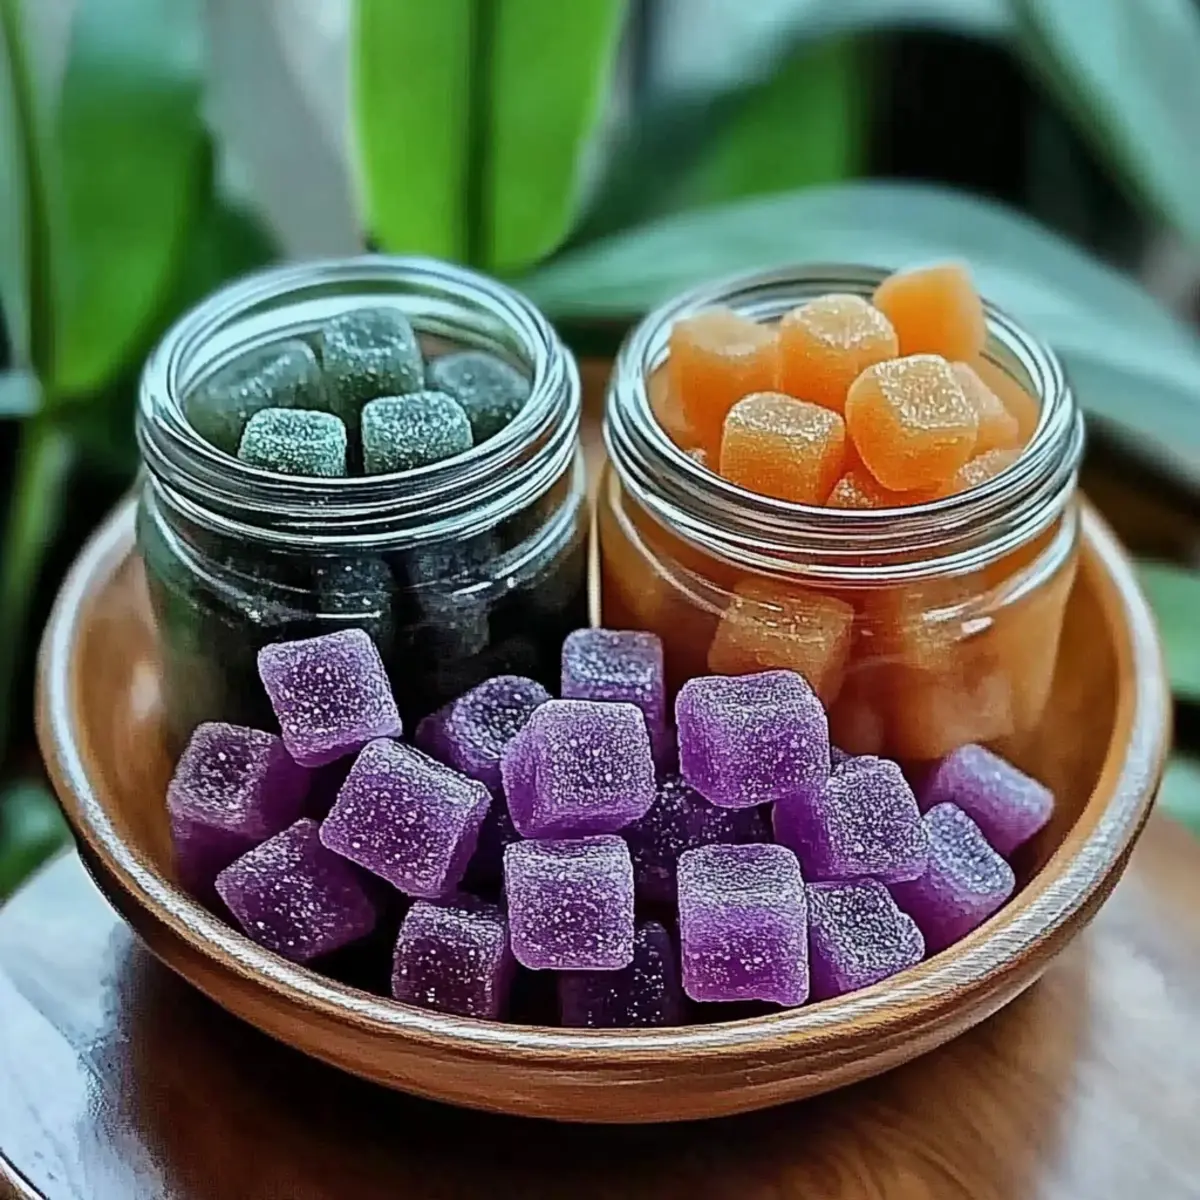
There's something truly soothing about immersing myself in a hands-on craft, especially when it involves bringing delightful scents into my home. Recently, I found myself in need of a natural air freshener that not only smells amazing but also adds a pop of color to my space. That's when I discovered the magic of DIY aroma stones!
These charming baking soda stones are a breeze to make and allow you to personalize your scents with your favorite essential oils. The combination of baking soda and cornstarch creates a lovely texture that's both decorative and functional. From calming lavender to invigorating citrus blends, the possibilities are endless.
As I mixed my ingredients, I could already envision these vibrant stones brightening up my living room and adding a touch of tranquility. Plus, they're perfect for anyone looking to step away from artificial fragrances! So, grab your mixing bowl and let's dive into crafting some delightful DIY aroma stones that will transform your space into a fragrant sanctuary.
Why will you love DIY Aroma Stones?
Fun and Creative: The DIY aroma stones are a delightful craft that transforms kitchen staples into beautiful decorations. Customizable Scents: Create unique blends with your favorite essential oils to match your mood or the season! Simple Process: With just baking soda, cornstarch, and water, this project is straightforward and perfect for all skill levels. Eco-Friendly Choice: Made from natural ingredients, they're a sustainable alternative to chemical air fresheners. Perfect Gift Idea: These stones also make charming homemade gifts, adding a personal touch to your presents. Embrace your inner artisan and turn your home into a fragrant oasis with these lovely creations!
DIY Aroma Stones Ingredients
For the Base
- Baking Soda - This is the foundation of your DIY aroma stones, providing structure and texture.
- Cornstarch - It binds the mixture together for stability; arrowroot powder works as a great substitute if needed.
- Water - Adjust the amount to achieve your preferred consistency for shaping the stones.
For Scenting
- Essential Oils - Choose your favorite scents for a personal touch; use 10-15 drops per batch for a fragrant result.
For Color (Optional)
- Food Color - Add a splash of color; use sparingly to reach your desired hue without overpowering.
- Mica Powder or Glitter (Optional) - For extra visual appeal, you can dust these over the stones before they dry.
Transform your home with these delightful DIY aroma stones, perfect for calming your space!
How to Make DIY Aroma Stones
-
Mix Dry Ingredients: In a mixing bowl, blend together 2 cups of baking soda and 1 cup of cornstarch. This combination provides a sturdy base for your aroma stones, ensuring they hold their shape beautifully.
-
Add Wet Ingredients: Gradually whisk in 1.25 cups of water along with your chosen essential oils. Keep mixing until you reach a smooth, pourable consistency, which should feel comfortable in your hands.
-
Customize Color: If you'd like to add some color, stir in a few drops of food coloring until your mixture reaches the desired shade. The vibrant hues will make your stones delightful to look at!
-
Mold Stones: Carefully pour the mixture into silicone molds, or shape them using your hands. Make sure they're packed well to avoid any crumbling.
-
Dry: Place your formed stones on wax paper or a drying rack and let them sit for 24 hours. This time allows them to harden completely, ensuring they maintain their shape.
-
Finishing Touches: For a little extra sparkle, dust your stones with mica powder or glitter before they dry. This optional step adds a charming shimmer to your creations!
Optional: Tie some twine around the stones for a lovely rustic gift presentation.
Exact quantities are listed in the recipe card below.
Storage Tips for DIY Aroma Stones
-
Room Temperature: Store the DIY aroma stones in a cool, dry place to keep their scent fresh and vibrant for up to 6 months.
-
Airtight Container: Once completely dried, place the stones in an airtight container to maintain their delightful fragrance and prevent moisture absorption.
-
Reapplication of Scents: To keep the aroma potent, add a drop or two of your favorite essential oil weekly. This tip helps refresh the scent of your DIY aroma stones.
-
Gift Storage: If you're gifting these charming creations, wrap them in tissue paper and place them in a decorative box to protect them until you're ready to share.
Make Ahead Options
These DIY Aroma Stones are perfect for busy home cooks looking to save time! You can prepare the stone mixture up to 24 hours in advance, allowing the delightful scents to meld beautifully. Simply mix your dry ingredients (baking soda and cornstarch) and wet ingredients (water and essential oils), and store the mixture in an airtight container to keep it fresh. When you're ready to mold the stones, just give the mixture a quick stir before pouring it into silicone molds. After shaping, let them dry as directed. With this make-ahead option, you'll create stunning air fresheners with minimal effort, enjoying fresh scents while staying on top of your busy schedule!
Expert Tips for DIY Aroma Stones
- Smooth Mixture: Ensure the mixture is lump-free to avoid dry spots in your DIY aroma stones. A smooth consistency is key for even drying.
- Stain Control: When using food coloring, wear gloves to prevent staining your hands. It makes the crafting process much more enjoyable!
- Longer Lasting Scents: To keep the aroma vibrant, add a drop or two of essential oil on the stones weekly-it's an easy trick to refresh their fragrance.
- Creative Molding: Experiment with different shapes by using various silicone molds to add fun designs to your stones and elevate your decor.
- Color Mixing: Don't be afraid to mix food colors to create custom shades that can complement your home décor or match seasonal themes.
DIY Aroma Stones Variations
There are endless possibilities to enhance your DIY aroma stones! Let your imagination run wild and personalize these fragrant gems to suit your style.
-
Herbal Mix: Combine dried herbs like rosemary or thyme into the mixture for an earthy, natural scent.
-
Citrus Twist: Add zest from lemon or orange peels for a refreshing zing that brightens your space.
-
Floral Delight: Use floral essential oils, like rose or jasmine, for a romantic touch that fills the air with sweetness.
-
Spa Essence: Incorporate calming scents like chamomile or sandalwood for a spa-like feel, perfect for relaxation.
-
Color Themes: Opt for seasonal colors like pastel hues for spring or warm tones for autumn to decorate in harmony with your home's ambiance.
-
Sparkle Upgrade: Instead of mica powder, use biodegradable glitter for an eco-friendly shimmer that's safe for the environment.
-
Scent Layering: Create layers in your stones by pouring different colored mixtures in stages to mix scents and colors beautifully.
Feel free to experiment and mix these ideas to create your own unique versions of these delightful DIY aroma stones!
What to Serve with DIY Aroma Stones?
Crafting beautiful, scented stones is a delightful experience that brings charm and fragrance into your home-a perfect touch for any cozy space.
- Decorative Bowls: Use beautiful bowls to display your aroma stones, allowing them to enhance your décor while releasing soothing scents.
- Essential Oil Diffuser: Pairing these stones with a diffuser can amplify the fragrance experience, creating a layered aroma that calms the mind.
- Scented Candles: Choose candles with complementary scents, such as lavender or citrus, for a perfectly fragrant atmosphere that encourages relaxation.
- Potted Plants: Incorporate fresh greenery to create a refreshing ambiance; the combination of stones and plants promotes a serene, natural environment.
- Fragrant Herbs: Add dried herbs like rosemary or mint nearby for a rustic touch. Their aroma can beautifully blend with your aroma stones, enhancing the sensory experience.
- Homemade Potpourri: Place your DIY aroma stones next to a bowl of potpourri. This can add extra texture and layers of fragrance to your space, elevating the entire atmosphere.
- Relaxing Music Playlist: Create a soothing sound environment as you enjoy the scents from your stones, turning your space into a personal retreat for the senses.
- Warm Beverages: Pair your stones with a warm cup of herbal tea, bringing comfort and tranquility as you relax in the scent-filled atmosphere.
- Artisanal Soaps: Display your stones alongside handmade soaps for a beautiful bathroom aesthetic; the stones will visually complement the soothing presence of the soaps.
- Aromatherapy Drinks: Sip on refreshing drinks infused with citrus or mint, which can bring the same invigorating essence as your crafted stones, enhancing the holistic experience.
DIY Aroma Stones Recipe FAQs
What is the best way to choose essential oils for my DIY aroma stones?
Absolutely! Choosing essential oils is all about personal preference. Think about the ambiance you want to create; calming scents like lavender or chamomile are perfect for relaxation, while citrus oils like lemon or orange can invigorate a space. A combination, such as eucalyptus and mint, can also be delightful! Use 10-15 drops per batch, and feel free to experiment until you find your ideal blend.
How long do DIY aroma stones last when properly stored?
Very! When stored in an airtight container at room temperature, your DIY aroma stones can maintain their fragrant goodness for up to 6 months. However, to keep them smelling fresh, I suggest adding a drop or two of essential oil every week; it's a simple way to refresh their aroma and prolong the enjoyment.
Can I freeze DIY aroma stones for longer storage?
Certainly! To freeze them, place fully dried aroma stones in a freezer-safe bag or container. They can be stored in the freezer for up to 3 months. When you're ready to use them, simply let them thaw at room temperature for a few hours. This process helps maintain their scent, but I recommend reapplying essential oil after thawing for optimal fragrance.
What should I do if my aroma stones crumble or don't hold their shape?
Oh no! If your aroma stones crumble, it could be that the mixture was too dry. Always ensure the mixture has a smooth, pourable consistency before molding. If they do crumble upon removal from the mold, try wetting your hands before shaping them to help them stick together better. You might also benefit from using less water initially and adding more as needed to find the right texture.
Are DIY aroma stones safe for pets?
Yes and no! While the natural ingredients are safe, some essential oils can be harmful to pets, particularly cats and dogs. Always research the specific essential oils you plan to use; oils like tea tree, eucalyptus, and citrus can be toxic to our furry friends. If you're unsure, stick to pet-safe options like lavender or chamomile, which are generally regarded as safe.
Can I customize the colors of my DIY aroma stones?
Absolutely! Color customization is one of the fun aspects of the process. Use food coloring sparingly to create the hues you love, or mix colors to achieve your desired shade. Just remember, the goal is to create beautiful, eye-catching stones, so feel free to let your imagination run wild!
DIY Aroma Stones: Easy, Calming Crafts for a Fresh Space
Equipment
- mixing bowl
- silicone molds
- Whisk
- Measuring cups
- Wax Paper
Ingredients
For the Base
- 2 cups baking soda provides structure and texture
- 1 cup cornstarch binds the mixture together; arrowroot powder can substitute
- 1.25 cups water adjust for preferred consistency
For Scenting
- 10-15 drops essential oils choose favorites for fragrant result
For Color (Optional)
- to taste food color use sparingly for desired hue
- to taste mica powder or glitter optional for visual appeal
Instructions
Preparation Steps
- In a mixing bowl, blend together 2 cups of baking soda and 1 cup of cornstarch.
- Gradually whisk in 1.25 cups of water and chosen essential oils until smooth.
- Stir in a few drops of food coloring to reach desired shade.
- Pour the mixture into silicone molds or shape them using hands, packed well.
- Let the stones dry on wax paper or a drying rack for 24 hours.
- Dust with mica powder or glitter before they dry if desired.


Leave a Reply