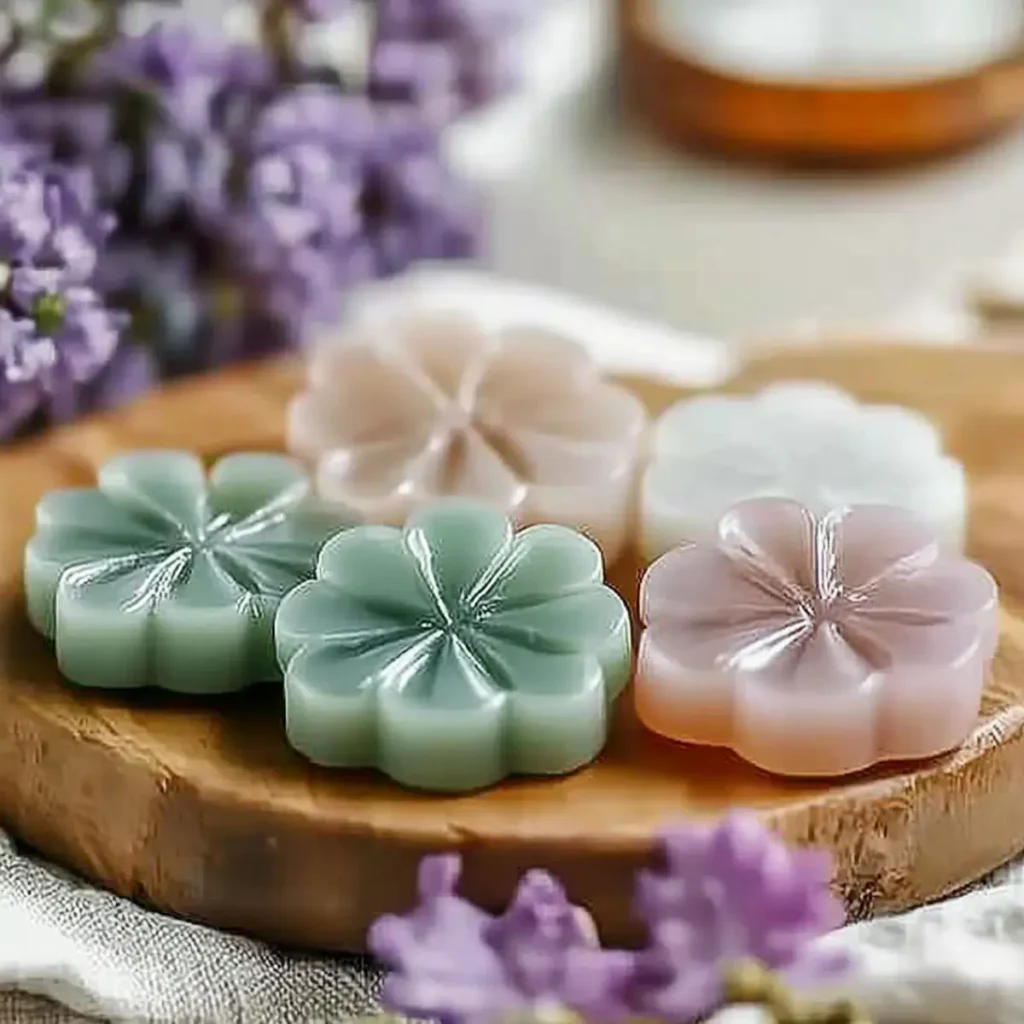
On a whim, I decided to dive into the world of DIY aroma stones, and let me tell you, it was a sensory delight! The moment I mixed the ingredients, a wave of beautiful fragrances transformed my kitchen into a mini sanctuary. Not only are these stones effortlessly pleasing to the nose, but they also serve as charming decorative pieces that brighten up any space in your home. Perfect for a rainy afternoon or when hosting friends, these naturally scented, beautifully handmade aroma stones are an ideal alternative to those synthetic air fresheners we often reach for. With just a few simple ingredients and a dash of creativity, you can immerse yourself in a fun and fragrant crafting experience that will have your home smelling divine. Ready to create something lovely for your home? Let's get started!
Why Love DIY Aroma Stones?
DIY Aroma Stones offer a delightful way to enhance your home atmosphere! Unique Crafting Experience: The process is fun and straightforward, perfect for all skill levels. Natural Ingredients: Utilizing simple, eco-friendly components ensures safety while infusing your space with fragrance. Stunning Decor: These charming stones can be displayed beautifully, adding character to any room. Versatile Scents: Customize your aroma stones with your favorite scents for a personalized touch. Plus, they make fantastic handmade gifts! Dive into this creative project and elevate your home's ambiance while having a blast!
DIY Aroma Stones Ingredients
Crafting your own DIY Aroma Stones is simple and rewarding!
For the Base
- Baking Soda - A natural ingredient that forms the foundation of your aroma stones.
- Cornstarch - Helps create a smooth texture, ensuring your stones are easy to shape.
- Water - Activates the dry ingredients; use filtered water for the best results.
For the Fragrance
- Essential Oils - Choose your favorite scents to personalize your aroma stones; they're what make them truly delightful!
- Herbs and Spices (optional) - Add dried herbs like lavender or cinnamon for an extra layer of fragrance and visual appeal.
For the Color (optional)
- Food Coloring - Use a few drops to give your stones a pop of color; keep it natural for an earthy look.
With these simple ingredients, you're well on your way to creating beautiful, naturally scented aroma stones that will transform your home!
How to Make DIY Aroma Stones
-
Mix Dry Ingredients: In a large bowl, combine 1 cup of baking soda and ½ cup of cornstarch. Stir until evenly mixed; this creates the base for your aroma stones.
-
Add Water: Gradually pour in ¾ cup of filtered water, stirring continuously until the mixture forms a thick paste. This should have a smooth texture like play dough.
-
Incorporate Fragrance: Add 10-15 drops of your chosen essential oils into the mixture. Feel free to blend different oils for a unique scent that resonates with you!
-
Add Color (optional): If you desire colorful stones, mix in a few drops of food coloring. Experiment with different colors to match your home décor or your mood.
-
Shape the Stones: Use your hands or cookie cutters to form small stones or shapes from the mixture. Keep them about 1 inch thick for optimal drying.
-
Dry the Stones: Place the shaped stones on a lined baking sheet and let them dry for 24-48 hours at room temperature. If you're in a hurry, you can bake them at 200°F for about 1.5 hours.
-
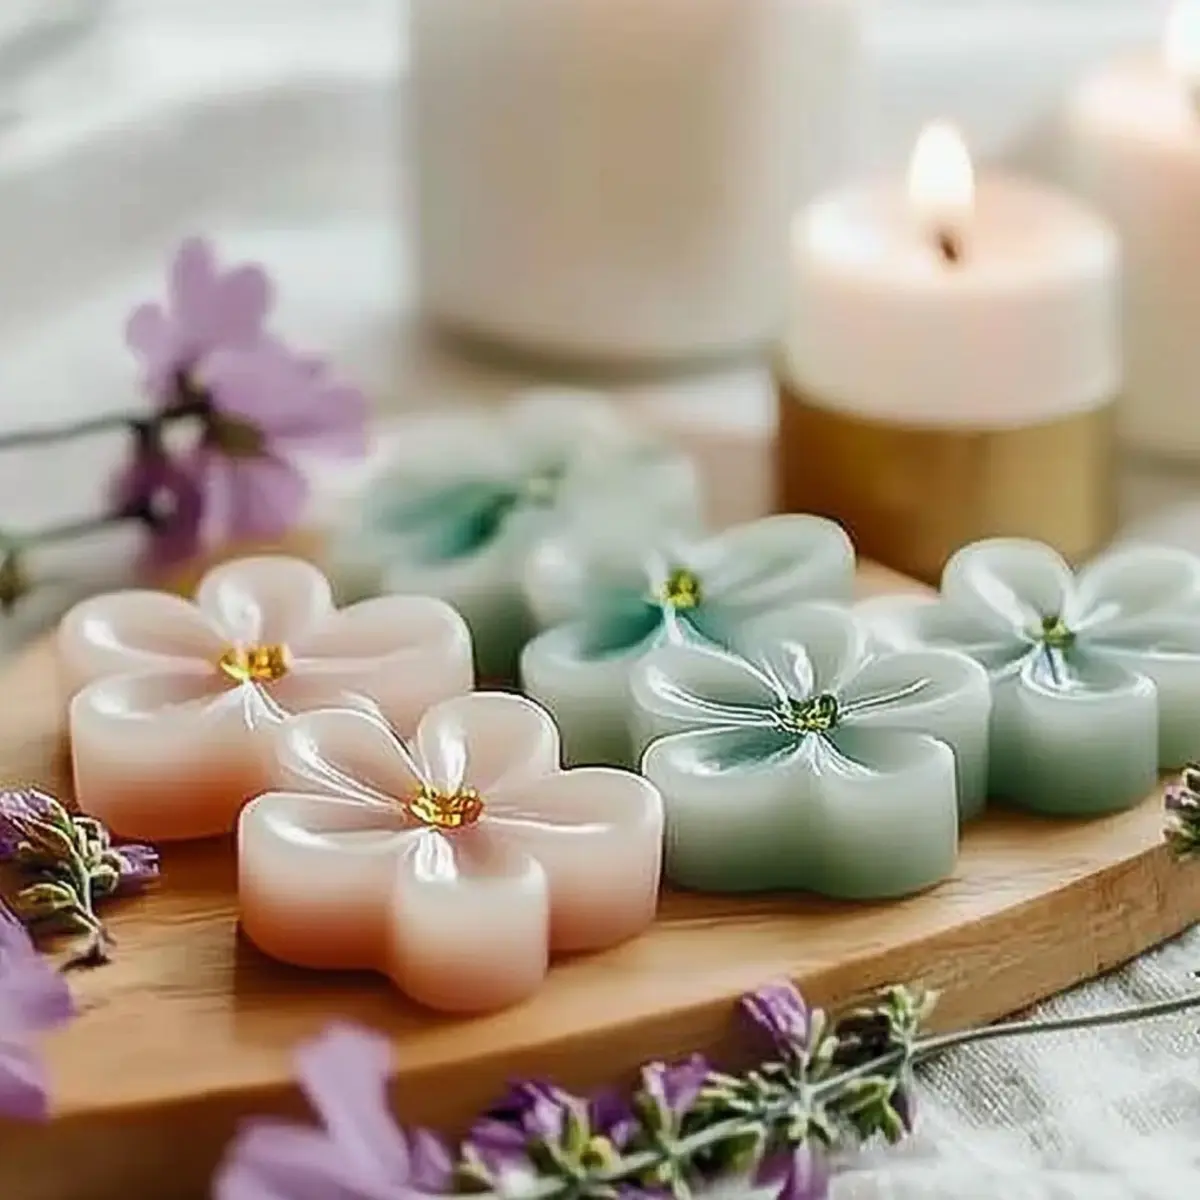
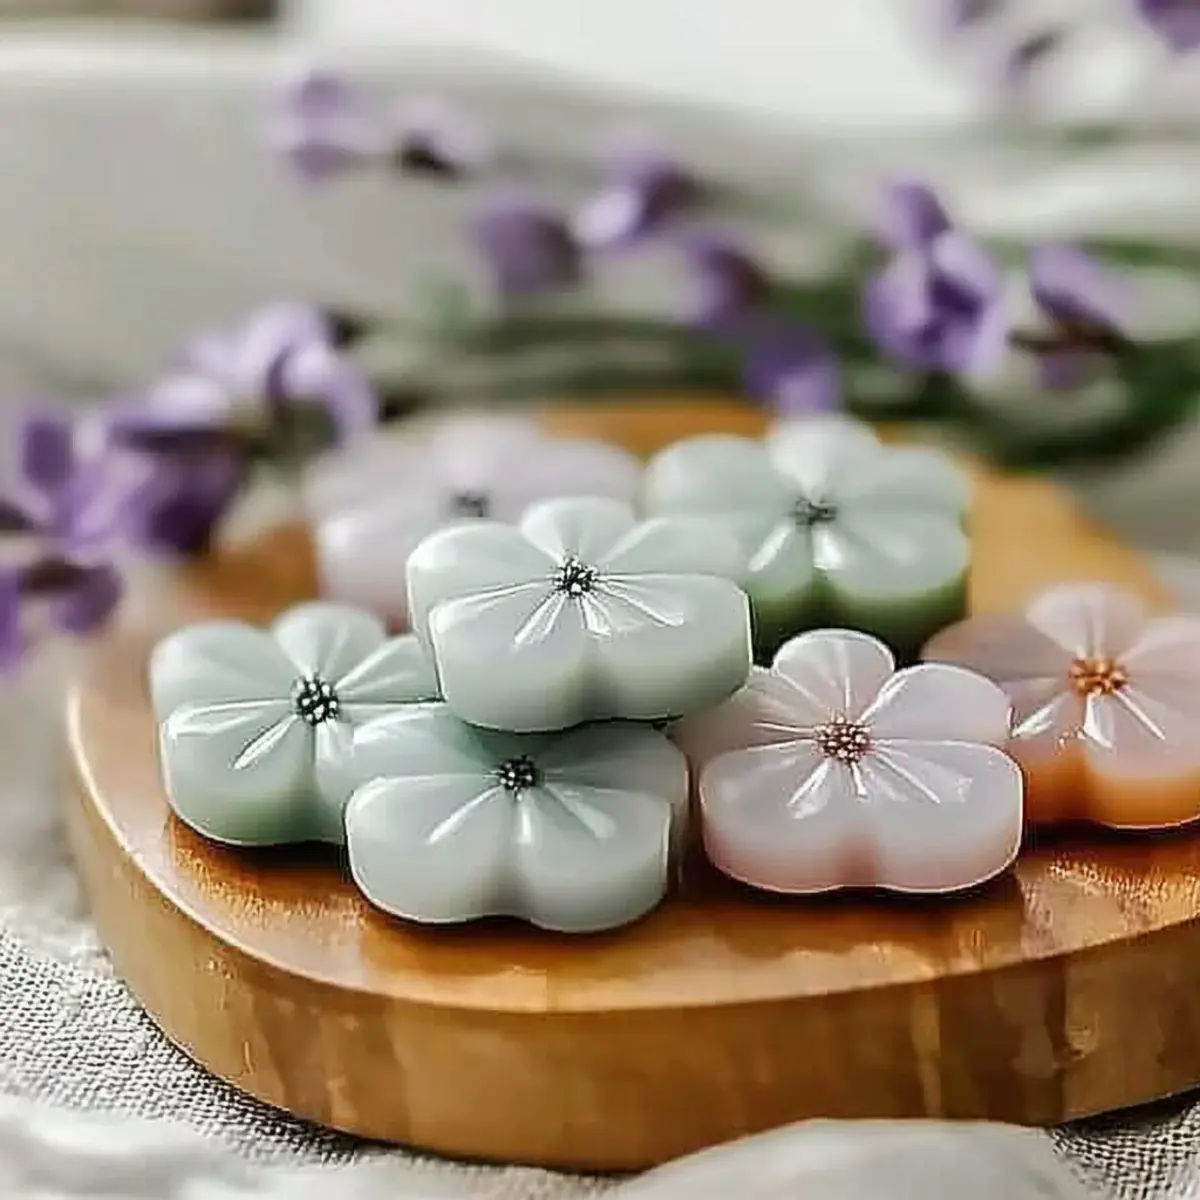
Display and Enjoy: Once fully dry, showcase your aroma stones in bowls around the house or gift them to loved ones. Enjoy the fragrant and decorative touch they bring to your space!
Optional: Consider wrapping them in a pretty cloth as a lovely homemade gift.
Exact quantities are listed in the recipe card below.
DIY Aroma Stones Variations
Embrace your creativity and customize your aroma stones with these delightful ideas!
-
Herbal Infusions: Add dried herbs like rosemary or chamomile for a unique, earthy scent twist. Each herb adds its charm, enriching the aroma and visual appeal.
-
Spiced Delight: Incorporate ground spices like cinnamon or nutmeg for a warm, inviting fragrance. This twist offers a cozy feel, perfect for cooler weather.
-
Citrus Zest: Mix in some lemon or orange zest with the essential oils for a refreshing, uplifting scent. The bright aroma can energize your space!
-
Layered Scents: Try blending different essential oils for a personalized, multi-layered fragrance. Feel free to experiment until you find your signature scent!
-
Lavender Dreams: Use lavender essential oil and dried lavender buds for a calming and soothing experience, making them perfect for bedrooms or relaxation spaces.
-
Colorful Layers: Create beautifully colored layers by dividing the mixture into different bowls and coloring them with various food dyes before shaping.
-
Seasonal Scents: Tailor your aroma stones to reflect the season by using seasonal scents like peppermint for winter or floral scents like jasmine for spring.
-
Funny Shapes: Use cookie cutters shaped like stars, hearts, or seasonal themes to make your aroma stones visually stunning while enhancing their theme.
Dive into these variations and let your imagination run wild as you create beautiful, scented gems for your home!
Tips for the Best Aroma Stones
-
Choose Quality Oils: Use high-quality essential oils for the best fragrance. Cheaper options may have synthetic fillers that diminish scent strength.
-
Get Creative with Shapes: Use cookie cutters for fun shapes or make custom designs! Unique shapes enhance visual appeal and can resonate with specific themes.
-
Monitor Drying Process: Ensure stones are completely dry before handling; damp stones may crumble. Place them in a warm, dry area or bake gently for quicker drying.
-
Test Scents Before Mixing: Before committing to a blend of essential oils, test them on a small piece of paper to see how they smell together.
-
Safety First: When making DIY aroma stones, supervise children if they're participating, as some essential oils can be irritating if applied directly to the skin.
Elevate your home with these charming DIY aroma stones that effortlessly combine beauty and fragrance!
Storage Tips for DIY Aroma Stones
Room Temperature: Store your dry DIY aroma stones at room temperature in a cool, dry place to maintain their fragrance and texture for up to 6 months.
Fridge: If you want to extend their scent, place the aroma stones in an airtight container in the fridge, but make sure they're completely dry first.
Rejuvenating Scent: If the fragrance fades, simply apply a few drops of essential oil to the stones to refresh their scent-no need to create new ones!
Gift Preparation: For gifts, wrap the aroma stones in breathable fabric or paper, making sure not to seal them tightly, allowing their lovely scent to waft through!
What to Serve with Glow Bubble Foam Play?
Creating a delightful sensory experience extends beyond the foam itself-let's add some fun activities!
-
Art Supplies: Gather colorful markers, crayons, or chalk to encourage creativity alongside the foam. Kids can draw or design vibrant art pieces inspired by their playful experience!
-
Sensory Bins: Set up a sensory bin filled with rice or beans where children can explore different textures while the foam provides a contrasting, bubbly delight.
-
Towels and Blankets: Lay down soft towels or blankets for kids to sit on as they play. This adds comfort and makes clean-up a breeze after splashing around.
-
Water Play Table: If possible, combine the foam with a water play table filled with cups and toys. The combination of foam and splashing water creates an immersive play environment.
-
Miniature Figures: Introduce small plastic animals or figures into the foam. The kids will love creating their own fantastical worlds where the foam acts as fluffy landscapes.
-
Outdoor Games: Follow up the foam activity with an outdoor scavenger hunt! This keeps the adventure alive as children search for treasures and explore nature after their sensory play.
Engaging your little ones beyond the foam will enhance their creativity and enjoyment while keeping the fun flowing!
Make Ahead Options
This Glow Bubble Foam Play recipe is fantastic for busy parents looking to simplify playtime! You can prepare the foam mixture up to 3 hours in advance. Simply combine the warm water and dish soap (1 cup of warm water with 1 tablespoon of dish soap) and mix gently, then store in an airtight container. To maintain that delightful foamy texture, avoid overmixing the foam and refrigerate until ready to use. When it's time for play, carefully whisk the mixture again to revive the bubbles and add food coloring right before serving for a vibrant pop! With this make-ahead option, you'll have the joy of colorful, sensory fun ready with minimal effort while keeping the kids entertained!

DIY Aroma Stones Recipe FAQs
How do I select the right essential oils for my aroma stones?
Absolutely! Choose high-quality essential oils that align with your personal preferences. Popular options include lavender for relaxation, citrus for energy, or eucalyptus for clarity. Blend different oils based on your mood for a unique, layered fragrance experience!
How should I store my DIY aroma stones?
For optimal freshness, keep your dry aroma stones at room temperature in a cool, dry place, which can preserve their scent and texture for up to 6 months. If you want to extend their fragrance even further, you can place them in an airtight container in the fridge, but ensure they're completely dry first.
Can I refresh the scent of my aroma stones if it fades?
Very! If you notice the fragrance weakening over time, you can easily rejuvenate your stones by applying a few drops of your favorite essential oil. This way, you can enjoy their delightful scent without needing to make a whole new batch!
What should I do if my aroma stones crumble?
The more the merrier when it comes to mixing! However, if your aroma stones crumble, it may be due to insufficient drying or overly moist conditions. Ensure they are thoroughly dried before handling, but if they are already crumbling, you may need to remix the ingredients and reshape them before drying again for better results.
Can kids participate in making DIY aroma stones?
Absolutely! This is a fantastic family activity, and kids can have lots of fun shaping the stones. Just remember to supervise them closely, especially while handling essential oils, as some can irritate the skin or cause allergic reactions. Encourage them to explore creativity while ensuring safety!
How long will it take for the aroma stones to dry completely?
For best results, let your shaped stones air-dry at room temperature for 24-48 hours until they're completely firm. If you're in a hurry, you can speed up the process by baking them gently at 200°F for about 1.5 hours. Check regularly to ensure they don't crack while drying!
These DIY Aroma Stones are not only a creative project but bring a lovely fragrance into your home-happy crafting!

DIY Aroma Stones: Naturally Scented, Beautifully Handmade Bliss
Equipment
- large bowl
- Mixing spoon
- Baking sheet
- cookie cutters
Ingredients
For the Base
- 1 cup Baking Soda
- 0.5 cup Cornstarch
- 0.75 cup Filtered Water
For the Fragrance
- 10-15 drops Essential Oils Choose your favorite scents
- Herbs and Spices (optional) Dried herbs like lavender or cinnamon
For the Color (optional)
- Food Coloring A few drops for color
Instructions
How to Make DIY Aroma Stones
- In a large bowl, combine 1 cup of baking soda and ½ cup of cornstarch. Stir until evenly mixed.
- Gradually pour in ¾ cup of filtered water, stirring continuously until the mixture forms a thick paste.
- Add 10-15 drops of your chosen essential oils into the mixture.
- If desired, mix in a few drops of food coloring.
- Use your hands or cookie cutters to form small stones.
- Place the shaped stones on a lined baking sheet and let them dry for 24-48 hours at room temperature.
- Once fully dry, showcase your aroma stones in bowls around the house or gift them to loved ones.


Leave a Reply