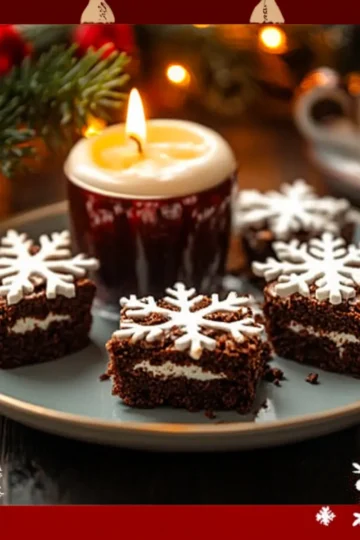
The holiday season brings a sense of wonder that transforms our kitchens into joyful hubs of creativity and delicious aromas. Picture this: the rich scent of chocolate mingling with hints of sweet vanilla, enticing family members from every corner of the house. That's exactly what you'll experience when you whip up these delightful Christmas Tree Brownies!
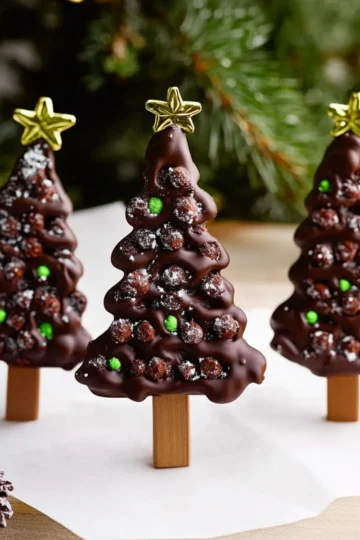
These festive treats are not only a feast for the eyes but also a heartfelt project for you and your kids to enjoy together. Shaped like charming little trees and adorned with colorful decorations, they will surely bring smiles and cheer at any holiday gathering. Easy to make and even more fun to decorate, these brownies are perfect for building lasting memories while banishing the monotony of fast food.
Let's dive into this simple yet impressive recipe that will have everyone asking for seconds-and leave you with a warm sense of accomplishment as you share these delightful creations with loved ones!
Why are Christmas Brownie Trees a must-try?
Joyful baking experience: These delightful brownies turn baking into a fun family activity, perfect for involving kids.
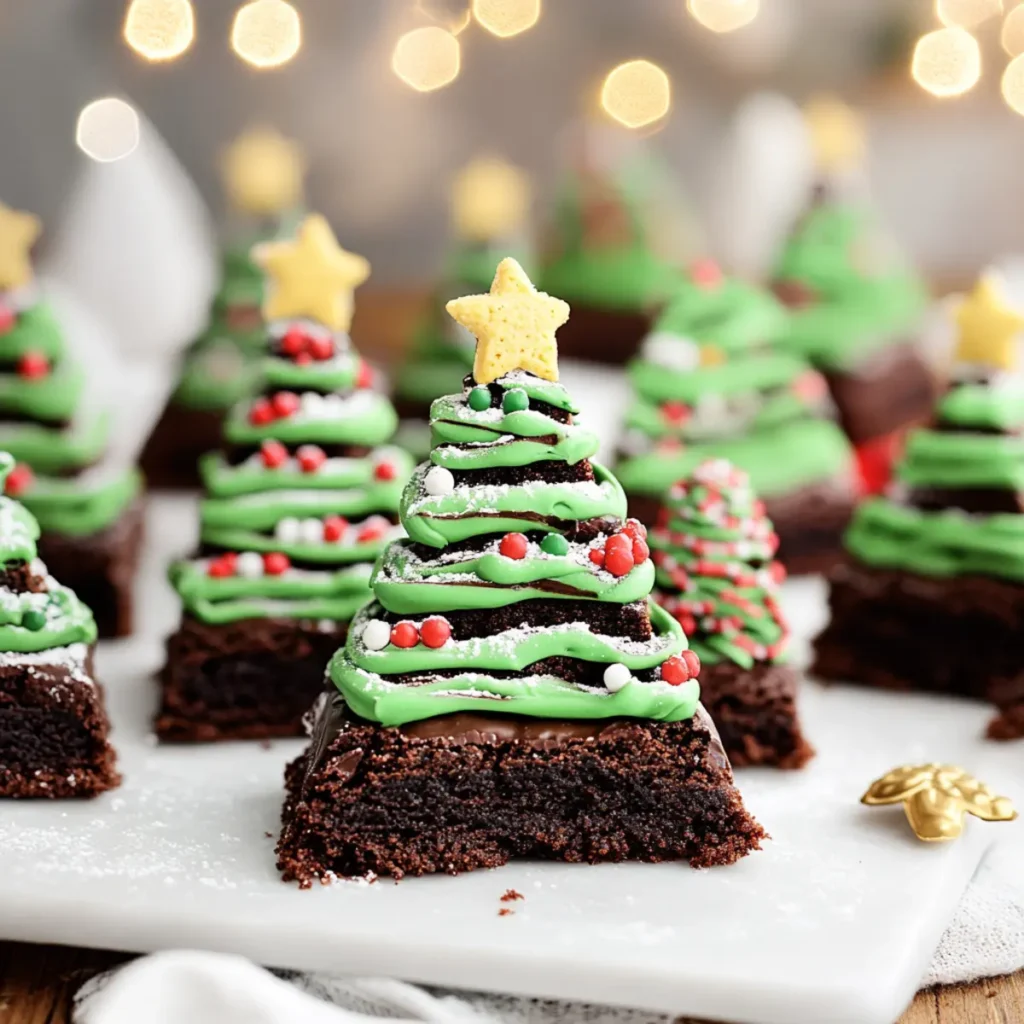
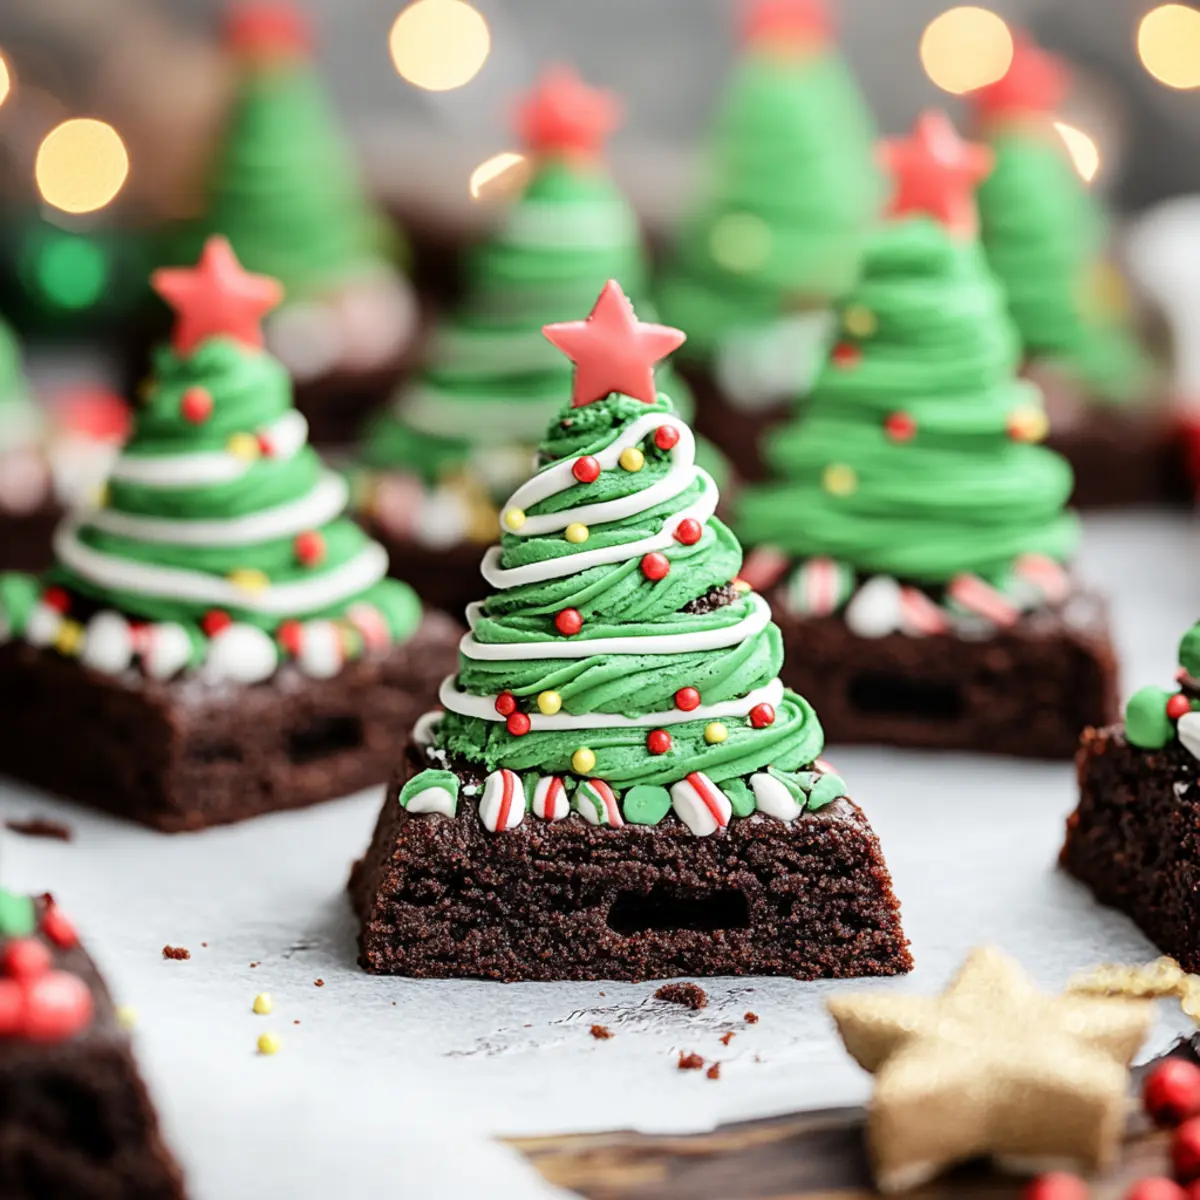
Festive presentation: Shaped like charming trees and decorated with vibrant icing and sprinkles, they add a whimsical touch to any holiday table.
Easy preparation: With simple ingredients and straightforward steps, you can whip them up in no time, ensuring less stress during the busy holiday season.
Customization galore: Let your creativity shine-experiment with different toppings or trunk substitutes to make each batch unique.
Perfect for sharing: These brownies are a hit at parties and gatherings, making them a crowd-pleaser that's sure to spark joy and compliments.
Christmas Brownie Trees Ingredients
Get ready to bake some festive magic!
For the Brownies
- Melted Butter - provides moisture and richness; essential for a fudgy texture.
- Granulated Sugar - sweetens the brownies and contributes to the chewy texture.
- Vanilla Extract - adds depth of flavor to these delightful Christmas Brownie Trees.
- Eggs - binds the ingredients and helps the brownies rise; crucial for structure.
- All-Purpose Flour - provides structure to the brownies; ensure not to overmix for the best results.
- Unsweetened Cocoa Powder - adds rich chocolate flavor; use high-quality for a decadent touch.
- Salt - enhances flavor and balances the sweetness in the brownies.
- Baking Powder - a leavening agent that helps the brownies rise slightly.
- Semisweet Chocolate Chips - creates pockets of melted chocolate, making every bite indulgent.
For the Frosting
- Confectioners' Sugar - forms the base for frosting; creates that sweet, smooth texture.
- Whole Milk - helps achieve a light, fluffy consistency; adjust based on desired texture.
- Green Food Coloring - tints icing for a festive look; natural substitutes work too.
For Decoration
- Candy Canes - serve as decorative "trunks" for the brownie trees; you can use chocolate sticks as a fun alternative.
- Sanding Sugar/Sprinkles - lovely decorative elements to sprinkle on the "ornaments"; feel free to get creative with colors!
Gather these delightful ingredients, and let's create some memory-making Christmas Brownie Trees!
How to Make Christmas Brownie Trees
-
Preheat the oven to 350°F (175°C) and prepare two 8-inch round cake pans by greasing them with butter and lining the bottoms with parchment paper. This step ensures easy release of the brownies.
-
Whisk together melted butter, granulated sugar, vanilla extract, and eggs in a large mixing bowl until smooth and well combined. This creates a rich base for your brownies.
-
Mix in another bowl the all-purpose flour, unsweetened cocoa powder, salt, and baking powder. Gently fold this dry mixture into the wet ingredients until just combined, then carefully add the semisweet chocolate chips for delightful bursts of chocolatey goodness.
-
Divide the brownie batter evenly between the prepared pans and bake for 35-40 minutes, or until a toothpick inserted in the center comes out clean but with moist crumbs. Let the brownies cool completely in the pans.
-
Prepare the frosting by beating together the butter, confectioners' sugar, salt, and vanilla until smooth. Gradually add whole milk until you reach a light, fluffy consistency. Color the frosting with green food coloring, adding a drop of red for a festive touch if desired.
-
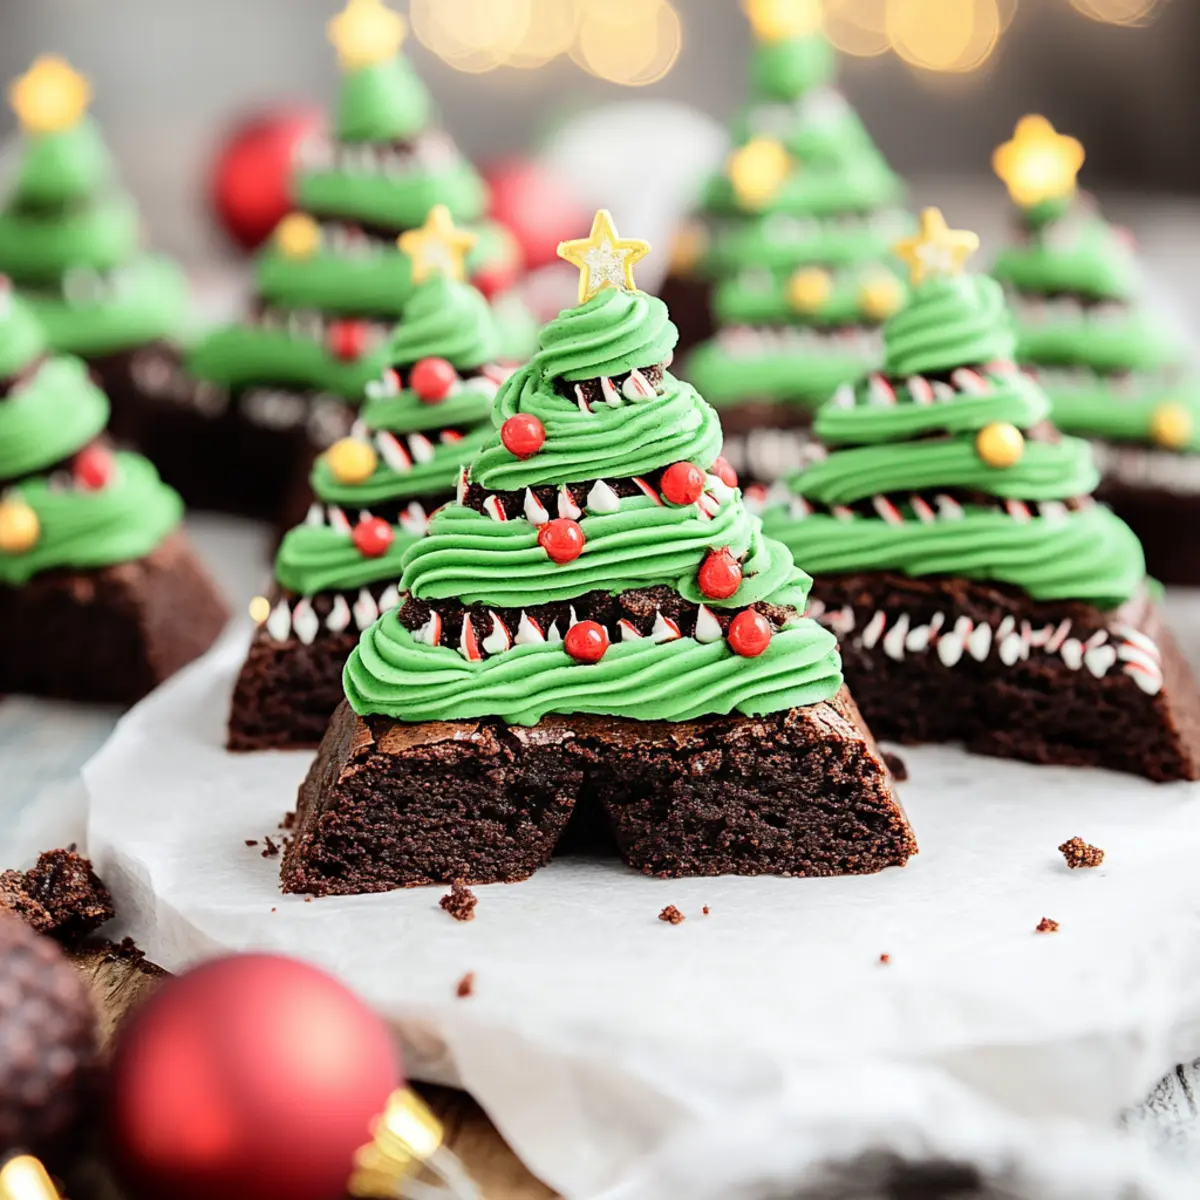
Cut each brownie into 8 triangles to form the tree shapes, and gently poke a hole at the base of each triangle for the candy cane "trunk."
-
Decorate each brownie tree by piping green frosting in a zig-zag pattern, then sprinkle with sanding sugar and colorful sprinkles to mimic ornaments.
Optional: Drizzle with melted chocolate for an extra touch of indulgence.
Exact quantities are listed in the recipe card below.

How to Store and Freeze Christmas Brownie Trees
Room Temperature: Store your Christmas Brownie Trees in an airtight container at room temperature for up to 3 days to maintain freshness and taste.
Fridge: For longer storage, you can keep the brownies in the fridge for up to a week, but allow them to come to room temperature before serving for the best flavor and texture.
Freezer: These delightful brownies can be frozen for up to 2 months. Wrap each brownie individually in plastic wrap and place them in a freezer-safe container.
Reheating: When you're ready to enjoy your frozen Christmas Brownie Trees, let them thaw in the fridge overnight. For a warm treat, microwave for 10-15 seconds, ensuring they're just warmed, not hot.
Tips for the Best Christmas Brownie Trees
- Perfect Texture: Avoid overmixing the brownie batter to maintain a fudgy, dense texture. Stir just until combined for the best results.
- Testing for Doneness: Use a toothpick to check if the brownies are ready; it should come out clean but may have a few moist crumbs for that perfect chew.
- DIY Piping Bag: If you don't have a piping bag, create one using a zip-top bag with a small corner cut off. It works like a charm for frosting!
- Vibrant Frosting: For a more natural-looking green frosting, add just one drop of red coloring to enhance the depth of the green shade.
- Creative Variations: Don't hesitate to substitute candy canes with chocolate sticks or pretzel rods for the trunks, adding fun twists to your Christmas Brownie Trees.
What to Serve with Christmas Tree Brownies?
These sweet, whimsical treats are perfect for creating a festive and joyous holiday spread.
-
Hot Cocoa: The rich chocolate flavor of cocoa complements the brownies beautifully, creating a cozy pairing for winter nights.
-
Vanilla Ice Cream: A scoop of creamy vanilla ice cream creates a delightful contrast to the fudgy brownies, adding a cool touch to each bite.
-
Festive Fruit Salad: A fresh mix of seasonal fruits brings brightness and balance, cutting through the sweetness with a refreshing crunch.
-
Peppermint Bark: The minty flavors of crushed peppermint mixed with chocolate echo the candy cane trimmings, enhancing the holiday spirit.
-
Chewy Caramel Sauce: Drizzling warm caramel on top gives an extra layer of sweetness, enticing anyone who loves a decadent dessert experience.
-
Gingerbread Cookies: These classic holiday cookies add a spicy warmth that contrasts wonderfully with the rich chocolate of the brownies.
-
Sparkling Cider: A glass of fizzy apple cider adds a festive touch to your dessert table, delighting guests with refreshing bubbles.
-
Chocolate Milkshake: For the chocolate lovers, a creamy shake elevates the indulgence and brings a fun twist to dessert time.
Serving these delightful additions alongside your Christmas Tree Brownies will create a magical experience for family and friends, leaving everyone merry and bright!
Make Ahead Options
These Christmas Tree Brownies are perfect for busy home cooks looking to save time during the festive season! You can prepare the brownie batter up to 24 hours in advance and refrigerate it in an airtight container. Alternatively, you can bake the brownies ahead of time, allowing them to cool completely before storing them in an airtight container at room temperature for up to 3 days. To maintain their fudgy texture, avoid overbaking. When ready to serve, simply cut the brownies into triangles, pipe the frosting, and decorate them with your favorite toppings. You'll have delightful Christmas Tree Brownies that are just as delicious and visually stunning, ready for your holiday celebrations with little last-minute effort!
Christmas Brownie Trees Variations
Get ready to make these festive delights even more exciting and tailor them to your family's tastes!
-
Gluten-Free: Substitute all-purpose flour with a gluten-free flour blend; guarantee a similar fudgy texture for those with dietary restrictions.
-
Nutty Addition: Fold in ½ cup of chopped walnuts or pecans into the brownie batter for some delightful crunch and flavor.
-
Minty Fresh: Add ½ teaspoon of peppermint extract to the frosting for a refreshing minty twist that complements the chocolate perfectly.
-
Dairy-Free: Use coconut oil instead of butter and almond milk in the frosting for a creamy, dairy-free version that's just as delicious.
-
Flavor Twist: Swap cocoa powder for white chocolate or caramel-flavored chips to create a unique brownie base-an unexpected delight that will surprise and please.
-
Fun Sprinkles: Decorate with edible glitter or themed sprinkles to match holiday events, adding sparkle and joy to each brownie.
-
Chocolate Ganache: Top with a simple chocolate ganache made from melted chocolate and cream; let it drip down the sides for an indulgent finish.
-
Spicy Kick: Sprinkle a pinch of cayenne pepper or cinnamon into the brownie batter for a subtle heat that beautifully complements the sweetness.
Christmas Brownie Trees Recipe FAQs
What type of chocolate should I use for the brownies?
Absolutely! For the best flavor in your Christmas Brownie Trees, I recommend using high-quality unsweetened cocoa powder and semisweet chocolate chips. This ensures a rich chocolate taste and a fudgy consistency. The combination of these chocolates creates the perfect depth of flavor that will delight your family and friends.
How should I store my Christmas Brownie Trees?
To keep your delightful Christmas Brownie Trees fresh, store them in an airtight container at room temperature for up to 3 days. If you want to extend their life, refrigerate them for up to a week, but be sure to let them come to room temperature before serving for optimal flavor and texture.
Can I freeze the Christmas Brownie Trees?
Yes, you can absolutely freeze your Christmas Brownie Trees! Wrap each brownie individually in plastic wrap and place them in a freezer-safe container or a resealable bag. They can be frozen for up to 2 months. When you're ready to enjoy them, just move the desired number to the fridge to thaw overnight, then warm them in the microwave for about 10-15 seconds if you prefer a cozy treat.
What if my brownie batter is too dry?
Very! If you find that your brownie batter is too dry, it might be due to over-measuring the flour or not enough liquid. To remedy this, I recommend adding a tablespoon of melted butter or water at a time until the consistency is just right. The batter should be thick but pourable for the best results.
Are there any allergy considerations for these brownies?
Certainly! If you or your guests have dietary restrictions, you can adjust the recipe accordingly. To make them gluten-free, simply substitute all-purpose flour with a 1:1 gluten-free blend. Also, if you're avoiding dairy, consider using dairy-free butter and milk alternatives. Always check for nut allergies when adding nuts or specific chocolates, as brands may vary in their ingredients.
Can I decorate the brownies with other toppings?
The more the merrier! Feel free to jazz up your Christmas Brownie Trees with additional toppings. You could use mini marshmallows, colored chocolate candies, or even edible glitter for a festive sparkle. Get creative and let your kids join in the fun for a memorable decorating session!

Delicious Christmas Brownie Trees: Easy Holiday Treat for Kids
Equipment
- 8-inch round cake pans
- Mixing bowls
- Whisk
- Spatula
- piping bag or zip-top bag
Ingredients
For the Brownies
- 1 cup Melted Butter provides moisture and richness
- 2 cups Granulated Sugar sweetens and contributes to chewy texture
- 1 tablespoon Vanilla Extract adds depth of flavor
- 4 large Eggs binds ingredients
- 1 cup All-Purpose Flour provides structure
- ¾ cup Unsweetened Cocoa Powder adds rich chocolate flavor
- ½ teaspoon Salt enhances flavor
- 1 teaspoon Baking Powder helps brownies rise
- 1 cup Semisweet Chocolate Chips creates pockets of melted chocolate
For the Frosting
- 2 cups Confectioners' Sugar forms the base for frosting
- ¼ cup Whole Milk helps achieve desired texture
- 1 teaspoon Green Food Coloring tints icing for festive look
For Decoration
- 12 pieces Candy Canes serve as decorative trunks
- 1 cup Sanding Sugar/Sprinkles for ornaments decoration
Instructions
Instructions
- Preheat the oven to 350°F (175°C) and prepare two 8-inch round cake pans by greasing them with butter and lining the bottoms with parchment paper.
- Whisk together melted butter, granulated sugar, vanilla extract, and eggs until smooth and well combined.
- Mix in another bowl the all-purpose flour, unsweetened cocoa powder, salt, and baking powder. Fold this dry mixture into the wet ingredients until just combined, then add the semisweet chocolate chips.
- Divide the brownie batter evenly between the prepared pans and bake for 35-40 minutes, or until a toothpick comes out clean but with moist crumbs.
- Let the brownies cool completely in the pans.
- Prepare the frosting by beating together the butter, confectioners' sugar, salt, and vanilla until smooth, then gradually add whole milk until light and fluffy. Color the frosting with green food coloring.
- Cut each brownie into 8 triangles to form the tree shapes, and poke a hole at the base of each triangle for the candy cane trunk.
- Decorate each brownie tree by piping green frosting in a zig-zag pattern, then sprinkle with sanding sugar and colorful sprinkles to mimic ornaments.

Leave a Reply