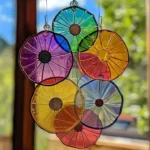
There's something enchanting about how sunlight dances through colorful suncatchers, casting vibrant reflections around the room. After a fun afternoon of crafting with my kids, we discovered the joy of making DIY melted bead suncatchers-a delightful, eco-friendly project that not only spruces up our windows but also keeps little hands busy. In just 10 minutes of prep, you can create these stunning decorations that are safe for children and perfect for unleashing their creativity.
Using simple, non-toxic ingredients, this craft embraces the colorful spirit of nature while adding a unique touch to your home. Whether you want to brighten a rainy day or simply take a break from the usual fast-paced kitchen routine, these bioplastic suncatchers will become an exciting highlight in your crafting adventures. Plus, you can customize them with natural dyes and assorted decorations to express your imagination. So let's dive into this colorful craft that's sure to become a cherished family favorite!
Why are bioplastic suncatchers so special?
Unique Crafting Experience: These bioplastic suncatchers offer a delightful way to connect with your kids while exploring eco-friendly crafting.
Fast and Fun: With just 10 minutes of prep time, you'll have everything set to create colorful masterpieces.
Safe Ingredients: Made from non-toxic materials, these suncatchers are perfect for little hands to work with.
Creative Potential: Customize with natural dyes and decorations-the possibilities are endless!
Brighten Your Home: Once finished, they transform your space, casting charming reflections and vibrant colors in every corner.
Whether you're looking for a fun project to engage the kids or an engaging way to brighten up your home, these suncatchers check all the boxes! So, gather your materials and let your creativity shine.
Bioplastic Suncatcher Ingredients
• Gather these simple materials to create colorful bioplastic suncatchers with ease.
For the Mixture
- ½ cup water - Use warm water for better mixing ease.
- 2 tablespoon cornstarch - This acts as a plant-based thickener for the mixture.
- 1 tablespoon white vinegar - It serves as a natural preservative to extend the suncatchers' life.
- 1 tablespoon unflavored gelatin powder - Provides structure; swap with agar-agar for a vegan option if desired.
For Coloring
- Natural or food-safe coloring (e.g., food coloring, beet juice, turmeric, spirulina) - Choose any preferred color to brighten your suncatchers!
Optional Decorations
- Fine glitter - Adds a sparkling touch; ensure it's non-toxic for kid safety.
- Flower petals - Use dried ones for added beauty; this keeps them looking fresh for longer.
- Tissue paper - Cut into small pieces to create layered effects and texture.
Now that you have all the ingredients lined up, it's time to start crafting your beautiful bioplastic suncatchers!
How to Make Bioplastic Suncatchers
-
Combine Ingredients: In a bowl, mix the warm water, cornstarch, white vinegar, and unflavored gelatin powder. Stir thoroughly until the mixture is smooth and well-combined-this will create the foundation for your vibrant suncatchers.
-
Add Color: Choose your favorite natural or food-safe coloring and add it to the mixture. Stir until you achieve your desired hue; don't be afraid to get creative and mix different colors for unique shades!
-
Pour Mixture: Carefully pour the colorful mixture into desired shapes on a silicone mat or tray. Aim for thin layers to promote quicker drying-this makes the process even easier and fun!
-
Decorate: If you wish, sprinkle fine glitter, scatter flower petals, or place small pieces of tissue paper on top of the mixture. These decorative touches add a personalized flair to your suncatchers.
-
Allow to Dry: Let the suncatchers dry for 24 hours. For best results, keep the layers thin and flip the suncatchers halfway through the drying process to ensure even results.
-
Peel Off Suncatchers: Once completely dry, gently peel the suncatchers off the silicone mat. They should easily lift away, revealing beautiful, shiny decorations ready to hang!
Optional: Use a thin ribbon to hang your suncatchers and let sunlight dance through them!
Exact quantities are listed in the recipe card below.
Bioplastic Suncatcher Variations
Unlock the full potential of your creative spirit by customizing these suncatchers into unique pieces of art that reflect your family's personality!
-
Dye Alternatives: Use fresh fruits like blueberries or blackberries for a beautiful, natural hue and a delicious smell.
-
Glitter Boost: Add glow-in-the-dark glitter to your mixture for an enchanting night-time display, casting magical glimmers after dark.
-
Herbal Infusion: Incorporate herbs like lavender or mint into the mixture for delightful aromas while adding a rustic touch.
-
Vegetable Dyes: Explore veggie-based colors using spinach for green or red cabbage for blues and purples, creating nature-inspired suncatchers.
-
Seasonal Themes: Design holiday-themed suncatchers by using colors and decorations related to Halloween, Christmas, or springtime to celebrate various occasions.
-
Texture Twist: Mix in tiny beads or sequins to the mixture for added texture and sparkle, turning your suncatchers into mesmerizing light catchers.
-
Vibrant Layering: Create multilayered suncatchers by pouring different colors at intervals; just ensure each layer is slightly dry before adding the next.
-
Shape Variety: Try using different molds or cookie cutters to craft suncatchers in unique shapes-think stars, hearts, or seasonal symbols for added fun!
With these fun variations, your suncatcher crafting will soar to new heights, making each piece a true masterpiece!
What to Serve with DIY Melted Bead Suncatchers?
Brightening your space with colorful crafts creates a magical ambiance in your home.
-
Refreshing Lemonade: This zesty drink perfectly complements the vibrancy of your suncatchers, offering a refreshing break during crafting sessions. The citrus notes energize and uplift, making it an ideal pairing for any creative project.
-
Fruit Skewers: Colorful fruit skewers add a fun and healthy snack option. Their bright colors mimic your suncatchers, creating a delightful visual feast. Plus, they're a healthy treat to keep little hands satisfied while they craft.
-
Mini Sandwiches: Easy-to-make mini sandwiches can be personalized with your kids' favorite fillings. They're simple to hold, making them the perfect addition to a crafting day while not weighing everyone down.
-
Crafty Upcycled Containers: Instead of traditional plates, use your recently rescued containers to create fun holders for snacks! Let your little ones design their own holders, adding more creative flair to the day.
-
Artistic Aprons: As a fun twist, why not dress the kids in painted aprons? This not only protects their clothes while crafting but also turns them into little artists displaying their creativity as they munch on snacks.
-
Enjoying the Outdoors: After crafting, take a moment to hang your suncatchers in a sunny spot outside. Pair it with some cloud-watching and light snacks in the backyard to celebrate your handiwork.
Keeping feeding and crafting experiences lively shows how every small detail can add joy to the day!
Expert Tips for Bioplastic Suncatchers
-
Choose Right Colors: Use bright, non-toxic colors that are safe for kids; natural dyes like beet juice create beautiful, organic hues.
-
Layering Wisely: Keep your layers thin for quicker drying times; thick layers may not dry evenly, leading to potential messiness.
-
Silicone Mats: Always use silicone mats or trays for easy removal; nothing beats the satisfaction of peeling off perfectly shaped suncatchers.
-
Drying Tricks: Flip your suncatchers halfway through the drying process to ensure they dry evenly and prevent warping.
-
Customize Creatively: Encourage kids to express themselves by mixing colors, adding decorations, or even using different shaped molds for unique designs.
Creating these bioplastic suncatchers can be a delightful experience, filled with creativity and vibrant results!
Storage Tips for Bioplastic Suncatchers
- Room Temperature: Keep your bioplastic suncatchers in a cool, dry spot away from direct sunlight to preserve their vibrant colors for up to 3 months.
- Fridge: If you want to store them for a longer period, place them in an airtight container in the fridge for up to 6 months while avoiding moisture.
- Display: To showcase your creations, hang them in windows, but ensure they are not exposed to extreme heat or humidity to maintain their integrity.
- Reheating (if needed): If you notice any bending or deformation, gently warm them with your hands; avoid direct heat sources to prevent melting.
Make Ahead Options
These DIY melted bead suncatchers are an excellent project for busy crafters looking to save time! You can prepare the mixture up to 24 hours in advance by mixing the water, cornstarch, vinegar, and gelatin powder, storing it in an airtight container in the refrigerator. This way, all that's left to do is add your color and decorations when you're ready to create. For the best results, keep the layers thin during pouring to ensure quick drying. Once your suncatchers are fully dry, gently peel them off the silicone mat and store them in a cool, dry place until you're ready to hang them. So, go ahead and prep ahead-these enchanting suncatchers will brighten your space with minimal last-minute effort!
Bioplastic Suncatchers Recipe FAQs
How do I select the right materials for my bioplastic suncatchers?
Choosing the right materials is essential for achieving vibrant and safe suncatchers. Look for non-toxic, water-soluble colors if you're using food coloring or natural dyes such as beet juice or turmeric for eco-friendliness. When selecting glitter, ensure it is labeled as non-toxic as well for kid safety. This attention to detail not only ensures safety but also enhances the beauty of your creations!
How should I store my bioplastic suncatchers?
To keep your bioplastic suncatchers looking splendid, store them in a cool, dry place away from direct sunlight. They can last for up to 3 months at room temperature! For extended storage, place them in an airtight container in the fridge where they can last up to 6 months, but be sure to avoid moisture which can damage them.
Can I freeze my bioplastic suncatchers for longer storage?
Absolutely! If you would like to save them for even longer, you can freeze your suncatchers. Make sure they are completely dry and store them in an airtight container to prevent moisture. When you're ready to use them again, simply let them thaw at room temperature before displaying them. This way, they retain their colors and shapes beautifully!
What should I do if my suncatchers don't dry properly?
If your suncatchers didn't dry as expected, don't worry! First, check that the layers you poured were thin, as thick layers can take longer to dry. If they're still tacky after 24 hours, trying flipping them once; sometimes, flipping can help even out the drying process. Also, consider placing them in a warm, dry area (but not direct sunlight) to speed things up.
Are there any dietary considerations I should know about?
While the bioplastic suncatchers are made from non-toxic materials, they are still not intended for consumption. Keep them out of reach of pets and small children to avoid any accidental ingestion. Always supervise kids during crafting sessions to ensure safety and enjoyment.
Can I customize my bioplastic suncatchers with additional decorations?
Very! Customization is one of the most exciting aspects of creating bioplastic suncatchers. You can add fine glitter, dried flower petals, or even small pieces of tissue paper on top of the mixture before it dries. These additional decorations not only enhance the visual appeal but also allow individual creativity to shine through. Enjoy experimenting with different designs!
Brighten Your Home with Easy Bioplastic Suncatchers for Kids
Equipment
- bowl
- silicone mat or tray
Ingredients
For the Mixture
- ½ cup water Use warm water for better mixing ease.
- 2 tablespoon cornstarch Acts as a plant-based thickener.
- 1 tablespoon white vinegar Natural preservative.
- 1 tablespoon unflavored gelatin powder Provides structure.
For Coloring
- natural or food-safe coloring Choose preferred color.
Optional Decorations
- fine glitter Ensure it’s non-toxic.
- flower petals Use dried ones.
- tissue paper Cut into small pieces.
Instructions
How to Make Bioplastic Suncatchers
- Combine Ingredients: In a bowl, mix the warm water, cornstarch, white vinegar, and unflavored gelatin powder until smooth.
- Add Color: Choose your favorite coloring and mix to achieve your desired hue.
- Pour Mixture: Pour the mixture into shapes on a silicone mat or tray, keeping layers thin.
- Decorate: Add fine glitter, flower petals, or tissue paper on top.
- Allow to Dry: Let the suncatchers dry for 24 hours, flipping halfway.
- Peel Off Suncatchers: Gently peel them off after drying.


Leave a Reply