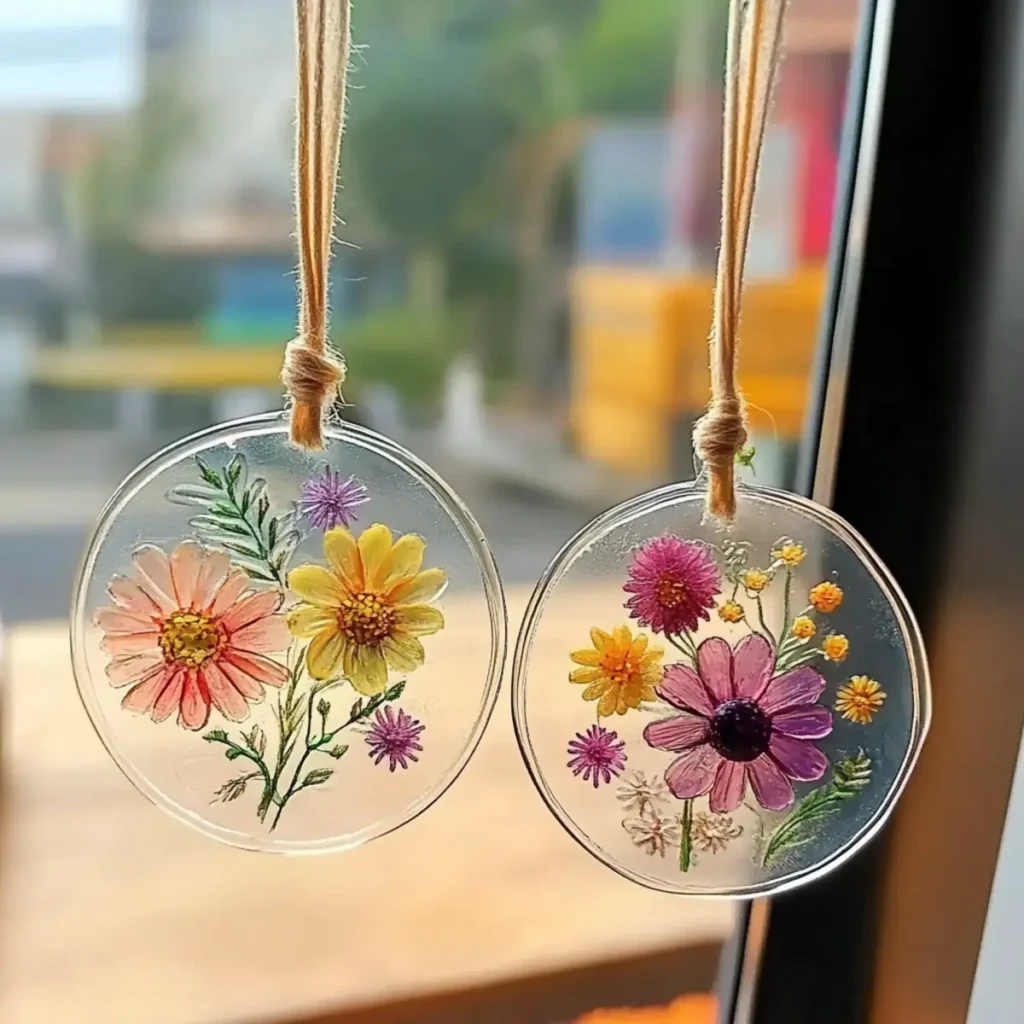
When I first spotted the golden sunlight filtering through a neighbor's window, illuminating an exquisite flower suncatcher, I was instantly enchanted. It got me thinking about how simple moments can bring so much joy, especially when you can create something beautiful yourself! That's why I'm excited to share this Clear Glue Flower Suncatcher Craft: A Stunning DIY Window Art for All Ages.
This delightful project uses just a few common materials, turning everyday pressed flowers into breathtaking artwork. In just 15 minutes of prep time, you can craft your unique suncatcher that dances with color and light, bringing a touch of magic to any space. Perfect for kids and grown-ups alike, it invites creativity and ensures a fun, hands-on experience that strengthens bonds-whether it's family or friends. So, gather your supplies and let's light up those windows with a splash of nature and artistic flair!
Why Choose Clear Glue Flower Suncatcher Craft?
Creativity Unleashed: This Clear Glue Flower Suncatcher Craft serves as a fantastic outlet for artistic expression, allowing you to get creative with colors and designs.
Kid-Friendly Fun: With minimal supervision, kids can join in, making this a perfect bonding activity for families or groups.
Quick and Easy: In just 15 minutes of prep, you'll have stunning artwork ready to brighten any space while engaging in a fun project.
Eco-Friendly Appeal: Using repurposed materials like plastic lids and pressed flowers promotes sustainability, making it an environmentally conscious crafting choice.
Versatile Designs: Feel free to embellish your suncatchers with glitter, sequins, or leaves, ensuring each piece is uniquely yours! Try making seasonal variations for ongoing fun.
Everyday Decoration: These vibrant suncatchers add charm to any window, turning ordinary lighting into a captivating visual display. Your home will glow with beauty!
Clear Glue Flower Suncatcher Ingredients
Get ready to craft beautiful window art!
For the Suncatcher Base
- Clear School Glue - Acts as the adhesive for flowers and decorations; feel free to substitute with any similar clear adhesive.
- Plastic Lid or Clear Acetate Sheet - Serves as the base for your suncatcher; recycling yogurt or takeout lids works perfectly!
For Decoration
- Pressed Flowers - Provides the main decorative element; choose between store-bought or homemade pressed flowers for variety.
- Tissue Paper Scraps, Glitter, Sequins, or Dried Leaves - Optional extras to enhance creativity and visual appeal; let your imagination run wild!
- Black Marker or Construction Paper (optional) - Use this for creating a decorative frame around your Clear Glue Flower Suncatcher.
For Assembly
- String or Suction Cup Hook - Necessary for hanging the suncatcher in a sunny spot; choose a sturdy option for secure display.
- Scissors - For cutting materials as needed during the crafting process.
- Wax Paper or Parchment Paper - Protects your workspace during the fun crafting process.
Get those supplies together and let the crafting magic begin with your Clear Glue Flower Suncatcher Craft!
How to Make Clear Glue Flower Suncatchers
-
Prepare your workspace: Lay down wax paper or parchment to keep your area clean and protected while you craft. This small step can save you from sticky messes later!
-
Apply glue: On your plastic lid or clear acetate sheet, spread a thin layer of clear school glue, covering the surface evenly for steady adhesion.
-
Arrange flowers: Delicately position your pressed flowers and any extra decorations you love on the glue-coated surface, ensuring they are displayed beautifully and thoughtfully.
-
Let it dry: Allow the glue to dry completely; this might take up to 24 hours. Patience is key for a beautiful finished product!
-
Peel off gently: Once dry, carefully peel your stunning suncatcher off from the lid or acetate sheet to reveal your colorful masterpiece.
-
Hang your creation: Use string or a suction cup hook to hang your new suncatcher in a sunlit spot, allowing it to shine and brighten your space.
Optional: Consider adding a decorative frame using a black marker or construction paper for a polished look.
Exact quantities are listed in the recipe card below.
How to Store and Freeze Clear Glue Flower Suncatchers
Storage: Keep your fully dried suncatchers flat in a cool, dry place for up to 6 months until you're ready to hang them. Ensure they are protected to avoid any scratches.
Freezing: Avoid freezing suncatchers as the temperatures can affect the adhesive quality and transparency. It's best to keep them stored at room temperature.
Display Tips: When ready to showcase your stunning Clear Glue Flower Suncatcher, simply use string or a suction cup hook to hang it in a sunny spot, enhancing its beauty with the sunlight.
Care Instructions: If dust accumulates, gently wipe with a soft, dry cloth to maintain its vibrant appearance without causing any damage.
What to Serve with Clear Glue Flower Suncatchers?
Brighten your crafting space with these delightful pairings that will inspire creativity and joy during the project!
-
Refreshing Lemonade: A cool, tangy drink that quenches thirst and uplifts spirits, making it the perfect companion for your crafting session.
-
Fruit Skewers: Colorful, bite-sized pieces of fresh fruit add fun and flavor. They're easy to grab between crafting and help keep everyone energized!
-
Popcorn Treats: Light and airy, these popcorn snacks can be dressed up with a sprinkle of your favorite seasonings. They're perfect for munching as you create.
-
Mini Sandwiches: Quick and easy to prepare, these little bites make a satisfying addition to your creative afternoon. Customize with favorite fillings to please all palates.
-
Colorful Vegetable Platter: Fresh, crunchy veggies paired with a tasty dip provide a refreshing contrast to your artful endeavors. It's a healthy way to keep the energy up!
-
Sparkling Water: A bubbly alternative to soda, this refreshing drink keeps you hydrated while adding a touch of festivity to your crafting atmosphere.
Clear Glue Flower Suncatcher Variations
Feel free to sprinkle your own creativity into this delightful craft and make it your own!
-
Leafy Greens: Swap out pressed flowers for vibrant leaves for a fresh, rustic look that celebrates the beauty of nature.
-
Colorful Paper Cutouts: Use colorful tissue paper cutouts to create playful designs-perfect for adding a festive touch to seasonal decor.
-
Nature's Sparkle: Incorporate small beads or sequins into the glue to introduce texture, shimmering in the sunlight for extra dazzle.
-
Fragrant Herbs: Consider using dried herbs along with flowers. This unique combination offers a sensory experience with enticing aromas!
-
Seasonal Themes: Create suncatchers tailored to the seasons; think orange leaves in autumn or bright petals in springtime to keep your decor fresh.
-
Mix and Match: Combine different decorative elements like glitter and leaves, letting your imagination roam wild for unique results every time.
-
Bright Frame: Use colorful construction paper as a decorative frame around your suncatcher, adding an eye-catching border that enhances its vividness.
-
Heated Designs: For a fun twist, add a touch of spice with red chili flakes to your glue mixture, transforming it into a visually interesting project that might even tell a story!
Embrace the joy of creating and watch as your unique versions come to life!
Make Ahead Options
These Clear Glue Flower Suncatchers are perfect for busy home cooks and crafters looking to save time without sacrificing fun! You can prepare the press flowers and decorative elements up to 3 days in advance, storing them in a cool, dry place to maintain their vibrancy. When ready to assemble, simply spread the glue on your plastic lid or acetate sheet, arrange your prepped flowers, and let the glue dry completely (which may take up to 24 hours). This way, you'll have the majority of your crafting completed ahead of time, making your crafting experience seamless and stress-free. Your beautiful suncatcher will be just as stunning when you finish it, and you'll have more time to enjoy the moment!
Expert Tips for Clear Glue Flower Suncatchers
Thin Layers: Use thin layers of glue to prevent cloudiness and achieve that crystal-clear finish you're after.
Mind the Overload: Avoid overcrowding with too many pressed flowers or decorations. This ensures the suncatcher remains light-friendly, showcasing its beauty.
Drying Time: Be patient! Allow the glue to dry completely for best results, which may take up to 24 hours for a flawless suncatcher.
Framing Option: To enhance your Clear Glue Flower Suncatcher's presentation, consider adding a decorative frame made with a black marker or construction paper.
Storage Tips: Once fully dried, store your creations flat in a cool, dry place if not hanging right away, preserving their beauty longer.
Clear Glue Flower Suncatchers Recipe FAQs
What type of flowers work best for pressing?
Absolutely! Flowers that are thin and flat, such as violets, pansies, or daisies, work best for pressing and will maintain their vibrant colors. Look for flowers that are freshly picked and not too thick; this helps them retain their beauty when dried.
How long can I store my suncatchers, and what's the best method?
You can keep your fully dried Clear Glue Flower Suncatchers stored flat in a cool, dry place for up to 6 months. Make sure to protect them with layers of wax paper to prevent scratches or damages while they are waiting to be displayed.
Can I freeze my suncatchers?
No, it's best to avoid freezing your suncatchers. Freezing can affect the adhesive quality of the glue, leading to cloudiness or altering the texture. Instead, store them at room temperature for optimal preservation.
What should I do if my suncatcher turns cloudy?
If your suncatcher begins to look clouded, it might be due to using too much glue or not letting it dry thoroughly. For next time, keep glue layers thin and allow ample drying time-up to 24 hours. If it's already cloudy, gently remove the suncatcher from its base and try remaking it with a thinner glue layer.
Are there any dietary considerations if children are participating?
While the materials used in this craft, like glue and flowers, are not edible, it's crucial to supervise kids closely to prevent them from putting any items in their mouths. Always choose non-toxic clear school glue to ensure safety.
Can I use other decorative elements besides pressed flowers?
Very! You can definitely swap out pressed flowers for leaves, colorful paper cutouts, or even small beads and sequins to create unique designs. This adds a personalized touch and allows everyone to express their creativity in fun new ways!
Clear Glue Flower Suncatchers Recipe FAQs

Craft Stunning Clear Glue Flower Suncatchers: DIY Fun for All!
Equipment
- Scissors
- string or suction cup hook
- wax paper or parchment paper
Ingredients
For the Suncatcher Base
- 1 bottle Clear School Glue Acts as the adhesive for flowers and decorations; feel free to substitute with any similar clear adhesive.
- 1 Plastic Lid or Clear Acetate Sheet Serves as the base for your suncatcher; recycling yogurt or takeout lids works perfectly!
For Decoration
- 1 cup Pressed Flowers Provides the main decorative element; choose between store-bought or homemade pressed flowers for variety.
- 1 Tissue Paper Scraps, Glitter, Sequins, or Dried Leaves Optional extras to enhance creativity and visual appeal; let your imagination run wild!
- 1 Black Marker or Construction Paper Optional for creating a decorative frame around your suncatcher.
For Assembly
- 1 String or Suction Cup Hook Necessary for hanging the suncatcher in a sunny spot; choose a sturdy option for secure display.
- 1 pair Scissors For cutting materials as needed during the crafting process.
- 1 sheet Wax Paper or Parchment Paper Protects your workspace during the fun crafting process.
Instructions
How to Make Clear Glue Flower Suncatchers
- Prepare your workspace: Lay down wax paper or parchment to keep your area clean and protected while you craft.
- Apply glue: On your plastic lid or clear acetate sheet, spread a thin layer of clear school glue, covering the surface evenly for steady adhesion.
- Arrange flowers: Delicately position your pressed flowers and any extra decorations you love on the glue-coated surface.
- Let it dry: Allow the glue to dry completely; this might take up to 24 hours.
- Peel off gently: Once dry, carefully peel your stunning suncatcher off from the lid or acetate sheet.
- Hang your creation: Use string or a suction cup hook to hang your new suncatcher in a sunlit spot.


Leave a Reply