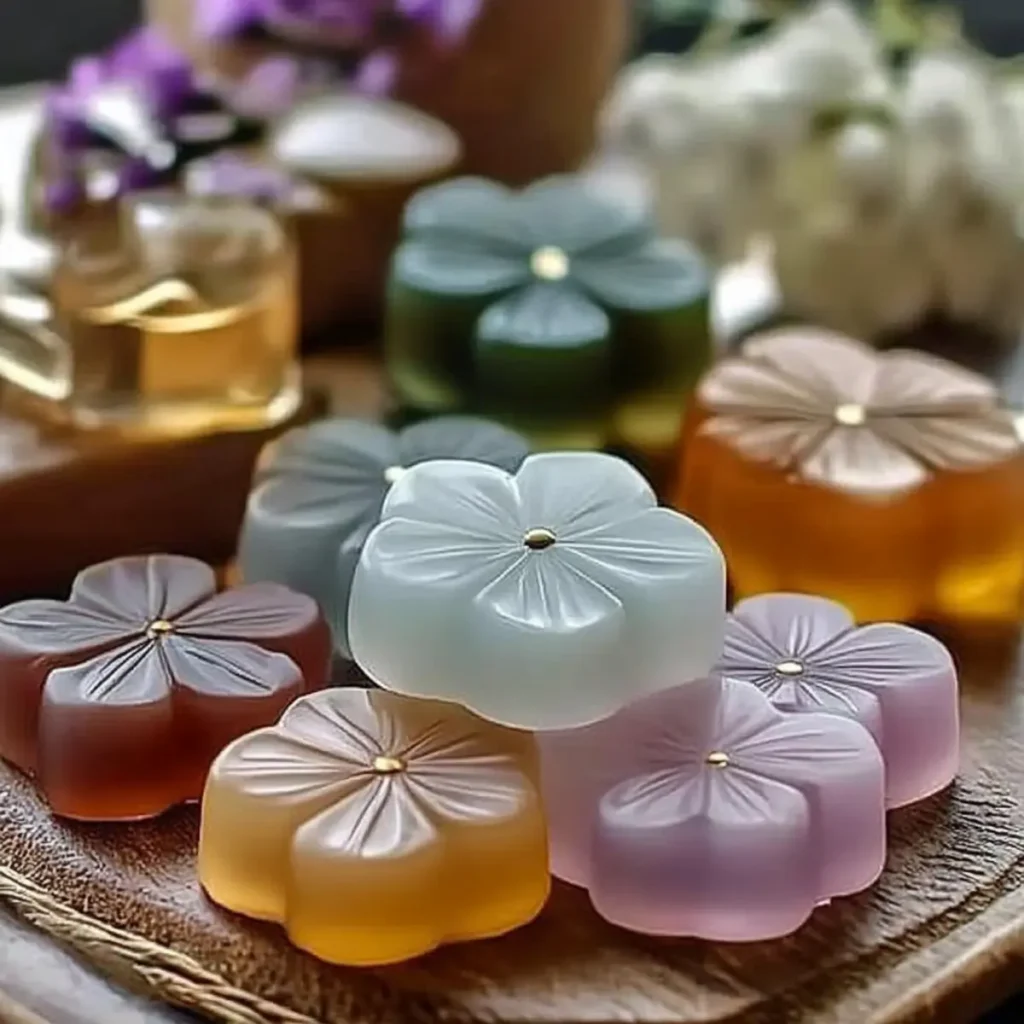
There's something incredibly satisfying about transforming simple ingredients into delightful home decor that not only looks beautiful but also fills your space with captivating aromas. I was inspired to create these DIY Aroma Stones on a particularly sunny Saturday while daydreaming about ways to brighten up my living room. The thought of adding natural scents to my environment made me eager to get started, using nothing but eco-friendly materials.
These aroma stones aren't just an artistic endeavor; they combine the vibrant aesthetics of your favorite colors with the soothing scents of essential oils, creating an inviting atmosphere that's both calming and refreshing. Imagine the joy of guests commenting on your uniquely handmade decor that also promotes a green lifestyle! In just a few simple steps, you can craft these lovely additions to your home, making it a little more colorful and fragrant in the process. Let's dive into the delightful world of DIY Aroma Stones and bring some natural charm to your space!

Why try DIY Aroma Stones for your home?
Transformative Experience: The beauty of DIY Aroma Stones lies in their ability to brighten any room with vibrant colors while filling it with natural scents.
Eco-Friendly Choice: Made with simple, non-toxic ingredients, these stones align perfectly with a sustainable lifestyle.
Creative Outlet: Unleash your artistic side by customizing colors and fragrances to match your personal style or home decor.
Long-Lasting Aroma: Enjoy a continuous, pleasant scent that lingers, refreshing your space for weeks without synthetic air fresheners.
Easy Instructions: With straightforward steps, anyone can create these charming pieces-perfect for all skill levels.
Experience the joy of crafting these delightful decor items and fill your home with warmth and fragrance!
DIY Aroma Stones Ingredients
• Create your own aromatic treasures!
For the Base
- Baking Soda - This is the primary ingredient, providing structure to the aroma stones.
- Cornstarch - Acts as a binding agent; can be swapped with arrowroot powder if needed.
- Warm Water - Activates the dry ingredients and helps form a malleable dough.
For Fragrance
- Essential Oils (15-30 drops) - Choose your favorite scents, like lavender for relaxation or eucalyptus for invigoration.
For Color
- Food Coloring or Mica Powder - Add natural color to your stones, ensuring it's food-safe for non-toxic options.
Elevate your home with these delightful DIY Aroma Stones that fill the air with beautiful scents while adding a pop of color to your decor!
How to Make DIY Aroma Stones
- Combine Ingredients: In a large mixing bowl, blend 1 cup of baking soda, ½ cup of cornstarch, and ¾ cup of warm water. Stir until it's smooth and resembles a doughy consistency.
- Knead the Mixture: Once combined, knead the dough with your hands for about 2-3 minutes until it feels firm yet pliable. This ensures all ingredients are well incorporated.
- Add Fragrance: Integrate your choice of essential oils (15-30 drops) into the dough. Mix thoroughly until the delightful scent is evenly distributed throughout the mixture.
- Color Your Stones: If you want colorful stones, add a few drops of food coloring or mica powder; continue kneading until the color is mixed evenly, resulting in a vibrant hue.
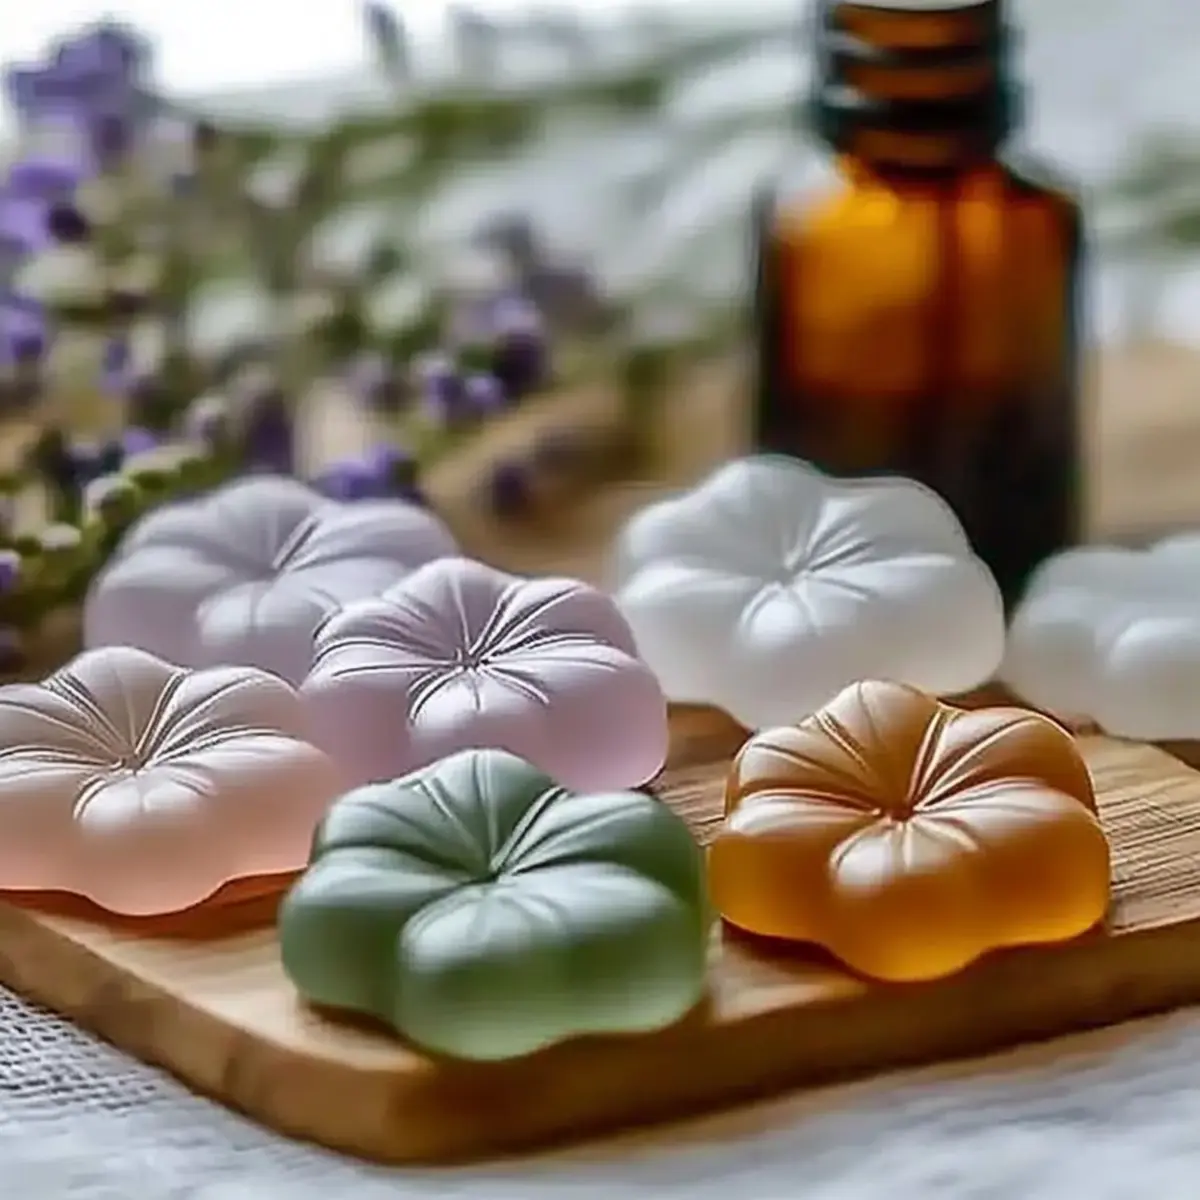
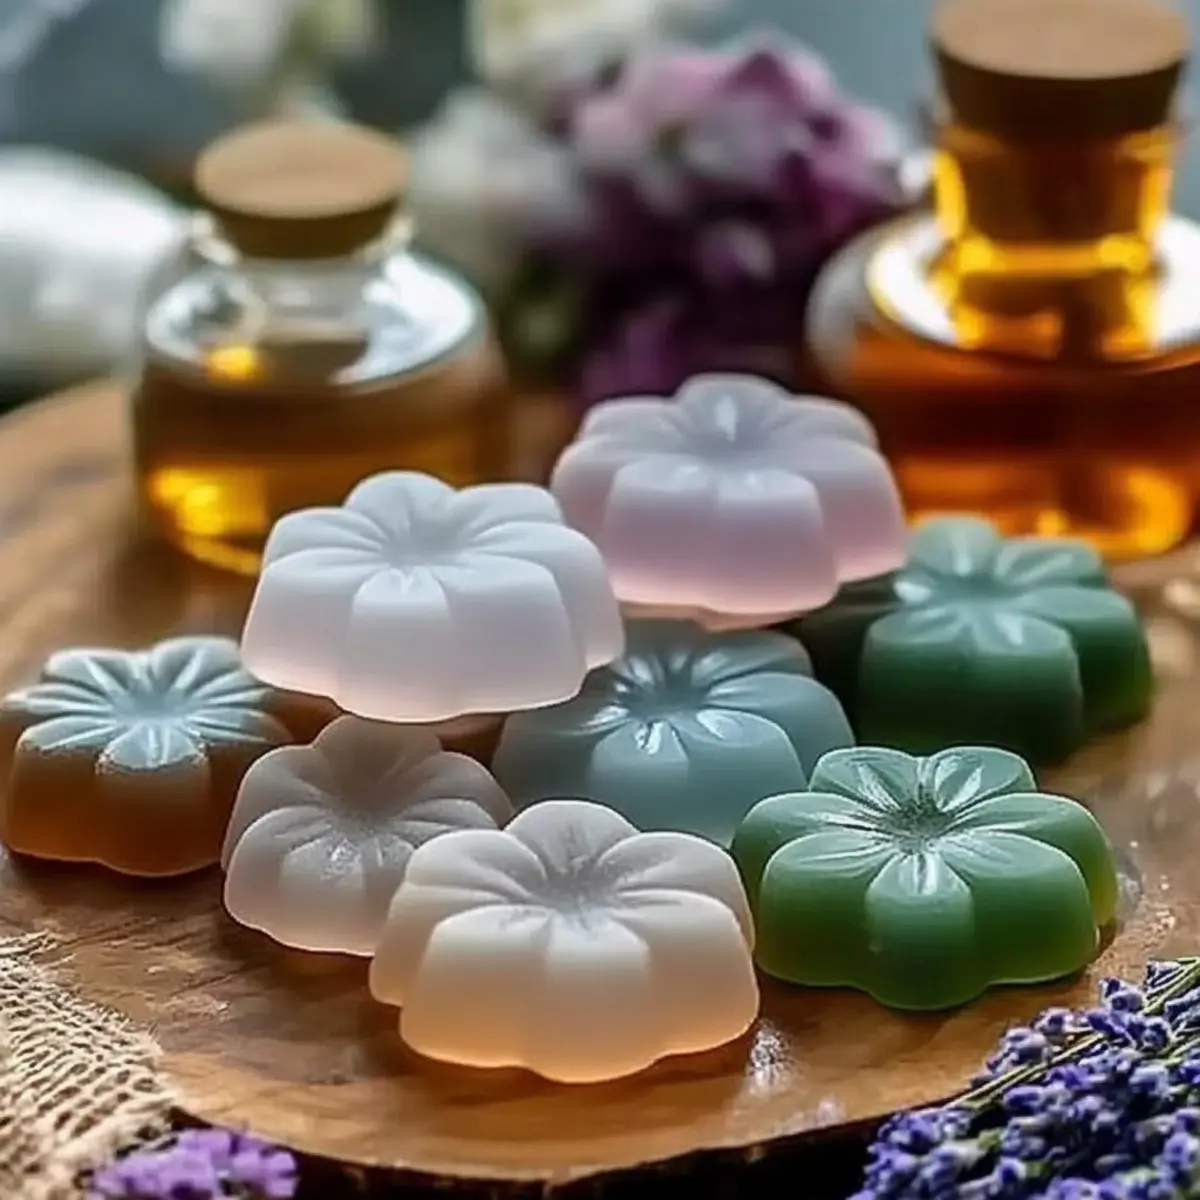
- Shape Your Stones: Roll the dough into small balls or flatten it into various shapes, depending on your creative vision. Take this opportunity to explore different designs!
- Dry Your Creations: Place the shaped stones on a parchment-lined baking sheet and let them air dry for about 24-48 hours until they're completely hardened.
- Enjoy the Aroma: Once dried, place your aroma stones in various spots around your home, allowing the gentle scent to spread and transform your space.
Optional: Try adding dried flowers or herbs for added texture and a lovely touch!
Exact quantities are listed in the recipe card below.
Make Ahead Options
These DIY Aroma Stones are perfect for prepping ahead of time, making your crafting experience a breeze! You can prepare the dough for the aroma stones and store it in an airtight container for up to 3 days before shaping and drying. When ready to create, simply remove the dough from the container and knead it again to ensure smoothness. Shape your stones and let them air dry for 24-48 hours until solid. To maintain quality, keep the mixture in a cool environment and prevent moisture exposure to ensure the aroma stones retain their scent and texture. Enjoy hassle-free crafting with these time-saving make-ahead tips!
Expert Tips for DIY Aroma Stones
- Consistent Mixing: Stirring your ingredients thoroughly ensures a smooth texture and helps to evenly distribute the essential oils, making your DIY Aroma Stones more fragrant.
- Kneading Matters: Take time to knead the dough well-this not only integrates the ingredients but also enhances the aroma release in your stones.
- Avoid Overwhelm: Don't add too many drops of essential oil; 15-30 is sufficient. An overly strong scent can be off-putting when using DIY Aroma Stones in closed spaces.
- Air Drying: Make sure your stones are dried entirely before displaying them; this prevents moisture and maintains their longevity.
- Creative Shapes: Use cookie cutters or molds to make unique designs. This lets your creativity shine while ensuring your DIY Aroma Stones fit seamlessly into your decor.
- Refresh Scents: When the fragrance starts to fade, simply add a few more drops of essential oil to reinvigorate your newly crafted pieces.
Storage Tips for DIY Aroma Stones
Room Temperature: Keep your finished DIY aroma stones in a cool, dry place to maintain their scent and appearance for up to 4 weeks.
Fridge: For longer-lasting freshness, store aroma stones in an airtight container in the fridge; this can extend their fragrance up to 8 weeks.
Reheating: If the scent starts to diminish, rejuvenate your aroma stones by adding a few drops of your favorite essential oil on top before using them again.
Display: Place the stones in well-ventilated areas to ensure a consistent aroma throughout your home while still enjoying their vibrant colors.
What to Serve with DIY Bioplastic Suncatchers?
Enhance your crafting day with delightful snacks and sips that complement the creativity of making your own eco-friendly decor.
- Herbal Infused Iced Tea: This refreshing drink keeps you cool while providing uplifting scents, perfect for fostering your creative spirit.
- Veggie Platter with Hummus: Crunchy veggies paired with smooth hummus offer a delightful balance, keeping your energy up as you work on your suncatchers.
- Fruit Skewers: Colorful and sweet fruit on sticks add a festive touch, just like the vibrant suncatchers you're creating!
- Almond Butter Energy Bites: Packed with nutrients and flavor, these bites offer a healthy, sweet treat that keeps the momentum going throughout your DIY session.
- Mini Caprese Bites: Refreshing and vibrant, these bites blend juicy tomatoes with basil and mozzarella-mirroring the lively colors of your finished creations.
- Sparkling Water with Lime: Infused with a zesty twist, this drink is the perfect palate cleanser as you craft your aromatic pieces.
- Chocolate-Dipped Fruit: Indulge in a sweet treat that's both luxurious and refreshing; the perfect reward for your creative efforts!
- Herbal Scented Candles: While not a snack, lighting a candle with friendly aromas will enhance your crafting space and inspire your imaginative designs.
- Lemonade: Classic and revitalizing, a chilled glass of lemonade offers a burst of citrus that energizes and refreshes your senses during the process.
DIY Aroma Stones Variations
Feel free to unleash your creativity and customize these delightful aroma stones to match your home's style and scent preferences!
-
Seasonal Scents: Swap your essential oils based on the season, like cinnamon for autumn or floral blends for spring. It's a fun way to celebrate the changing seasons!
-
Natural Colorants: Instead of food coloring, use natural sources like beet juice or turmeric for earthy tones. These options not only add color but also represent your commitment to all things natural.
-
Add Texture: Incorporate dried flowers or herbs into your mixture for a lovely texture and added fragrance. It's a charming twist that gives your stones a rustic appearance!
-
Vary Shapes: Instead of standard stones, try creating different shapes, like hearts or stars, using cookie cutters. This can personalize your decor and create a whimsical touch.
-
Layering Scents: Create layered aroma stones by mixing different scents in various sections. Experiment with sweet and fresh or calming and invigorating combinations to create your unique blends!
-
Essential Oil Infusions: Opt for infused oils, like rosemary or mint, to elevate the aroma experience and provide a refreshing twist. Each infusion brings a different layer of scent to your stones!
-
Filling Molds: Use silicone molds to create unique designs such as coasters or decorative pieces, adding functionality to beauty. Your creations could serve multiple purposes!
-
Heat Variations: If you enjoy a stronger scent, try adding slightly more drops of essential oil to your stones as they dry. Just a little extra can go a long way in in enhancing the aroma!
DIY Aroma Stones Recipe FAQs
What type of baking soda should I use?
Absolutely! It's best to use fine-textured baking soda for smooth results. Look for brands that specifically state "pure" or "non-clumping" on the packaging to avoid any unexpected texture in your aroma stones.
How should I store my DIY aroma stones?
For optimal freshness, keep your finished aroma stones in a cool, dry place at room temperature for up to 4 weeks. If you want to extend their scent, placing them in an airtight container in the fridge can keep them fragrant for an additional 4 weeks. Just remember to avoid direct sunlight and excess humidity.
Can I freeze my aroma stones?
While freezing isn't recommended for storing aroma stones, if you have a batch of unused dough, you can wrap it well in plastic and freeze it for up to 3 months. When you're ready to use it, simply thaw in the fridge overnight and reshape it before adding essential oils and colors.
What if my aroma stones didn't dry completely?
No worries! If your stones are still damp after 48 hours, they might need additional time to air dry. You can also place them in a low-temperature oven (around 200°F or 93°C) for 30-60 minutes to help them dry out faster. Just keep an eye on them to prevent burning!
Are there any allergy considerations I should be aware of?
Great question! Since essential oils are often derived from natural sources, some individuals may have sensitivities or allergies. Always check for specific allergies related to the oils you choose and consider doing a patch test before placing the stones in your environment. If you have pets, ensure that the oils you use are safe for them, as some essential oils can be harmful to animals.
Can I customize the scents or colors of my aroma stones?
Very much so! Feel free to experiment with any essential oils or natural colors you enjoy. The beauty of DIY is that you can mix and match to create aromas that cater to your personal taste and home decor. Just remember that a little goes a long way when adding your fragrances!
Scent Your Space Naturally: Easy DIY Aroma Stones Magic
Equipment
- mixing bowl
- Baking sheet
- Parchment Paper
Ingredients
For the Base
- 1 cup baking soda provides structure
- ½ cup cornstarch can swap with arrowroot powder
- ¾ cup warm water activates dry ingredients
For Fragrance
- 15-30 drops essential oils choose favorite scents
For Color
- food coloring or mica powder ensure food-safe
Instructions
How to Make DIY Aroma Stones
- Combine Ingredients: In a large mixing bowl, blend 1 cup of baking soda, ½ cup of cornstarch, and ¾ cup of warm water. Stir until it's smooth and resembles a doughy consistency.
- Knead the Mixture: Once combined, knead the dough with your hands for about 2-3 minutes until it feels firm yet pliable.
- Add Fragrance: Integrate your choice of essential oils (15-30 drops) into the dough. Mix thoroughly.
- Color Your Stones: Add food coloring or mica powder; continue kneading until the color is evenly mixed.
- Shape Your Stones: Roll the dough into small balls or flatten it into various shapes.
- Dry Your Creations: Place the shaped stones on a parchment-lined baking sheet to air dry for 24-48 hours.
- Enjoy the Aroma: Once dried, place your aroma stones around your home.


Leave a Reply