
There's something truly special about infusing your home with personalized touches, and what better way to add a dash of vibrancy and scent than with DIY aroma stones? Picture this: a warm afternoon spent shaping colorful stones while your favorite essential oils fill the air with calming fragrances. These delightful decorative stones not only brighten up your space but serve as a charming reminder of your creative time spent at home.
As I dove into this project, I discovered how wonderfully versatile these stones can be. By simply mixing some everyday ingredients, you can create stunning décor that's perfect for every season or occasion. Whether you're looking to bring a fresh aroma to your living room or craft unique gifts for loved ones, this simple yet satisfying craft offers endless possibilities. So, roll up your sleeves, unleash your imagination, and let's dive into making our very own DIY aroma stones that will elevate your home décor!
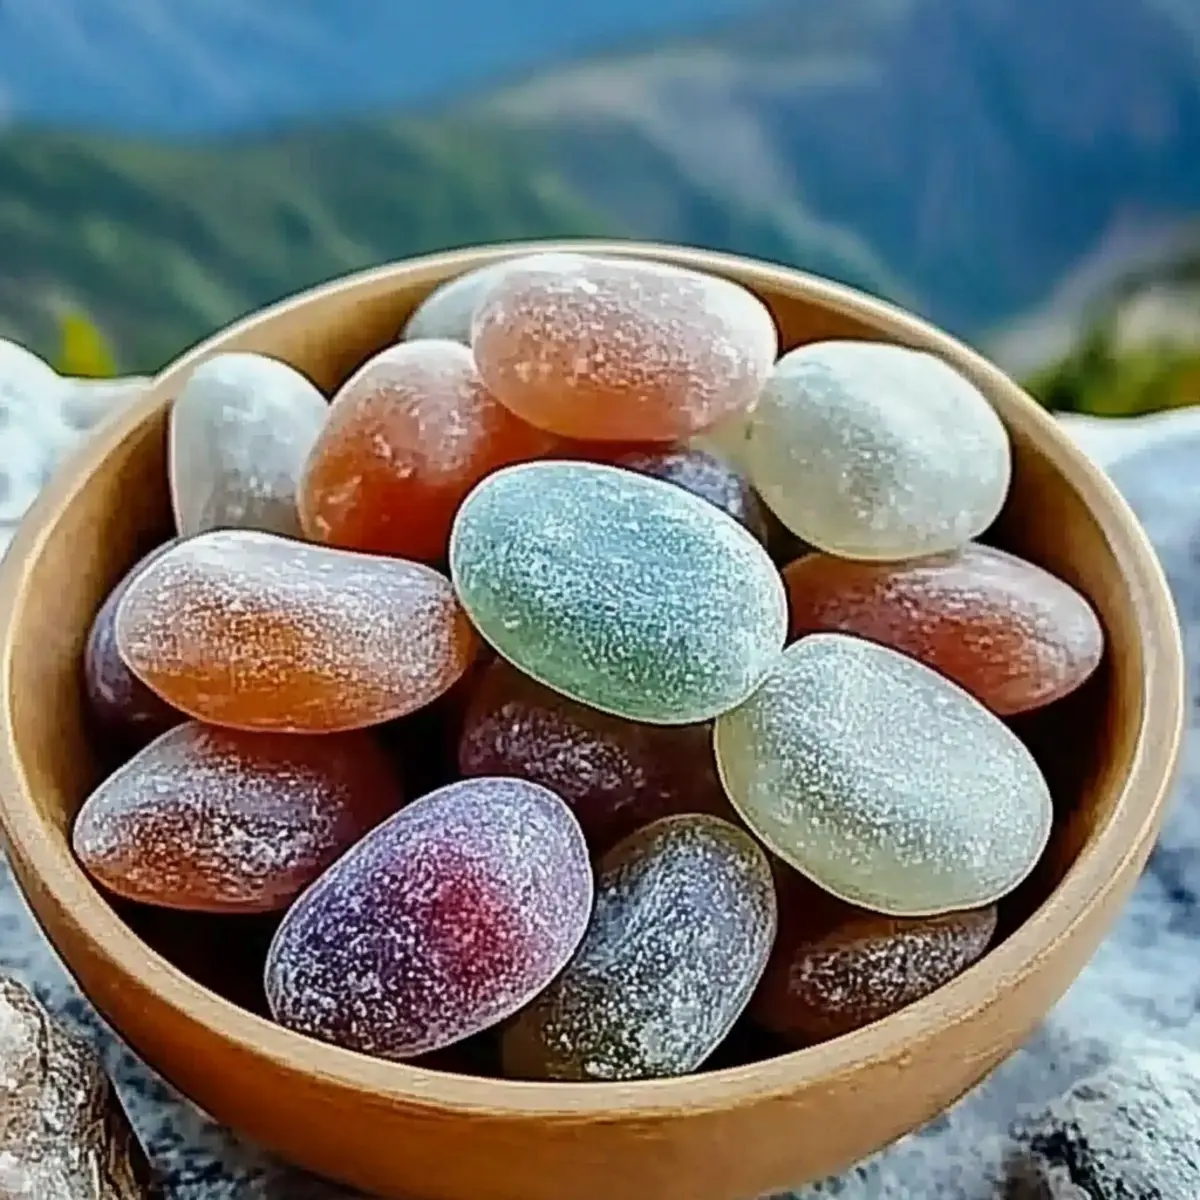
Why Love DIY Aroma Stones?
DIY Aroma Stones are the perfect blend of creativity and functionality.
- Endless Customization: Mix colors and scents to reflect your personal style or seasonal themes.
- Simple Crafting Process: This fun project requires minimal skill, making it enjoyable for all ages.
- Aromatherapy Benefits: Infuse your living space with your favorite essential oils while crafting.
- Eco-Friendly Decor: Ditch the plastic and fast fashion-these stones are a sustainable DIY choice!
- Unique Gifts: Create thoughtful, handmade presents that friends and family will cherish.
Embrace this delightful project to refresh your home with unique decor!
DIY Aroma Stones Ingredients
• Start creating your vibrant DIY aroma stones with the following essentials:
For the Base
- White All-Purpose Flour - This forms the sturdy base of your stones, ensuring they maintain their shape.
- Salt - Adds durability as it helps harden the stones during the drying process.
- Cornstarch - Provides a smooth texture and assists the dough in holding together beautifully.
- Cooled Boiled Water - Activates the dough for a perfect blend of consistency.
For the Fragrance and Color
- Essential Oils - Personalize the scent with your favorite essential oil or blend for delightful fragrance.
- Mica Powder or Food Coloring - Add vibrant colors to your stones; adjust quantities for a bold or subtle hue.
Get ready to embark on this charming crafting journey that transforms simple ingredients into beautiful DIY aroma stones!
How to Make DIY Aroma Stones
-
Prepare Dough: In a spacious mixing bowl, whisk together white all-purpose flour, salt, and cornstarch until well combined. This flour blend forms the sturdy base of your stones, creating a solid foundation.
-
Combine Wet Ingredients: Gradually pour in the cooled boiled water, mixing gently until the dough begins to form. Aim for a smooth consistency that isn't too sticky; this should only take a few minutes!
-
Incorporate Fragrance and Color: Add your desired essential oils and mica powder or food coloring to the dough. Mix thoroughly until the color and scent are evenly distributed throughout the mixture for an aromatic experience.
-
Shape Stones: With clean hands, mold the dough into various stone shapes or use silicone molds for a neat finish. Let your creativity shine with different sizes and textures!
-
Drying Process: Arrange the shaped stones on a parchment-lined baking sheet and let them air dry for at least 12 hours. They should feel solid and dry to the touch before moving on.
Optional: Sprinkle a little glitter on top before drying for a dazzling effect!
Exact quantities are listed in the recipe card below.
Make Ahead Options
Making your DIY Aroma Stones in advance is a fantastic way to streamline your crafting time! You can prepare the dough up to 24 hours ahead of time and store it in an airtight container in the refrigerator to keep it fresh and moist. To enhance the aromatic experience, mix in your essential oils and mica powder right before shaping the stones. Once formed, the stones need at least 12 hours to dry, so consider making them the night before an event or gifting occasion. By prep-ahead strategies, you ensure that your DIY Aroma Stones maintain their vibrant colors and delightful scents, offering a stunning and personalized home décor piece with minimal effort!
Storage Tips for DIY Aroma Stones
Cool, Dry Place: Store your dried aroma stones in a cool, dry area away from direct sunlight to maintain their vibrant colors and fragrance.
Airtight Container: Place the stones in an airtight container to keep moisture at bay, preserving their lovely scent for up to 6 months.
Avoid Humidity: Moist environments can damage the stones; always store them in places with low humidity to prevent deterioration.
Refreshing Scents: If the fragrance fades over time, simply add a few drops of essential oils to reinvigorate your DIY aroma stones before displaying them again.
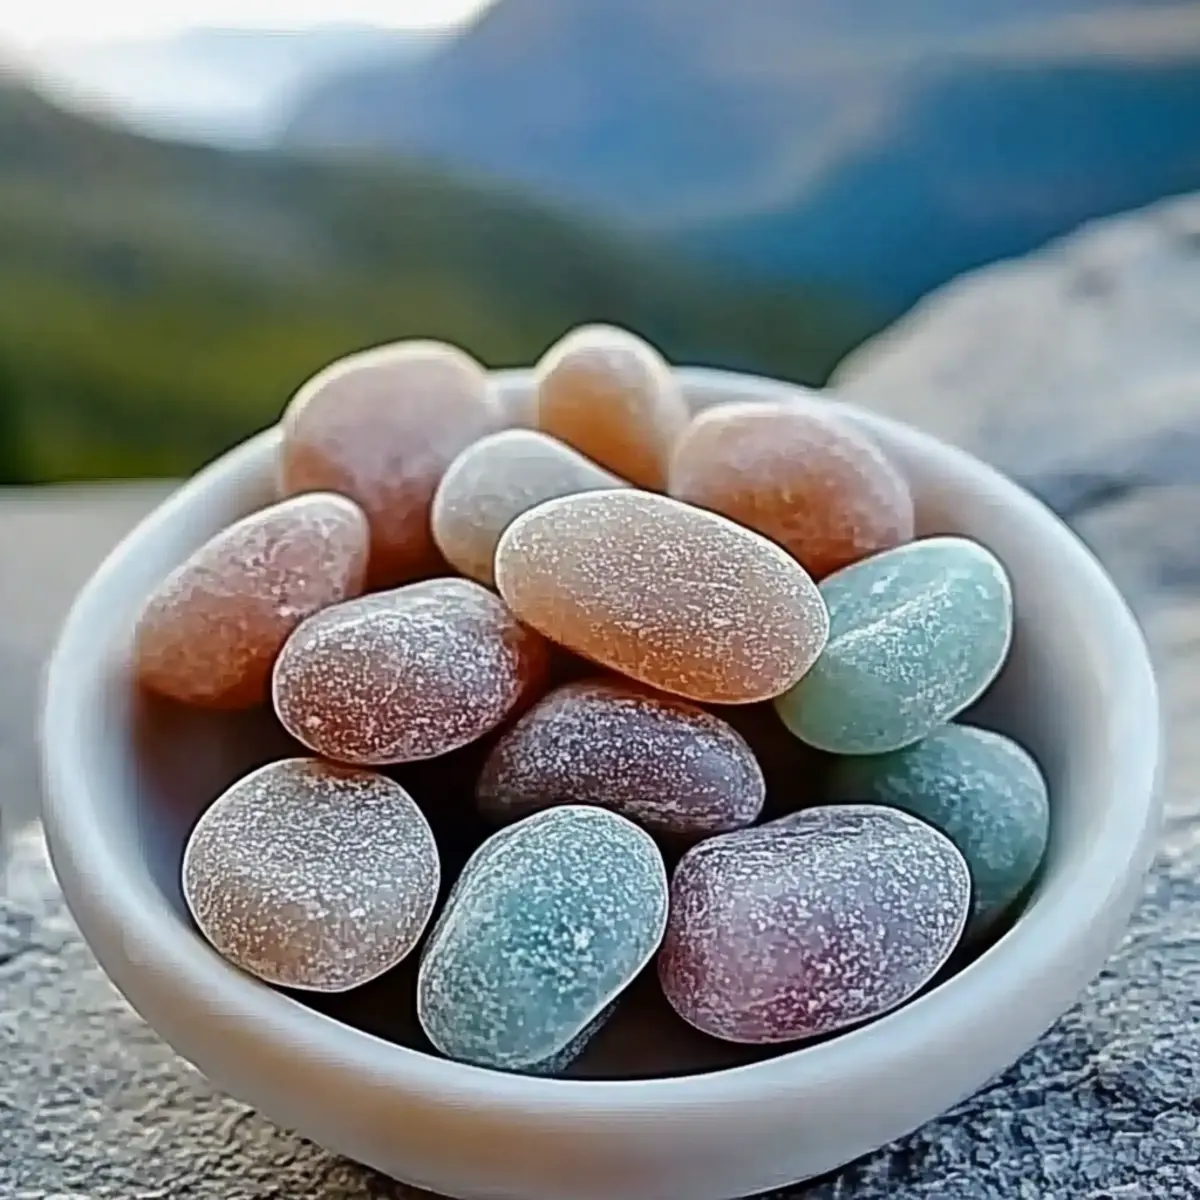
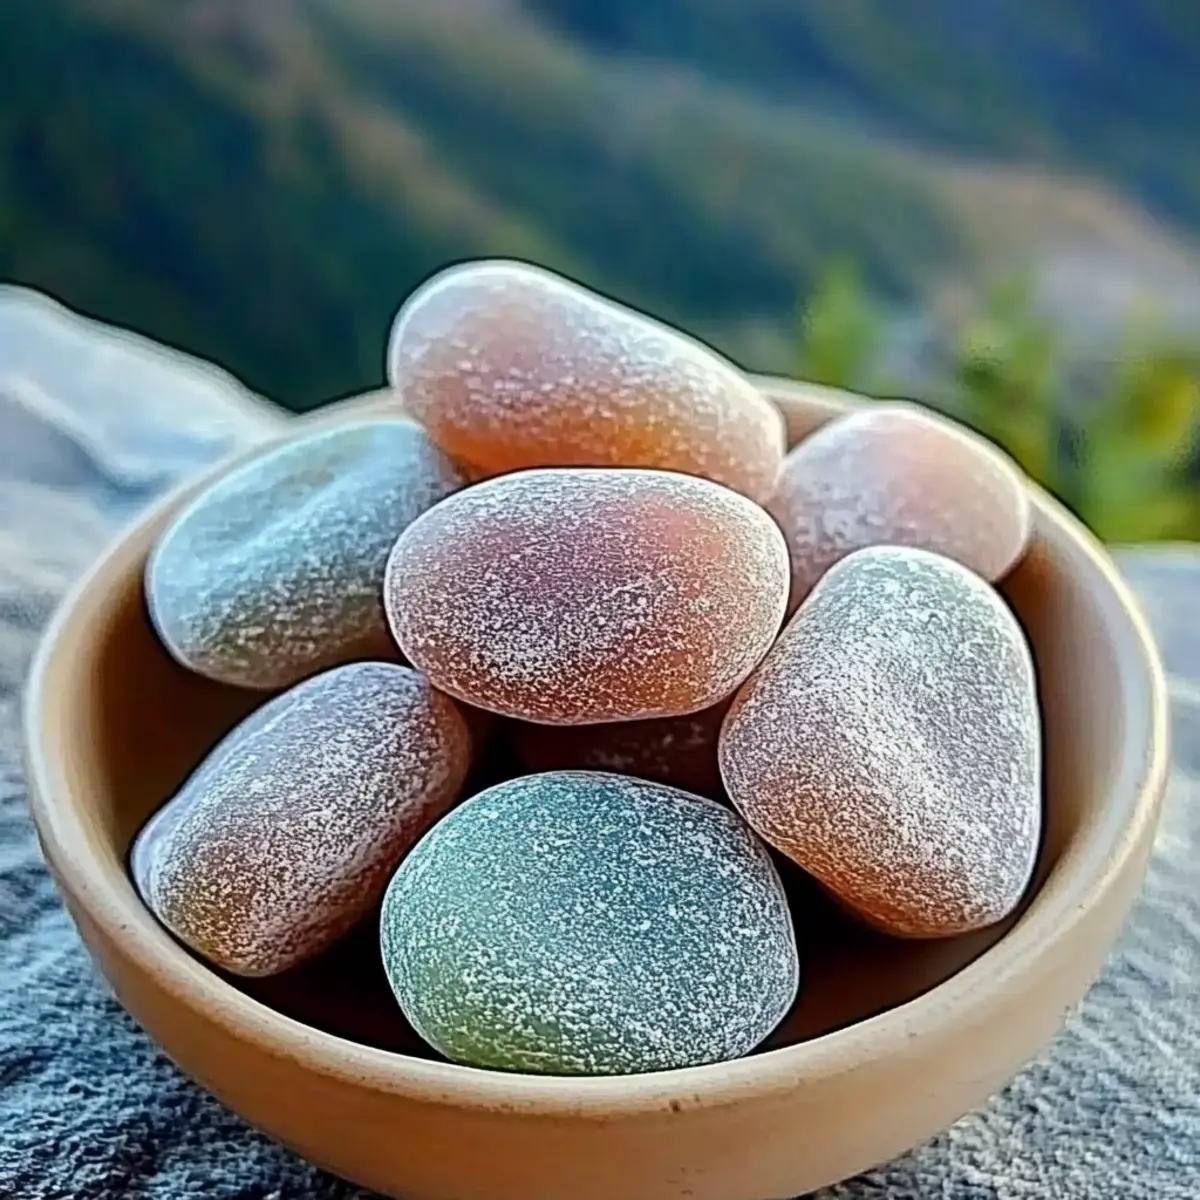
What to Serve with DIY Colored Stones?
Creating your own decorative treasures can easily spark your creativity and enhance your living space.
- Stylish Bowls: Use vibrant ceramic or wooden bowls to display your colorful stones, adding a pop of personality to any room.
- Candles: Pair your stones with beautifully scented candles to create an inviting atmosphere and enhance aromatherapy experiences.
- Fresh Flowers: Bright blooms in a vase complement the stones' colors, bringing nature indoors and creating a warm, lively decor scheme.
- Fragrant Sachets: Place handmade sachets nearby filled with dried lavender or eucalyptus to amplify the sensory experience your stones provide.
- Artistic Frames: Showcase framed artwork or family photos alongside the stones for a cohesive, personalized touch that tells your story.
- Reading Nook: Create a cozy corner with soft lighting, a good book, and your colorful stones for a relaxing visual treat.
- Brewed Tea or Coffee: Serve a warm cup of your favorite beverage while you enjoy the delightful ambiance created by your DIY aroma stones.
- Textured Fabrics: Use soft throws or textured cushions nearby to add comfort while you admire your crafted decor.
- Seasonal Decor: Change the display with the seasons; mix in leaves, pinecones, or other natural elements for refreshing contrasts.
DIY Aroma Stones Variations
Feel free to let your creativity soar as you customize these charming aroma stones to suit your style and preferences!
-
Essential Oil Swaps: Experiment with different essential oils for seasonal scents, such as peppermint for winter or lavender for spring.
-
Natural Dyes: Use beet juice or turmeric for an all-natural coloring option, resulting in gorgeous hues without artificial additives.
-
Texture Variations: Add sand or fine pebbles to the mixture for a textured stone surface that mimics real stones while inviting tactile exploration.
-
Scent Layering: Create multi-layered stones by mixing different colors and scents, allowing each layer to be revealed as the stone ages.
-
Themed Shapes: Use cookie cutters to shape your stones for holidays like hearts for Valentine's Day or stars for the festive season to further enhance your décor.
-
Glitter Accents: Sprinkle biodegradable glitter into your dough for a sparkling finish that catches the light and adds an enchanting touch.
-
Size Variety: Craft a mix of small, medium, and larger stones for a playful arrangement that showcases the diversity of your creations.
-
Spice Infusion: Add a pinch of cinnamon or clove powder into the mix for an aromatic twist that brings warmth and coziness to your home.
Expert Tips for DIY Aroma Stones
- Well-Mixed Dough: Ensure all ingredients are mixed thoroughly to avoid cracks during drying. An even mixture will yield smoother stones.
- Customize Scents: Experiment with different essential oils to create unique blends. Consider seasonal scents for added charm and comfort in your home.
- Use Molds: For uniformity, silicone molds can help your stones look polished and well-shaped. This is especially useful for gifts!
- Drying Time: Be patient during the drying process; improper drying can lead to softness. Ensure the stones are fully dry before handling them.
- Storage Care: Once completed, store your DIY aroma stones in a cool, dry place. This helps maintain their fragrance and prevents moisture damage.
DIY Colorful Decorative Stones for Home Decor Recipe FAQs
How do I choose ripe essential oils?
Absolutely! While essential oils don't ripen in the traditional sense, it's important to select high-quality oils from reputable brands. Look for pure oils with no additives or fillers, as these will provide the best fragrance and therapeutic benefits. If you're using fragrance oils, give them a sniff-pick ones that resonate with you and fit the mood you're aiming for!
What's the best way to store my DIY aroma stones?
To maintain the quality of your DIY aroma stones, store them in a cool, dry place away from direct sunlight. Ideally, keep them in an airtight container to prevent moisture damage and to keep their scents intact. This way, they can last for up to 6 months without losing their vibrant colors or lovely aromas.
Can I freeze my DIY aroma stones?
Although freezing isn't typically necessary for DIY aroma stones, you can store any leftover dough in the freezer if you plan to make them later. Simply wrap the dough tightly in plastic wrap and place it in an airtight container. It will last up to 3 months. When ready to use, let it thaw in the fridge overnight and knead a bit before shaping.
What should I do if my stones crack while drying?
Very! If you notice cracks appearing during the drying process, it's usually because the dough was either too dry or not mixed well. Don't worry! You can repair the stones by wetting your fingers and gently smoothing over the cracked areas before allowing them to dry again. It's so important to ensure your dough is well-mixed for a consistent texture!
Are these stones safe for pets?
While DIY aroma stones are generally safe when created with non-toxic materials, it's wise to keep them out of reach of pets. Some essential oils can be harmful to animals, particularly cats and dogs, in concentrated forms. If you're concerned, consider using pet-safe oils or forgo the scent entirely to ensure your furry friends are safe.
How can I tell when my aroma stones are fully dry?
The more the merrier! To check if your stones are ready, gently press on the surface-if they feel solid and no longer damp, they're done! You can also tap them lightly; they should sound hollow. Depending on your environment, drying may take longer than 12 hours, so ensure they're fully dried out before displaying or packaging them.
Savor the Joy: DIY Aroma Stones for a Cozy Home Decor
Equipment
- mixing bowl
- silicone molds
- Baking sheet
- Parchment Paper
Ingredients
For the Base
- 2 cups White All-Purpose Flour Forms the sturdy base of your stones.
- 1 cup Salt Helps harden the stones during drying.
- 1 cup Cornstarch Provides a smooth texture for the dough.
- 1 cup Cooled Boiled Water Activates the dough for easy mixing.
For the Fragrance and Color
- 10 drops Essential Oils Personalize scent with favorite oils.
- 1 tablespoon Mica Powder or Food Coloring Adds vibrant color to the stones.
Instructions
How to Make DIY Aroma Stones
- In a spacious mixing bowl, whisk together white all-purpose flour, salt, and cornstarch until well combined.
- Gradually pour in the cooled boiled water, mixing gently until the dough begins to form.
- Add essential oils and mica powder or food coloring to the dough and mix thoroughly.
- Mold the dough into various shapes or use silicone molds for a neater finish.
- Arrange the shaped stones on a parchment-lined baking sheet and let them air dry for at least 12 hours.


Leave a Reply