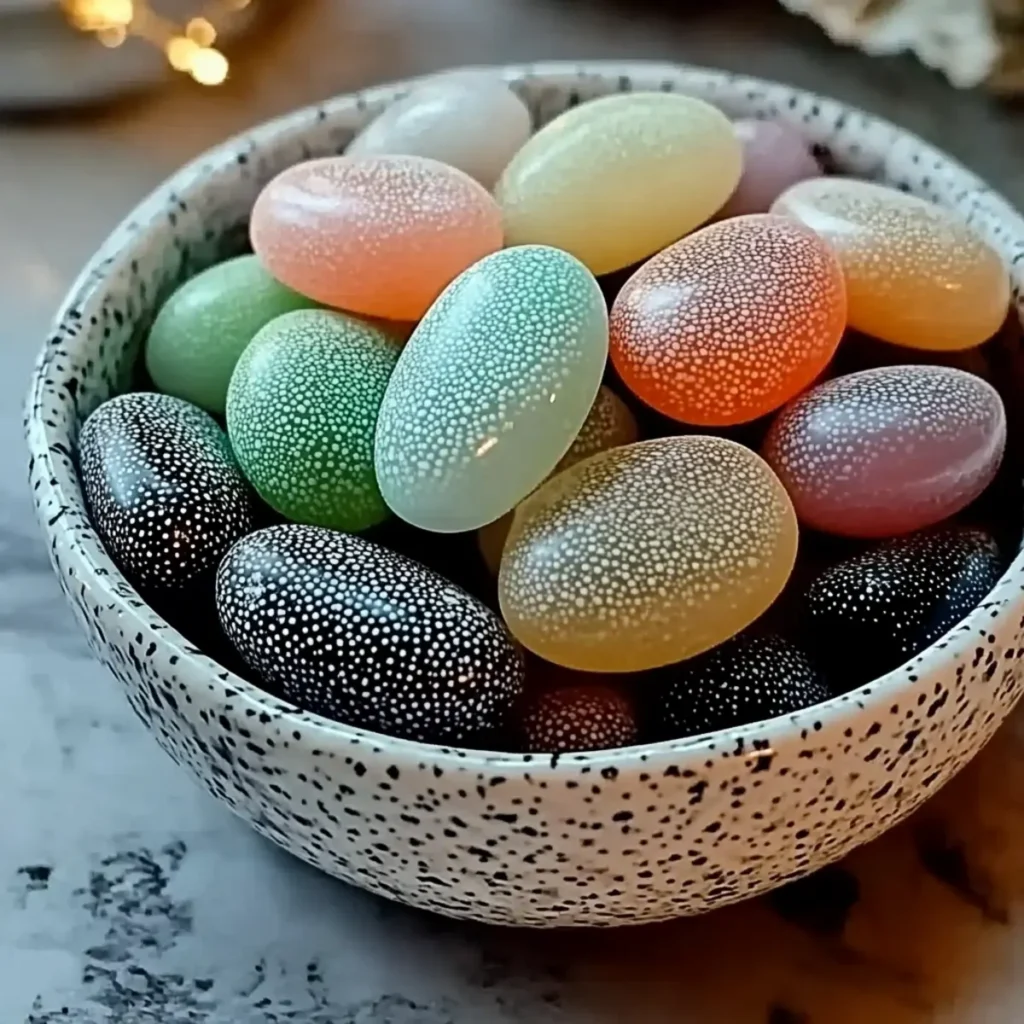
There's something incredibly satisfying about transforming everyday ingredients into beautiful, fragrant treasures for your home. Recently, I found myself surrounded by dull commercial air fresheners, each one more artificial than the last. That's when I decided to experiment with creating my own DIY Aroma Stones. Imagine scent-infused stones, uniquely tailored with my favorite essential oils-each one a little burst of nature that not only looks charming but also fills my space with delightful aromas.
These eco-friendly stones are not only simple to craft but also offer a customizable experience that fits any mood or occasion. Whether you're looking to uplift your living room or create a soothing atmosphere in your bedroom, these charming little creations can be adjusted to your personal scent preferences. Plus, they're perfect for anyone tired of the fast-paced, artificial fragrances found in stores. Let's dive into this fun, creative project and bring some handcrafted beauty into our homes!
Why DIY Aroma Stones are Perfect for You?
Transforming your home with DIY Aroma Stones is a game changer! Eco-friendly materials mean you're caring for the planet while enhancing your space. Customizable scents allow you to blend oils that match your mood, giving you endless options. Simple process ensures anyone can dive in, regardless of skill level. Plus, it's a fun activity for all ages, making it perfect for family bonding or solo creativity. Create fragrant décor that's both beautiful and functional!
DIY Aroma Stones Ingredients
For the Stone Mixture
- Baking Soda - Absorbs moisture and helps hold the fragrance, making your DIY Aroma Stones effective and lasting.
- Cornstarch - Binds the ingredients together and gives the stones a silky texture for a pretty finish.
- Warm Water - Activates the mixture and creates a moldable paste; if unavailable, room temperature water works too.
For the Fragrance
- Essential Oil - Infuses delightful scents into your stones; choose from options like lavender, lemon, or peppermint for a personalized touch.
For Color (Optional)
- Natural Coloring - Adds visual appeal to your stones; consider mica powder for vibrancy or spices for a more natural look.
How to Make DIY Aroma Stones
-
Combine Dry Ingredients: In a large bowl, mix ½ cup of baking soda and ½ cup of cornstarch. This blend creates a sturdy base for your DIY Aroma Stones, ready to hold delightful fragrances.
-
Add Water Gradually: Slowly pour in ¼ cup of warm water, mixing as you go. Stir until you achieve a moldable paste-this should take just a few moments!
-
Incorporate Essential Oils: Add 15-30 drops of your chosen essential oil to the mixture. Stir well to evenly distribute the scent, allowing the aroma to reflect your personal style.
-
Add Natural Coloring (Optional): If you'd like to add some flair, mix in your natural coloring choice. Stir until colors are evenly blended, giving your stones a vibrant appearance!
-
Shape Your Stones: Form the mixture into small stones or shapes that catch your eye. Place them on a tray, adding creativity to their designs.
-
Dry the Stones: Allow the stones to dry for 1 day. If humidity is high, consider using a fan or dehumidifier to speed up the drying process.
-
Store and Refresh: Once dried, store any unused stones in an airtight container. Refresh with additional essential oil whenever you desire a scent boost.
Optional: Add a sprinkle of dried flowers for an extra decorative touch!
Exact quantities are listed in the recipe card below.
Make Ahead Options
These DIY Essential Oil Stones are not just delightful to make but also perfect for meal prep and ahead preparation! You can mix the dry ingredients-½ cup of baking soda and ½ cup of cornstarch-up to 3 days in advance and store them in an airtight container to maintain freshness. When you're ready to craft your stones, simply add the warm water and essential oils to the pre-mixed dry ingredients. Once shaped, allow your stones to dry for 1 day (consider using a fan or dehumidifier if needed). By preparing components ahead of time, you'll save precious moments during busy weeknights while still enjoying the soothing aromas of your DIY Essential Oil Stones just as fresh and fabulous!
Expert Tips for DIY Aroma Stones
-
Mix Gradually: Slowly add the warm water to your dry ingredients to avoid creating a runny mixture. This helps you maintain the perfect texture for your DIY aroma stones.
-
Humidity Awareness: High humidity can extend the drying process, so place your stones in a well-ventilated area or use a fan for quicker results.
-
Fragrance Boost: For optimal scent retention, refresh your stones with essential oil every few weeks. This keeps your space smelling delightful!
-
Experiment Freely: Don't hesitate to blend different essential oils for unique aromas. Try creating your signature scent that reflects your personality!
-
Natural Colors: If you prefer a more organic look, avoid commercial food coloring and use natural spices or herbal powders for a beautiful hue in your DIY aroma stones.
How to Store and Freeze DIY Aroma Stones
Fridge: Keep the stones in an airtight container in the fridge if you live in a humid climate. This will help extend their fragrance lifespan for up to 2 weeks.
Freezer: For long-term storage, place the stones in a freezer-safe container or bag. They can last up to 3 months this way, but ensure they're completely dry first.
Refresh: To revive the aroma, simply apply a few drops of essential oil to the stones before using them again. This is especially effective after they've been stored for a while.
Room Temperature: If you plan to use the aroma stones within a couple of weeks, store them at room temperature in a cool, dry place away from direct sunlight.
What to Serve with DIY Essential Oil Stones?
Bring depth and delight to your home with accompanying choices that complement the soothing scents these stones release.
-
Fresh Flowers: Their natural beauty enhances the ambiance while echoing the fresh scents of your DIY aroma stones.
-
Citrus Slices: Bright, zesty fruit adds a cheerful pop to your space, aligning beautifully with invigorating essential oil fragrances.
-
Tea Candles: Softly glowing lights create a cozy atmosphere, inviting relaxation and uplifting your scent experience.
Engaging in more acts of self-care can turn your home into a haven. The stones work harmoniously alongside these elements, enhancing your senses and creating a warm, inviting space.
DIY Aroma Stones Variations
Feel free to get creative and make these aroma stones uniquely yours with these fun twists!
-
Scent Blends: Experiment with combinations like citrus-lavender or spiced cinnamon-vanilla to enhance your aromatic experience. Mixing different scents not only diversifies your options but can also evoke specific moods.
-
Mold Shapes: Use seasonal molds like hearts, stars, or holiday-themed designs for festive flair. This personal touch makes them perfect for gifts or seasonal decor!
-
Herbal Infusions: Add dried herbs such as rosemary or mint to the mix for added texture and fragrance. The herbs invite a natural element that intensifies the earthy feel of your DIY stones.
-
Color Variations: Incorporate spices like turmeric for a warm yellow hue or beet powder for rosy pink stones. Utilize nature's bounty to create visually appealing stones that are as delightful to see as they are to smell.
-
Heat Boost: Infuse a hint of spice by adding a dash of cinnamon or clove essential oil for a cozy scent. This twist is perfect for creating a warm atmosphere during chilly evenings.
-
Aromatherapy Focus: Tailor your oils for specific benefits, like calming chamomile for relaxation or energizing citrus for a boost. Each stone can serve a unique purpose, enhancing your space and mood holistically.
-
Floral Notes: Blend floral oils like jasmine or geranium with your chosen scents for a fresh fragrance. The floral element brings a touch of elegance and invigorating freshness into your home.
-
Gift Ideas: Create themed sets by scent, color, or purpose, perfect for gifting. These custom creations bring joy and thoughtfulness to anyone's space, making them truly special.
Let your imagination run wild, and enjoy the delightful journey of crafting these enchanting aroma stones!
DIY Essential Oil Stones Recipe FAQs
What type of essential oils can I use for my aroma stones?
You can choose from a variety of essential oils! Popular options include lavender for its calming properties, lemon for a fresh scent, peppermint for an invigorating aroma, eucalyptus for a soothing effect, or even blend your favorites for a custom fragrance. Just ensure they are safe for aromatherapy use!
How should I store my DIY aroma stones to maintain their scent?
To keep your aroma stones fresh, store them in an airtight container away from direct sunlight. If you live in a humid climate, placing them in the fridge can extend their fragrance lifespan for up to 2 weeks. At room temperature, they should be fine for a couple of weeks, but for long-term use, consider refreshing them with a few drops of essential oil periodically.
Can I freeze my aroma stones for long-term storage?
Absolutely! For long-term storage, your DIY aroma stones can be kept in a freezer-safe container or bag. Just ensure they are completely dry before freezing. They can last up to 3 months this way. When you're ready to use them again, apply a few drops of essential oil to revive their scent.
What should I do if my aroma stone mixture is too runny?
If you find your mixture is too runny, don't worry! Start by adding a bit more baking soda and cornstarch (try adding a tablespoon of each at a time) until you achieve a firmer, moldable paste. This can happen if you added the water too quickly, so always add it gradually while mixing.
Is this recipe safe for pets?
While essential oil stones can create a lovely atmosphere, some essential oils can be harmful to pets. Oils like tea tree, citrus, and others are often toxic to cats and dogs. To be safe, consult with your veterinarian before using certain oils, and always keep stones out of pets' reach to prevent any accidental ingestion!
Do I have to use natural colorants in my aroma stones?
Using natural colorants is optional, and you can indeed skip this step if you prefer an uncolored stone. If you decide to color them, I recommend using mica powder for vibrancy or natural spices like turmeric or beet powder for a subtle hint of color. Avoid food coloring for a cleaner, more natural look!

Transform Your Home with DIY Aroma Stones: Beautifully Fragrant
Equipment
- large bowl
- Tray for shaping
Ingredients
For the Stone Mixture
- 0.5 cups Baking Soda Absorbs moisture and holds fragrance.
- 0.5 cups Cornstarch Binds ingredients and gives a silky finish.
- 0.25 cups Warm Water Activates the mixture.
For the Fragrance
- 15-30 drops Essential Oil Choose from lavender, lemon, or peppermint.
For Color (Optional)
- Natural Coloring Consider mica powder or spices.
Instructions
Instructions
- Combine Dry Ingredients: In a large bowl, mix ½ cup of baking soda and ½ cup of cornstarch.
- Add Water Gradually: Slowly pour in ¼ cup of warm water, mixing as you go until a moldable paste forms.
- Incorporate Essential Oils: Add 15–30 drops of your chosen essential oil, stirring well to distribute the scent.
- Add Natural Coloring (Optional): Mix in your natural coloring choice if desired, stirring until colors are evenly blended.
- Shape Your Stones: Form the mixture into small stones or shapes and place them on a tray.
- Dry the Stones: Allow the stones to dry for 1 day, using a fan if humidity is high.
- Store and Refresh: Store unused stones in an airtight container and refresh with essential oil as needed.


Leave a Reply