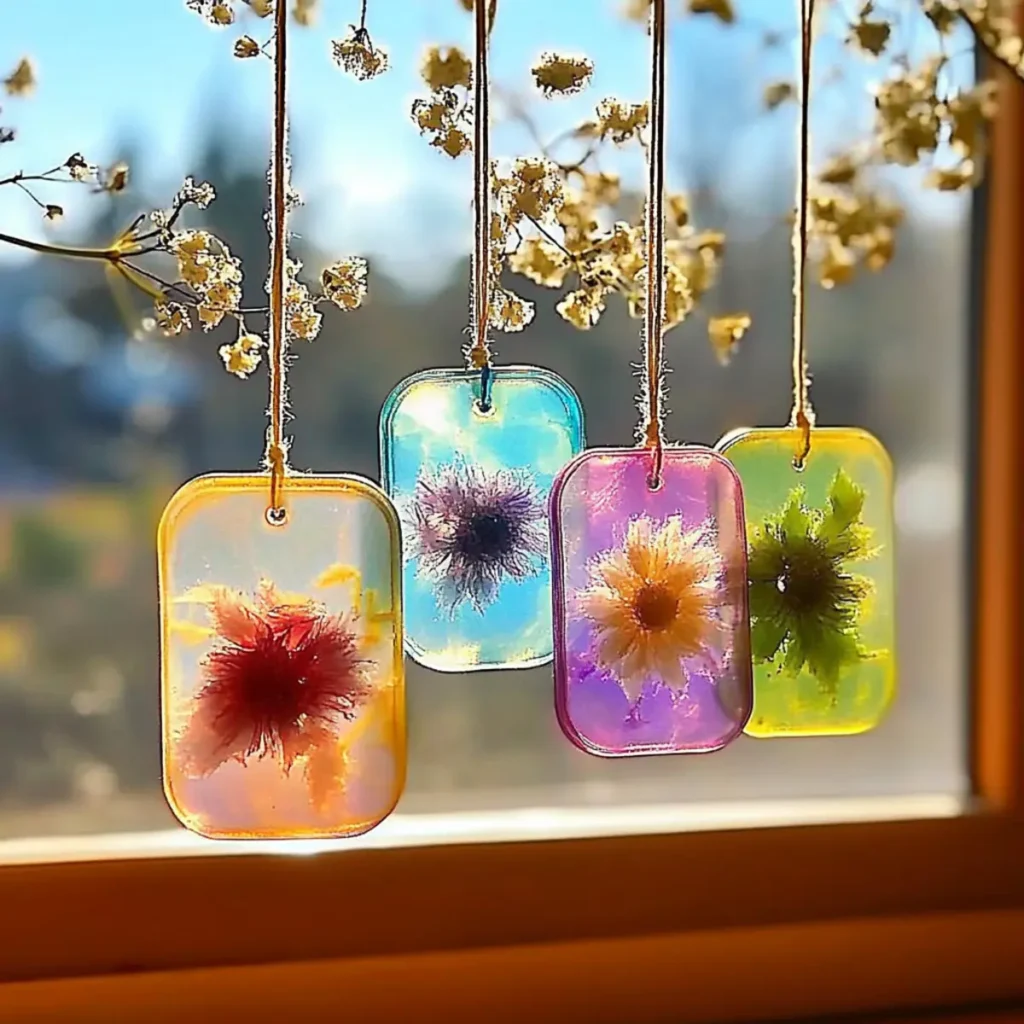
There's something delightfully nostalgic about crafting-especially when you can create something that brightens your home. In just around 30 minutes, you can make your own DIY Bioplastic Suncatchers, adding a vibrant splash of color to any window. I stumbled upon this eco-friendly gem during an afternoon search for fun projects to do with my kids, and it quickly became our favorite way to embrace sustainability and creativity.
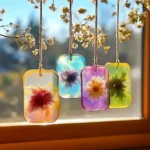
These suncatchers not only elevate your decor with their translucent beauty but also let you play with various natural colors and decorations, making each piece truly one-of-a-kind. Whether you're involving children in the process or indulging in a bit of calm crafting by yourself, this project is perfect for everyone. Plus, with ingredients that you might already have at home, it's an accessible and enjoyable way to reduce waste while getting crafty. So, gather your supplies, and let's dive into making these enchanting suncatchers together!
Why DIY Bioplastic Suncatchers Are Awesome?
DIY Bioplastic Suncatchers are a delightful way to unleash your creativity!
- Quick: You can whip up these beauties in just 30 minutes!
- Eco-Friendly: Use natural ingredients and reduce waste in your crafting.
- Customizable: Tailor each suncatcher with vibrant colors and unique decorations.
- Fun for All: Perfect for kids or a solo crafting day to unwind.
- Brighten Up: The finished pieces capture light beautifully, adding charm to any window.
Get inspired and explore even more creative ideas with our comprehensive guide on eco-friendly crafts.
DIY Bioplastic Suncatcher Ingredients
-
For the Base Mixture
• Water - Forms the essential liquid base for your DIY bioplastic suncatchers.
• Cornstarch - Provides thickness and structure to hold your suncatcher together.
• White Vinegar - Enhances clarity and acts as a preservative, ensuring longevity.
• Unflavored Gelatin - Adds elasticity, helping your suncatchers maintain their shape. -
For the Color and Decoration
• Natural or Food-Safe Coloring - Use vibrant hues like beet juice or turmeric to create eye-catching colors.
• Glitter - For an extra sparkle; opt for eco-glitter for a sustainable touch.
• Flower Petals - Add a lovely organic element; consider using confetti or pressed leaves for variety.
• Tissue Paper - Optional for an added layer of texture and colorful effects.
Enjoy crafting your DIY Bioplastic Suncatchers while being eco-conscious, and let your creativity shine through!
How to Make DIY Bioplastic Suncatchers
-
Mix Ingredients: In a saucepan, combine water, cornstarch, and white vinegar over low heat. Stir continuously until the mixture is smooth and begins to thicken, about 5-7 minutes.
-
Add Gelatin: Gradually mix in the unflavored gelatin, stirring until it is fully dissolved. This will bring elasticity to your suncatchers, ensuring they hold their shape.
-
Color Your Mixture: Stir in your chosen natural or food-safe coloring. Adjust the amount to achieve your desired vibrant shade-get creative and experiment with different hues!
-
Incorporate Add-Ins: If you wish, add in glitter, flower petals, or pieces of tissue paper to personalize your suncatchers with charming decorations.
-
Pour into Molds: Evenly distribute the colorful mixture into various molds, smoothing the tops for an even finish. Silicone molds work wonderfully for easy removal!
-
Set and Dry: Allow the suncatchers to cool and dry flat in a cool, dry place. Let them sit for at least several hours, checking to ensure they are firmly set before removing.
-
Finish: Carefully remove the suncatchers from the molds. If you notice any curling, store them flat between layers of wax paper for added protection.
Optional: Add a touch of natural twine for hanging to enhance the rustic appeal!
Exact quantities are listed in the recipe card below.
What to Serve with DIY Bioplastic Suncatchers?
As you embark on this colorful crafting adventure, consider pairing your suncatcher creations with delightful experiences that make the day even sweeter.
-
Fresh Lemonade: A refreshing drink that complements the playful spirit of your crafting session, quenching thirst while keeping you energized.
-
Light Finger Foods: Serve small veggies and dip or fruit skewers for a delightful and easy-to-eat snack as you get crafty. These bites will keep everyone fueled for the creative process!
-
Comfy, Cozy Music: Create a perfect ambiance by playing soft tunes in the background, encouraging a relaxed and enjoyable crafting atmosphere.
-
Family-Friendly Movies: After crafting, enjoy watching a light-hearted film together, allowing your suncatchers to shine bright in the window as the cheerful scene unfolds.
-
Storytime: Gather around and share favorite stories or craft-related books, sparking imagination and creativity while everyone admires the colorful suncatchers.
-
Sweet Treats: Bake or buy some cookies and enjoy them as a fun dessert to celebrate your creative achievement-the perfect reward after your hard work!
Bringing these delightful elements together will make your crafting day with DIY Bioplastic Suncatchers not only productive but wonderfully memorable!
How to Store and Freeze DIY Bioplastic Suncatchers
-
Room Temperature: Once your suncatchers are fully dried and set, store them in a cool, dry place to maintain their clarity and shape.
-
Fridge: If you need to store them for short periods, wrapping each suncatcher in wax paper and placing them in the fridge can help prevent warping or curling, keeping them safe for up to one week.
-
Freezer: For longer storage, you can freeze your DIY bioplastic suncatchers. Wrap them individually in wax paper and then place them in an airtight container, where they can last about 3 months.
-
Reheating: If you notice any curling upon removal from the freezer, gently warm them at room temperature for a short period before hanging. This should help them return to their original shape.
Make Ahead Options
These DIY Bioplastic Suncatchers are perfect for busy home cooks looking to save time on their crafting projects! You can prepare the base mixture (water, cornstarch, white vinegar, and gelatin) up to 24 hours in advance; simply store it in an airtight container in the refrigerator to maintain its quality. Additionally, gather your decorations and pre-measure your natural or food-safe coloring, glitter, and flower petals for a quicker crafting experience. When ready to create, just reheat the mixture gently, incorporate your colors and add-ins, and pour it into molds as instructed. This way, you'll have your charming suncatchers ready to hang with minimal effort!
Expert Tips for DIY Bioplastic Suncatchers
- Choose the Right Mixture: Ensure all ingredients are blended thoroughly to avoid lumps, which can impact the clarity of your suncatchers.
- Use Eco-Glitter: Opt for eco-glitter instead of standard glitter; it adds sparkle while being more sustainable for the environment.
- Mold Selection: Silicone molds are ideal for easy removal of suncatchers. If using plastic molds, consider greasing them lightly for better release.
- Flattening Techniques: If your suncatchers curl while drying, store them flat between wax paper to maintain their shape and durability.
- Creative Colors: Experiment with natural colorings from fruits and vegetables, such as beet juice or turmeric, for stunning, unique shades in your DIY bioplastic suncatchers.
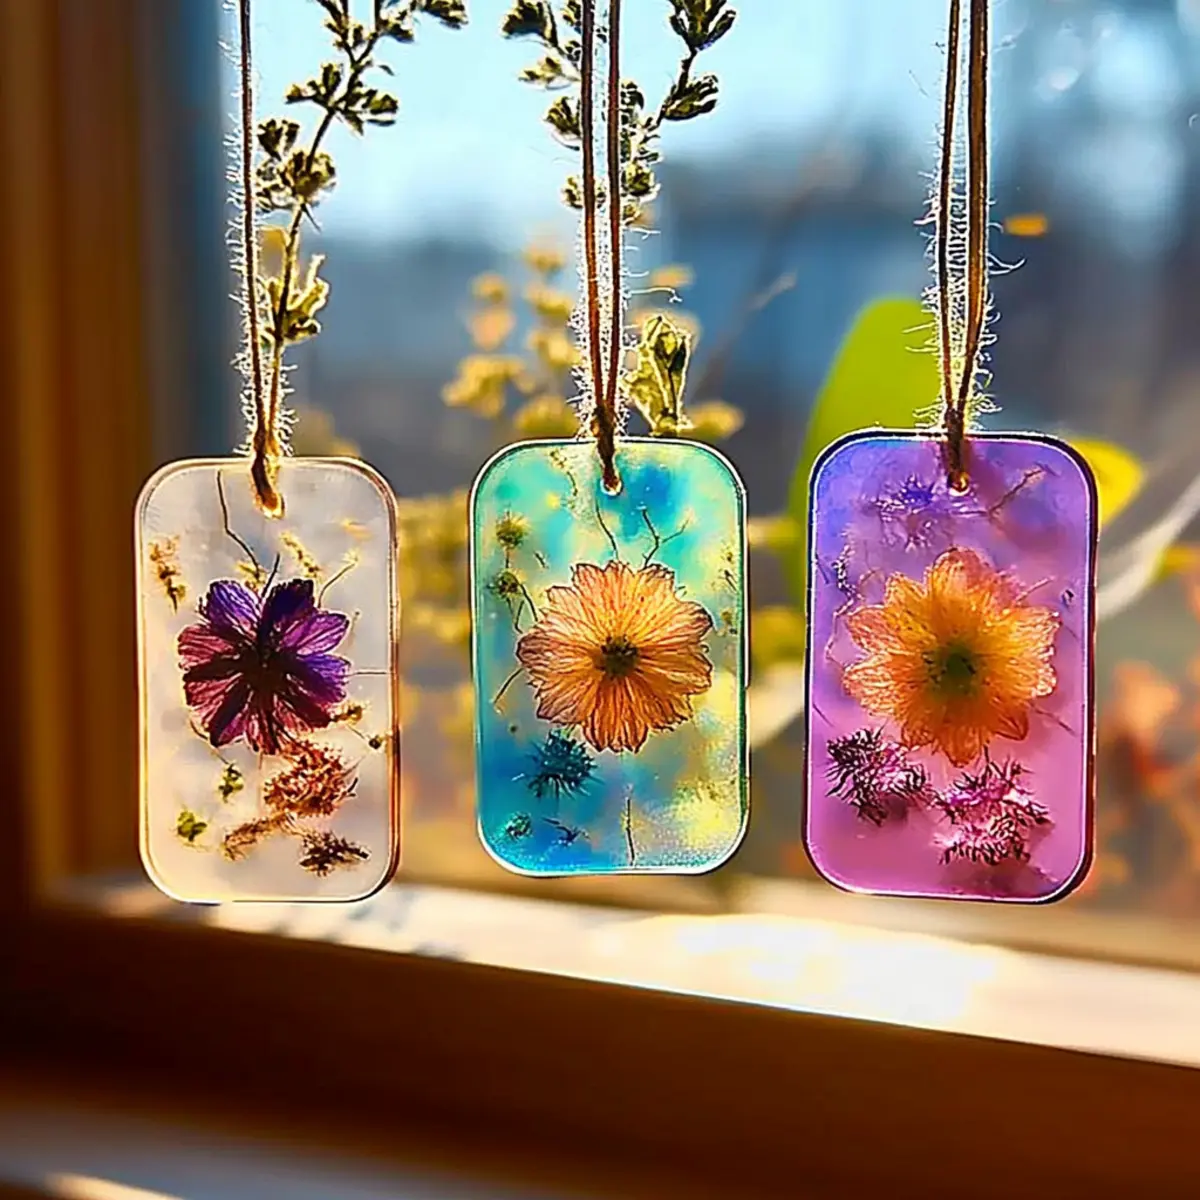
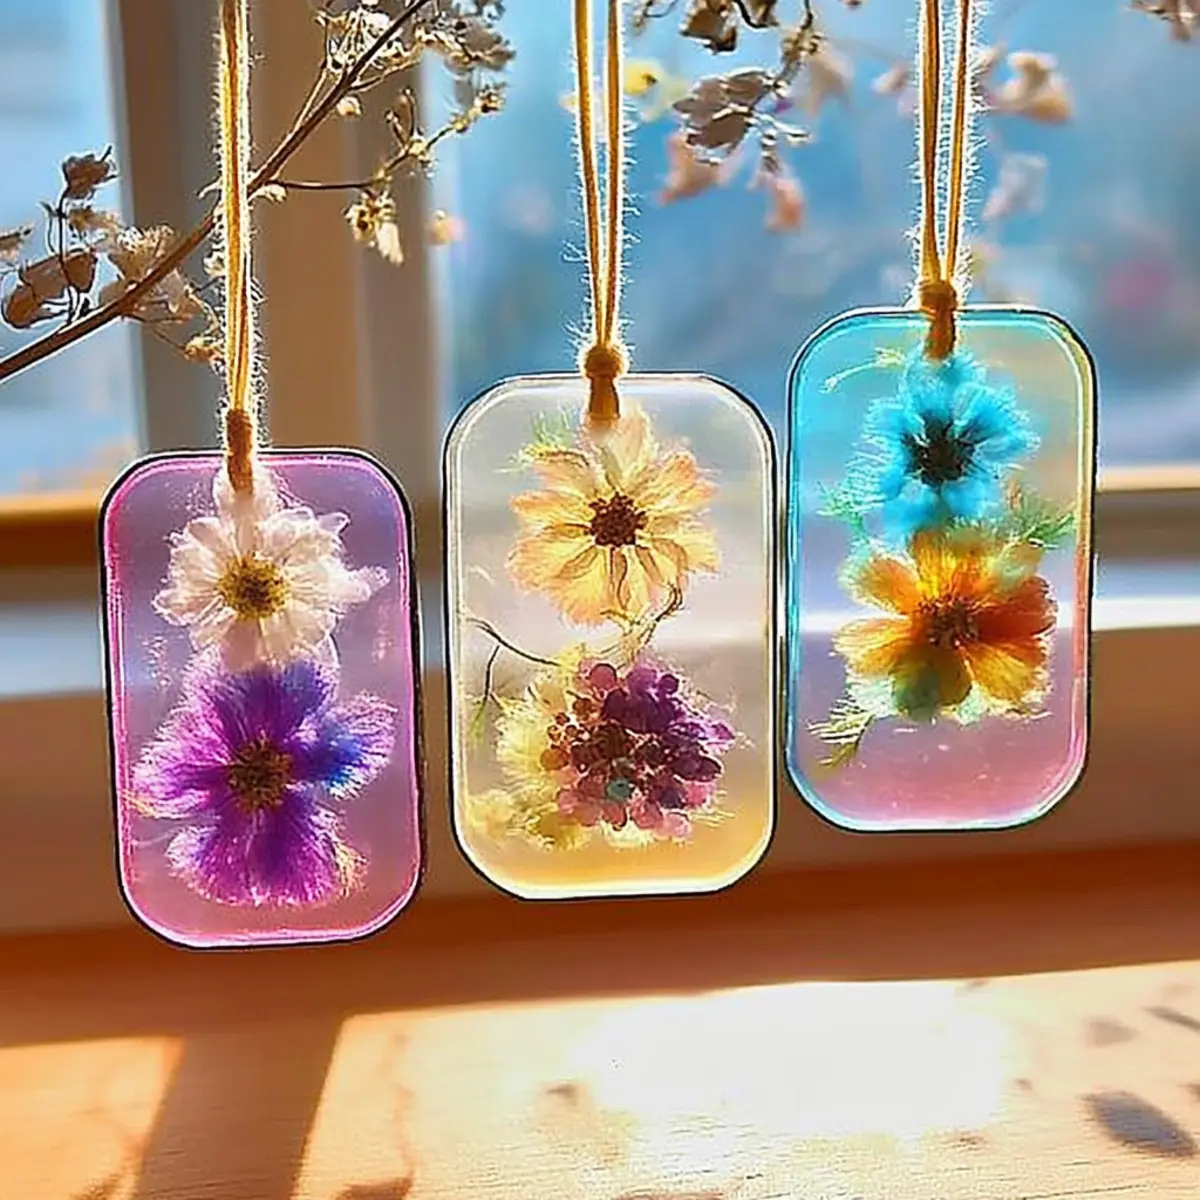
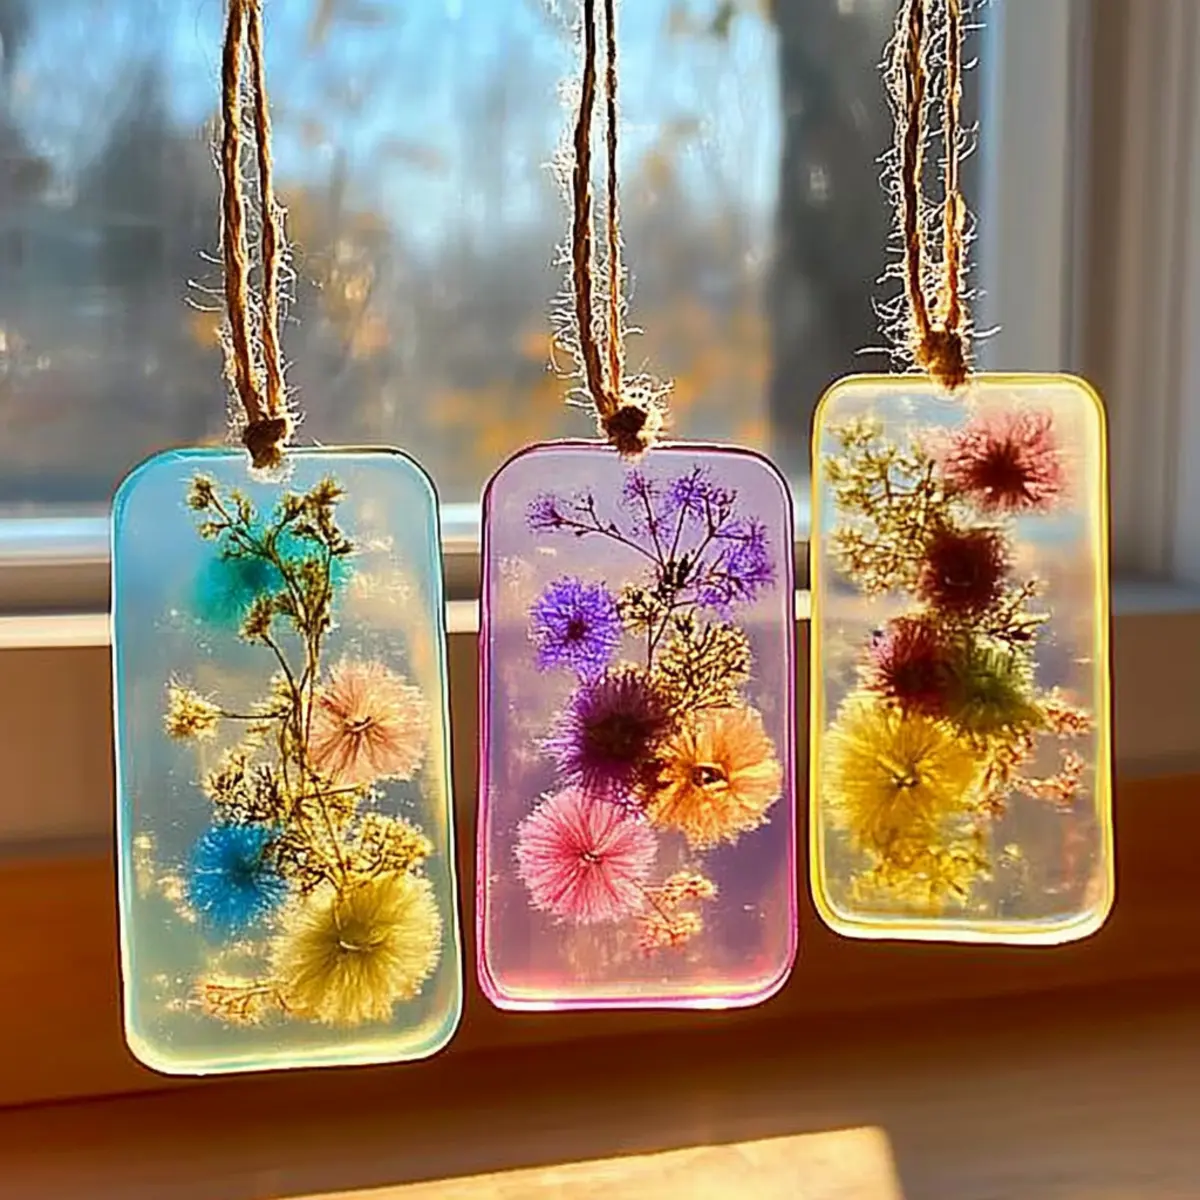
DIY Bioplastic Suncatcher Variations
Feel free to unleash your creativity and make these suncatchers uniquely yours!
- Vegan Option: Replace unflavored gelatin with agar-agar to craft a plant-based version of your suncatchers.
- Natural Dyes: Use juices from fruits and vegetables like beet, spinach, or purple cabbage for vibrant, eco-friendly colors. This addition not only enhances beauty but also allows you to experiment with earthy tones.
- Texture Twist: Add various natural textural elements like dried herbs or seaweed into the mixture for a genuinely one-of-a-kind suncatcher. The finish will be both stunning and tactile!
- Herb Infusion: Mix in dried flower petals or fragrant herbs to impart additional scents and colors, making every suncatcher a sensory delight.
- Layered Creation: Pour different colored mixtures into the mold in layers for a mesmerizing marble effect. This will add depth and an artistic flair to your finished pieces.
- Seasonal Elements: Decorate with seasonal finds, like leaves in autumn or small snowflakes for winter-themed suncatchers, allowing you to celebrate the seasons through your crafting.
- Sparkly Surprise: Swap out standard glitter for biodegradable alternatives, ensuring your creations shine while being kind to the planet. The sparkle will impress and charm!
- Mini Variants: Use smaller molds to make mini suncatchers or coasters, perfect for gifts or playful additions to your decor. Small touches can bring big joy!
DIY Bioplastic Suncatchers Recipe FAQs
How do I choose the right fruit or vegetable for natural colorings?
Absolutely! When selecting fruits or vegetables for natural colorings, you can use vibrant options like beet juice for red, turmeric for yellow, or spirulina for a lovely green hue. Just ensure they are fresh and free from any obvious signs of spoilage, such as dark spots or wilting. You can juice or blend them and then strain to get a smooth puree for your mixture.
How should I store my DIY bioplastic suncatchers?
To keep your beautiful suncatchers in great shape, store them in a cool, dry place once they are completely dry. I often recommend wrapping each one in wax paper to prevent any curling while in storage. This way, they can be safely kept at room temperature for up to 3 to 4 days.
Can I freeze my DIY bioplastic suncatchers?
Yes, you can! To freeze your DIY bioplastic suncatchers for longer-term preservation, wrap each one in wax paper and place them in an airtight container. They can be kept in the freezer for up to 3 months. When you're ready to use them, simply leave them at room temperature for a while, and they should come back to their original shape!
What should I do if my suncatchers warp after drying?
If you notice that your suncatchers have warped after drying, don't fret! The key is to store them flat between two sheets of wax paper, which will help them regain their shape. If they're still a bit curled, try gently warming them at room temperature for about 15 minutes. This should help them smooth out nicely.
Are these suncatchers safe for pets, or do they contain any allergens?
Very! The ingredients used in your DIY bioplastic suncatchers are generally safe; however, if you have pets or allergies to specific elements like gelatin, make sure to opt for a vegan alternative, such as agar-agar. Always keep the suncatchers out of reach of pets, especially if there are decorative elements like glitter that might be tempting to them.
How long does it take for the suncatchers to fully dry?
Typically, your DIY bioplastic suncatchers will take about several hours to fully set and dry. I recommend letting them sit overnight for best results, especially in a dry environment. Check to ensure they are completely firm before removing them from the molds.
DIY Bioplastic Suncatchers: The Best Eco-Friendly Craft Ever
Equipment
- saucepan
- silicone molds
Ingredients
For the Base Mixture
- 1 cup Water Essential liquid base
- 2 tablespoons Cornstarch Provides thickness
- 1 tablespoon White Vinegar Enhances clarity and preserves
- 2 teaspoons Unflavored Gelatin Adds elasticity
For the Color and Decoration
- as needed Natural or Food-Safe Coloring Use vibrant colors
- as needed Glitter Eco-glitter preferred
- as needed Flower Petals Consider using pressed leaves too
- as needed Tissue Paper Optional for texture
Instructions
How to Make DIY Bioplastic Suncatchers
- Combine water, cornstarch, and white vinegar in a saucepan over low heat. Stir continuously until smooth and thickened for about 5-7 minutes.
- Mix in unflavored gelatin, stirring until fully dissolved to bring elasticity.
- Stir in your chosen natural or food-safe coloring to reach your desired shade.
- Add glitter, flower petals, or tissue paper for personal decoration.
- Pour the mixture into molds, smoothing the tops for an even finish.
- Allow suncatchers to cool and dry flat for several hours until firmly set.
- Carefully remove the suncatchers from molds and store flat between sheets of wax paper if curling occurs.


Leave a Reply