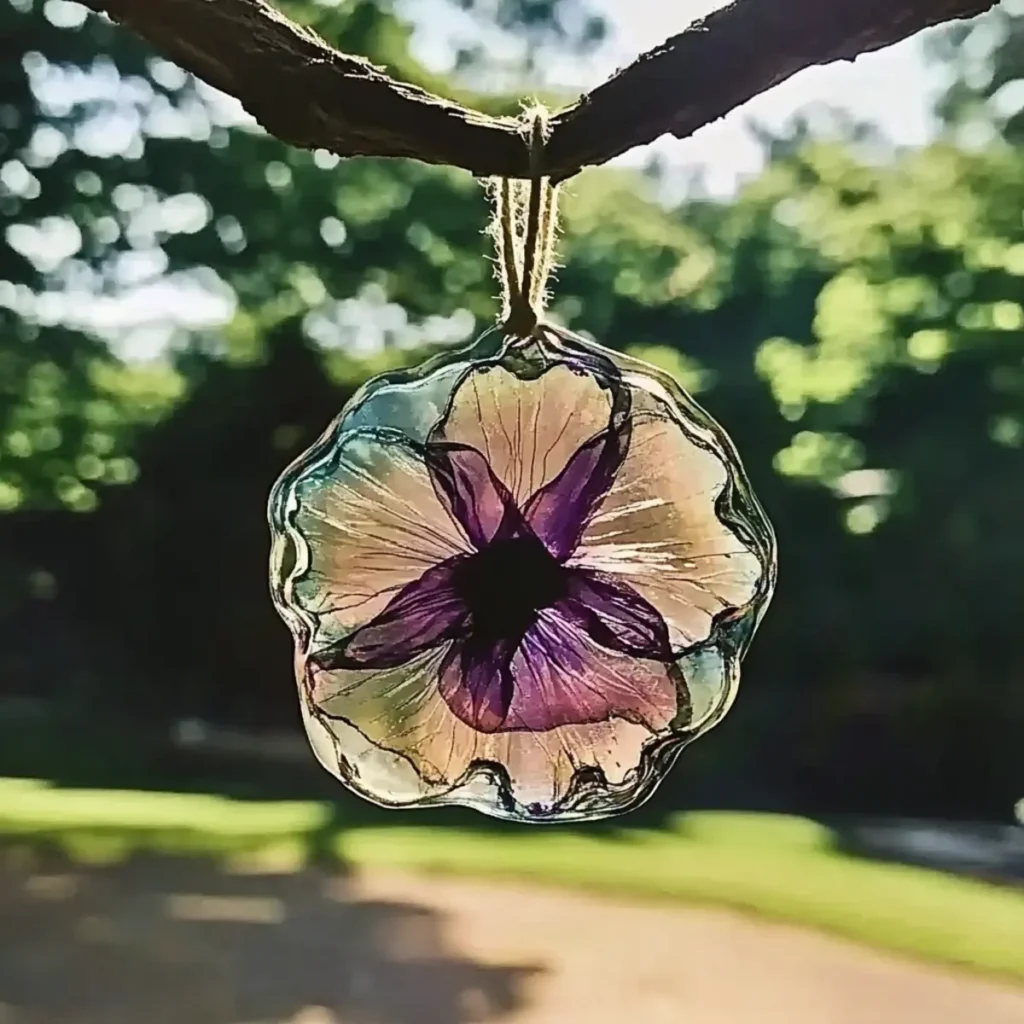
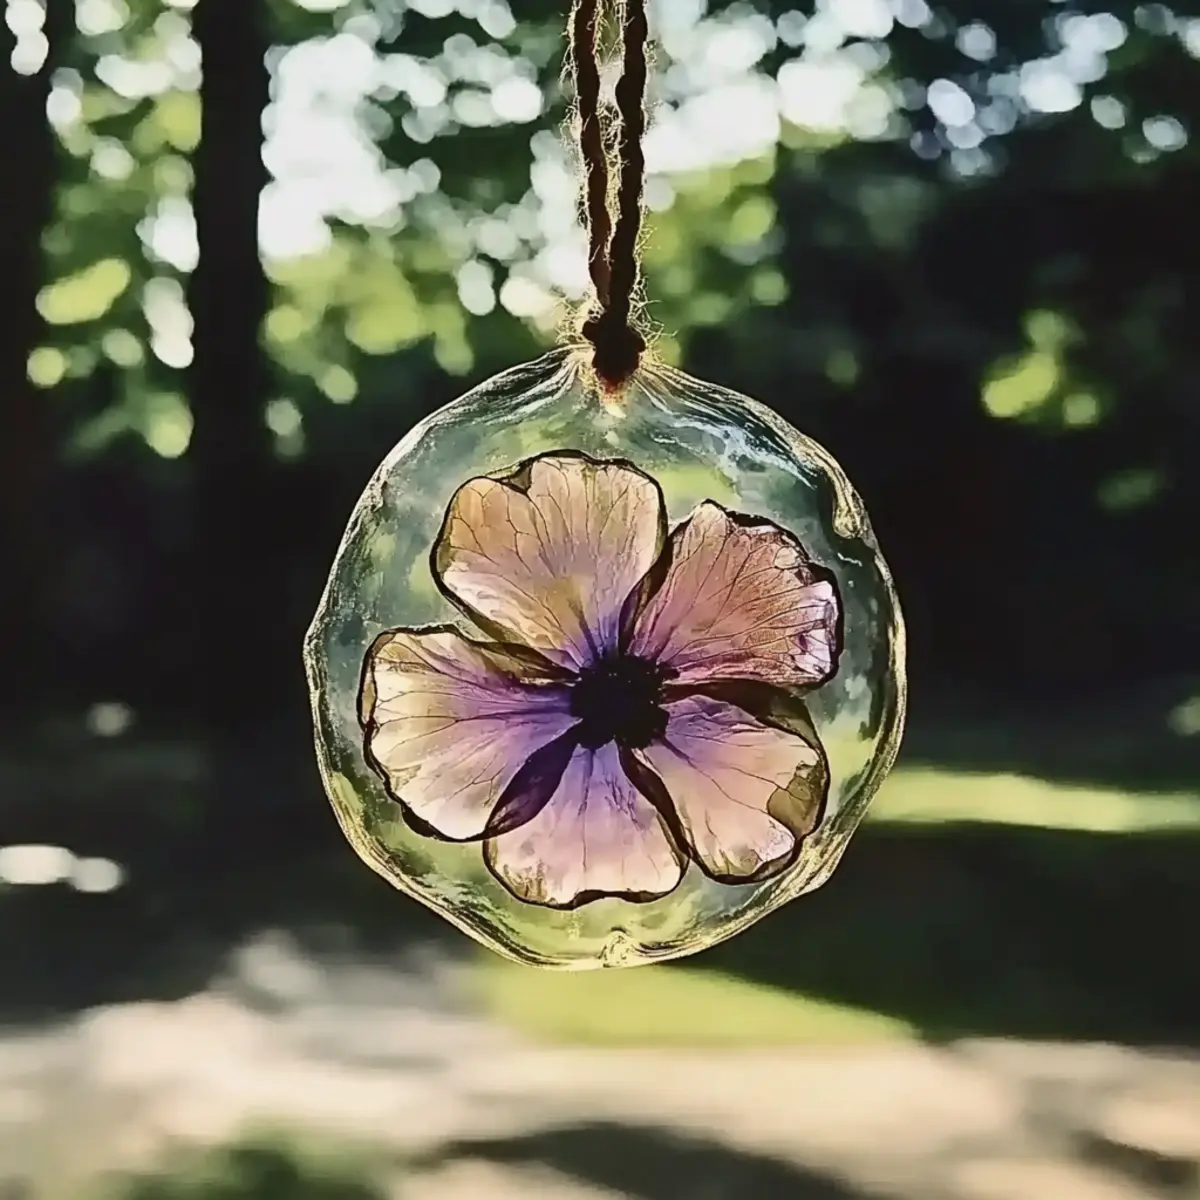
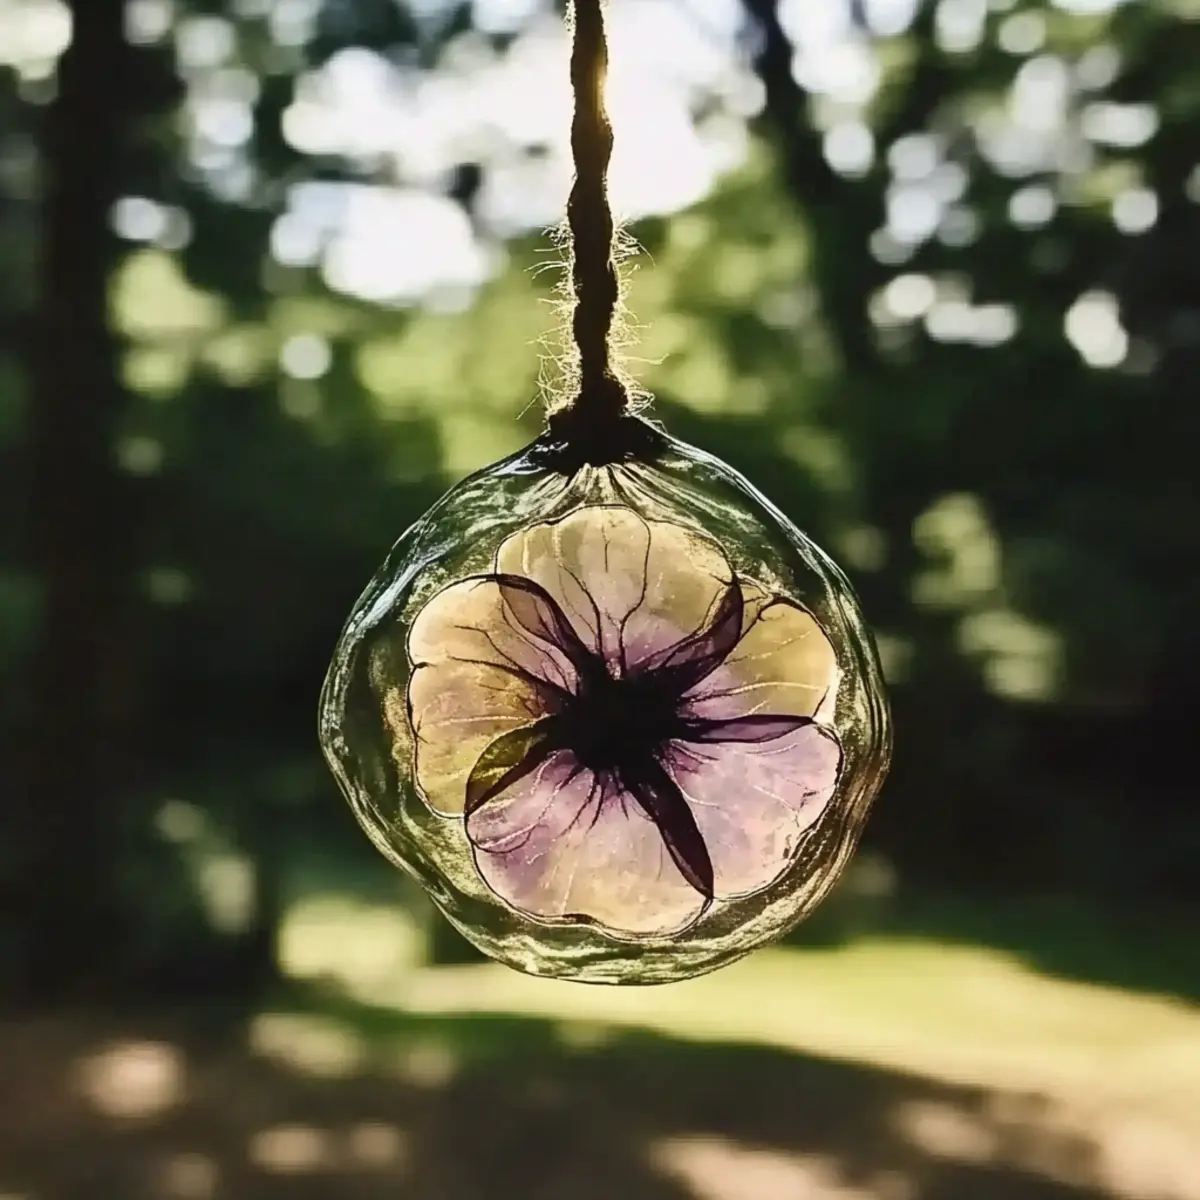
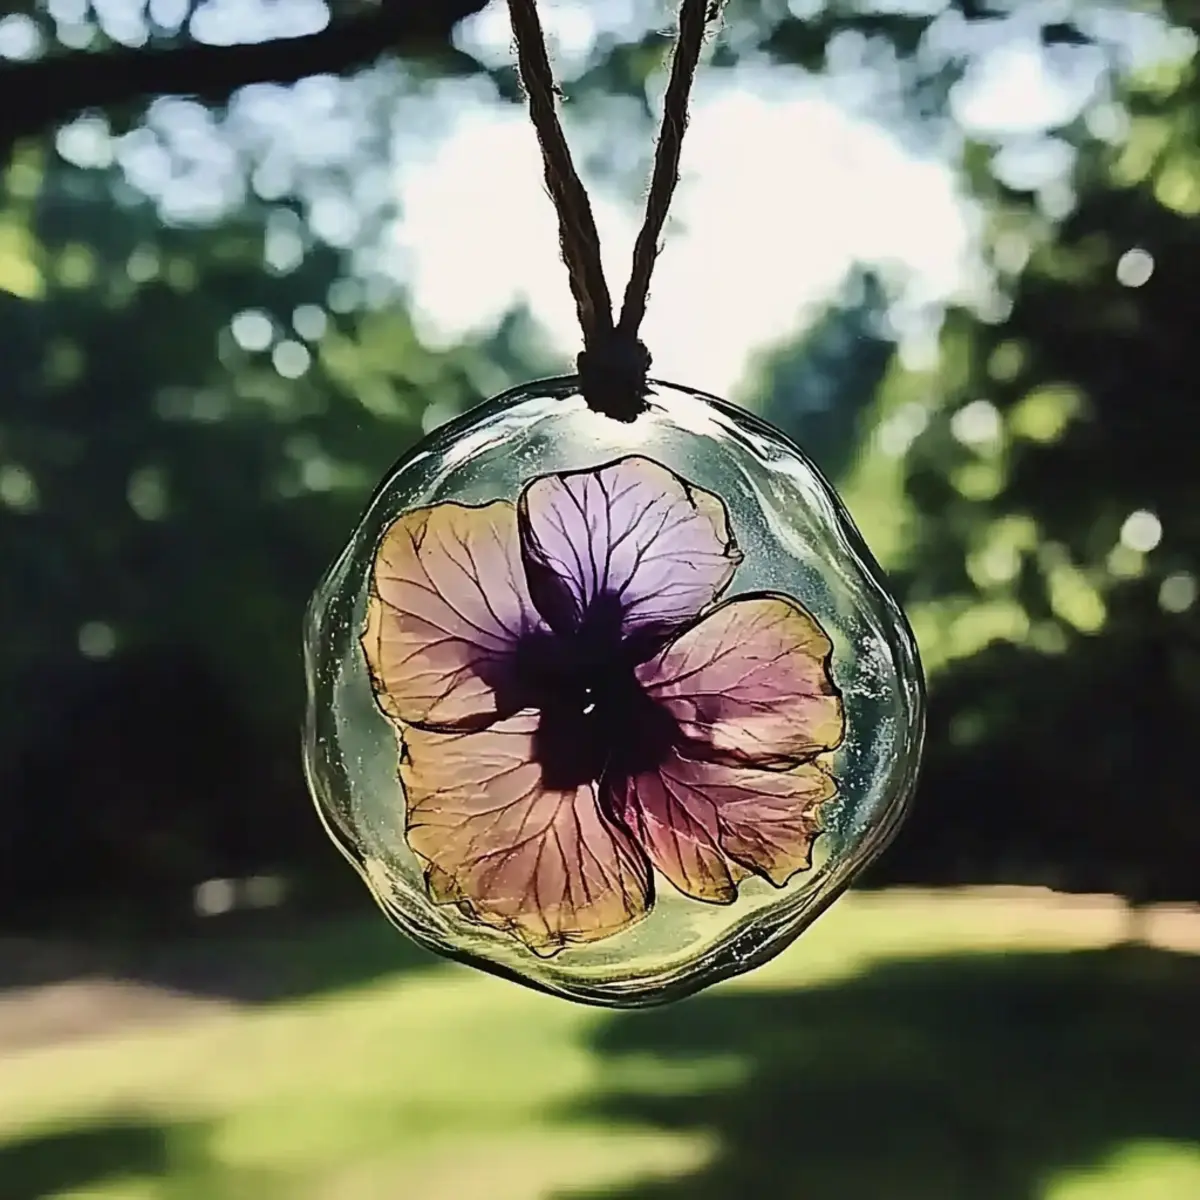
As spring dances into our lives, there's an undeniable urge to bring a bit of nature indoors. Imagine transforming the delicate petals and vibrant leaves you find on a stroll through the park into stunning works of art that bask in the sunlight. That's exactly what these Nature-Inspired Gelatin Suncatchers do! What I love most about this eco-friendly DIY project is how simple yet captivating it is, making it perfect for both kids and adults.
With just a few natural materials and some unflavored gelatin, you can create eye-catching decorations that shimmer beautifully against your windows. Not only do they add a breathtaking pop of color, they also provide a fantastic way to spend time with loved ones while celebrating the beauty of the great outdoors. So, roll up your sleeves and join me in this delightful crafting adventure that will brighten up your home and your heart!
Why DIY Bioplastic Suncatchers Are Amazing?
Versatile and Fun: These DIY Bioplastic Suncatchers can be customized with various nature finds, making each piece unique to your style.
Eco-Friendly Craft: By using natural materials, this craft supports eco-awareness and allows you to celebrate the environment.
Simple Process: With just a few easy steps, you'll create vibrant decorations that shine beautifully in sunlight, perfect for all ages to enjoy.
Quality Time: It's a fantastic way to bond with friends and family while sparking creativity and exploration during your outdoor adventures.
Ultimate Decor: Hang them in your window, and watch how they illuminate your space with colors and nature's beauty, making dull areas lively!
So, gather your supplies and let's get crafting on this delightful project, perfect for brightening up your home while having fun!
DIY Bioplastic Suncatcher Ingredients
• Gather everything you need to unleash your creativity with these charming decorations!
For the Base
- Gelatin Powder (unflavored) - Provides the foundational structure for your suncatchers; substitute with agar-agar for a vegan option.
- Boiling Water - Activates the gelatin for molding; no substitutions here!
For the Nature Elements
- Loose Parts from Nature (petals, leaves, herbs, tiny pinecones, twigs) - These enhance your suncatchers' beauty; collect safe, non-toxic items during a nature walk.
- Cookie Cutters or Silicone Molds - Shape your creations into fun designs; pick shapes that are suitable for everyone, young and old.
For the Decorative Touches
- Food Coloring or Natural Dyes - Optional, but can add stunning colors to your gelatin; remember to use sparingly for the right shade!
- Essential Oils (Lavender or lemon) - Bring a refreshing aroma to your project; just a few drops are all you need.
- Glitter or Confetti - Optional for a touch of sparkle; ensure it's biodegradable to keep the Earth happy!
For the Finishing Touch
- String or Yarn - Necessary for hanging your fabulous suncatchers; any strong cord will do the trick!
- Plastic Lids (Yogurt container lids) - Perfect as molds for your suncatchers; ensure they're clean and dry for best results.
With this selection of ingredients, your DIY Bioplastic Suncatchers are just a few steps away from bringing a sparkle of nature into your home!
How to Make DIY Bioplastic Suncatchers
-
Prepare Gelatin Mixture: Begin by dissolving the unflavored gelatin powder in boiling water in a mixing bowl. Mix well until completely dissolved, ensuring a smooth blend for your suncatchers.
-
Add Color and Scent (optional): If you want to brighten your suncatchers, mix in food coloring or natural dyes. A few drops of essential oils can also be added for a delightful aroma-stir gently to incorporate.
-
Arrange Natural Materials: Take your gathered petals, leaves, or twigs and place them into the clean plastic lids. Distribute the materials evenly for a balanced look, letting your creativity shine!
-
Pour Gelatin Mixture: Carefully pour the gelatin mixture over the arranged natural elements in the lids, ensuring everything is covered. This will create a beautiful infusion of nature and art!
-
Chill to Set: Place your lids in the refrigerator and allow them to chill for several hours until the gelatin solidifies completely. This is the perfect time for a mini art break!
-
Dry and Hang: Once set, gently remove the suncatchers from the molds and place them on a towel or plate to dry. Afterward, attach string or yarn for easy hanging in your favorite spots.
-
Final Notes: For quicker drying, consider using thinner layers of gelatin. Be sure to store them flat while they dry for the best results!
Optional: Add some biodegradable glitter before pouring for a magical sparkle effect!
Exact quantities are listed in the recipe card below.
DIY Bioplastic Suncatcher Variations
Feel free to tap into your creativity and customize these suncatchers to make them uniquely yours!
-
Seasonal Splashes: Incorporate seasonal flowers and leaves, like vibrant autumn hues or spring blossoms, for dynamic color shifts that reflect nature's cycles.
Imagine how each season brings its own palette; it's a joyful way to celebrate the beauty around us! -
Flavorful Aromas: Use flavored gelatin for a delightful twist-just remember it's for scent, not edible! Citrus or berry flavors can evoke fresh outdoor moments.
With just a few drops, you can create a captivating sensory experience to savor while crafting. -
Luminous Touch: Add biodegradable glitter to the gelatin mix before pouring-this imparts a magical sparkle that dances when the sunlight hits!
It's like capturing the twinkle of a star to brighten your home. -
Textured Layers: Create multiple thin layers of different colors and natural elements in your suncatchers, introducing beautiful patterns and depth.
Layering is like telling a story-it adds intrigue and excitement to each suncatcher! -
Shape Variety: Experiment with unconventional cookie cutter shapes, like stars or hearts, allowing for personalized flair in your decorations.
Channel your inner artist and make each piece a mini masterpiece that's cherished. -
Eco-Friendly Dyes: Instead of commercial food coloring, use natural dyes from fruits and vegetables like beet juice or turmeric, celebrating sustainability.
It's a wonderful opportunity to connect more deeply with nature's palette! -
Themed Suncatchers: Create suncatchers based on holidays or events-use red and green for Christmas or bright pastels for Easter.
These personalized creations can set a cheerful mood for any festivity! -
Herbal Infusions: Add dried herbs or flower petals to the gelatin for a lovely scent as well as a beautiful appearance.
Imagine hanging lavender-infused suncatchers where its fragrance wafts through the air-pure bliss!
What to Serve with DIY Bioplastic Suncatchers?
Creating these vibrant, eco-friendly decorations is just the beginning of a delightful crafting session that celebrates nature and creativity.
- Refreshing Lemonade: The zesty brightness of lemonade complements the colorful suncatchers, refreshing your spirit as you craft.
- Fruit Kabobs: Eye-catching and healthy, skewers of assorted fruits add a delightful pop of color and flavor, much like your suncatchers!
- Herbal Iced Tea: Infuse your crafting environment with calming aromas from herbal iced tea, enhancing the tranquility of your creative space.
- Veggie Platter: A vibrant array of veggies with hummus makes for a healthy snack, keeping energy levels up while you create.
- Nature Walk Basket: Prepare a picnic basket with finger foods to enjoy after your crafting session-this could inspire further nature discoveries!
- Sparkling Water: Pair your crafting with sparkling water infused with mint and citrus for a sophisticated and refreshing drink option.
- Cheese and Crackers: This savory snack offers a delightful contrast to the sweet fruits and adds a touch of elegance to your crafting atmosphere.
- Mini Cupcakes: Decorate some mini cupcakes as a fun activity to accompany your suncatchers, inviting creativity both in crafting and baking.
- Fruit Smoothies: Blend colorful fruits into delicious smoothies, echoing the vibrant colors of your creations and adding a nutritious boost!
- Nature-Themed Cookies: Bake some cookies shaped like leaves and flowers for a sweet treat that ties beautifully into your crafting experience.
Enjoy these delicious options as you immerse yourself in the joy of making DIY Bioplastic Suncatchers!
Make Ahead Options
These DIY Bioplastic Suncatchers are perfect for busy home cooks looking to bring a touch of nature into their decor without the last-minute rush! You can prepare the gelatin mixture and arrange your natural materials up to 24 hours in advance by following the initial steps and storing everything in the refrigerator. This not only saves time but also allows the suncatchers to set more efficiently. Just remember to keep them flat while they chill to maintain their quality. When you're ready to finish, simply pour the gelatin over the prepared elements, chill until solid, and hang your beautiful creations for a vibrant display!
Expert Tips for DIY Bioplastic Suncatchers
-
Complete Dissolution: Ensure the unflavored gelatin is fully dissolved in boiling water to avoid lumps, which can ruin the smooth finish of your suncatchers.
-
Protect Your Space: Cover your work surface with newspaper or a plastic tablecloth; gelatin can be sticky, and this will make cleanup easier.
-
Non-Toxic Materials: Always choose only safe, non-toxic natural items for your suncatchers, especially if kids are involved, ensuring everyone's safety during your craft.
-
Cool Completely: Let the gelatin chill for at least several hours in the refrigerator to ensure it sets properly. Patience will reward you with beautiful, sturdy creations!
-
Experiment and Enjoy: Don't hesitate to try different nature finds or colors based on seasonal themes. The versatility of DIY Bioplastic Suncatchers allows for endless creative expressions!
-
Biodegradable Glitter: If you're using glitter, opt for biodegradable options to keep your craft eco-friendly and in harmony with nature.
How to Store and Freeze DIY Bioplastic Suncatchers
Flat Storage: Keep your suncatchers flat in a cool, dry place to avoid distortion. They can last up to 1-2 weeks when stored indoors away from direct sunlight.
Composting Option: When you're ready to let go, consider composting your suncatchers, as they are made from eco-friendly materials, aligning with your commitment to sustainability.
Refrigeration Tip: If you want to extend their life slightly, place them in the fridge for temporary storage, but remember this is best done for short periods.
Display Carefully: Handle your suncatchers gently as they are delicate; ensure they are hung securely to enjoy their beauty without risk of damage.
DIY Bioplastic Suncatchers Recipe FAQs
What type of gelatin should I use for my suncatchers?
Absolutely! Unflavored gelatin powder is your go-to for these DIY Bioplastic Suncatchers. If you're looking for a vegan alternative, I recommend using agar-agar, which works similarly but is derived from seaweed. Just remember to follow the package instructions for proper usage since agar can behave differently than gelatin in terms of setting and temperature!
How should I store my completed suncatchers?
Very good question! Store your suncatchers flat in a cool, dry place, away from direct sunlight. They can last about 1-2 weeks this way, maintaining their charm without warping. Ensure they're laid out on a towel or paper plate to prevent sticking to surfaces. For slightly extended life, you can refrigerate them temporarily, but only for short-term storage as refrigeration can lead to moisture buildup.
Can I freeze my suncatchers for longer storage?
Yes, but with a note of caution! If you want to freeze your DIY Bioplastic Suncatchers, wrap them carefully in plastic wrap to prevent freezer burn, and place them in an airtight container. They should hold up for up to 3 months. However, be aware that freezing might change their texture upon thawing, so it's best for short-term decorative emergency storage rather than long-term.
What should I do if my gelatin mixture has lumps?
It's easy to fix! If your gelatin mixture is lumpy, simply return it to the heat gently while stirring continuously until the lumps dissolve. It's essential to ensure the gelatin is completely melted before using it, as lumps can affect the final clarity and beauty of your suncatchers. If you've already poured it and noticed lumps, unfortunately, those suncatchers may not turn out as desired, so it's better to take time with this step.
Are these suncatchers safe for kids to make?
Definitely! These DIY Bioplastic Suncatchers are made from non-toxic ingredients and often include safe, natural materials that children can use. Just be sure to supervise younger kids, especially around boiling water and any sharp objects like scissors if they help with cutting or arranging nature elements. It's a fantastic activity for sparking creativity and connecting with nature, all while ensuring safety!
Can I use scented oils, and how much should I add?
Absolutely! A few drops of essential oils like lavender or lemon not only add a lovely fragrance to your suncatchers but also create a pleasant crafting atmosphere. Just remember to use them sparingly-around 3-5 drops will suffice for a nice aroma without overpowering the natural scents of the materials you'll be using. Enjoy your fragrant crafting experience!

DIY Bioplastic Suncatchers: Vibrant Nature Art That Shines!
Equipment
- mixing bowl
- Refrigerator
- Plastic lids
- Spoon
Ingredients
For the Base
- 2 tablespoons Gelatin Powder (unflavored) Substitute with agar-agar for a vegan option.
- 1 cup Boiling Water No substitutions.
For the Nature Elements
- 1 cup Loose Parts from Nature (petals, leaves, herbs, tiny pinecones, twigs) Collect safe, non-toxic items.
- 1 set Cookie Cutters or Silicone Molds Suitable shapes for all ages.
For the Decorative Touches
- a few drops Food Coloring or Natural Dyes Use sparingly for the right shade.
- a few drops Essential Oils (Lavender or lemon) Adds aroma.
- optional Glitter or Confetti Ensure it's biodegradable.
For the Finishing Touch
- 1 length String or Yarn For hanging.
- 2 lids Plastic Lids (Yogurt container lids) Ensure they're clean and dry.
Instructions
How to Make DIY Bioplastic Suncatchers
- Prepare Gelatin Mixture: Begin by dissolving the unflavored gelatin powder in boiling water in a mixing bowl. Mix well until completely dissolved.
- Add Color and Scent (optional): If desired, mix in food coloring or natural dyes and a few drops of essential oils.
- Arrange Natural Materials: Place your gathered petals, leaves, or twigs into the plastic lids, distributing evenly.
- Pour Gelatin Mixture: Carefully pour the gelatin mixture over the arranged natural elements in the lids.
- Chill to Set: Place your lids in the refrigerator to chill for several hours until solidified.
- Dry and Hang: Gently remove the suncatchers from the molds and attach string for easy hanging.
- Final Notes: Use thinner layers of gelatin for quicker drying, and store flat while drying.


Leave a Reply