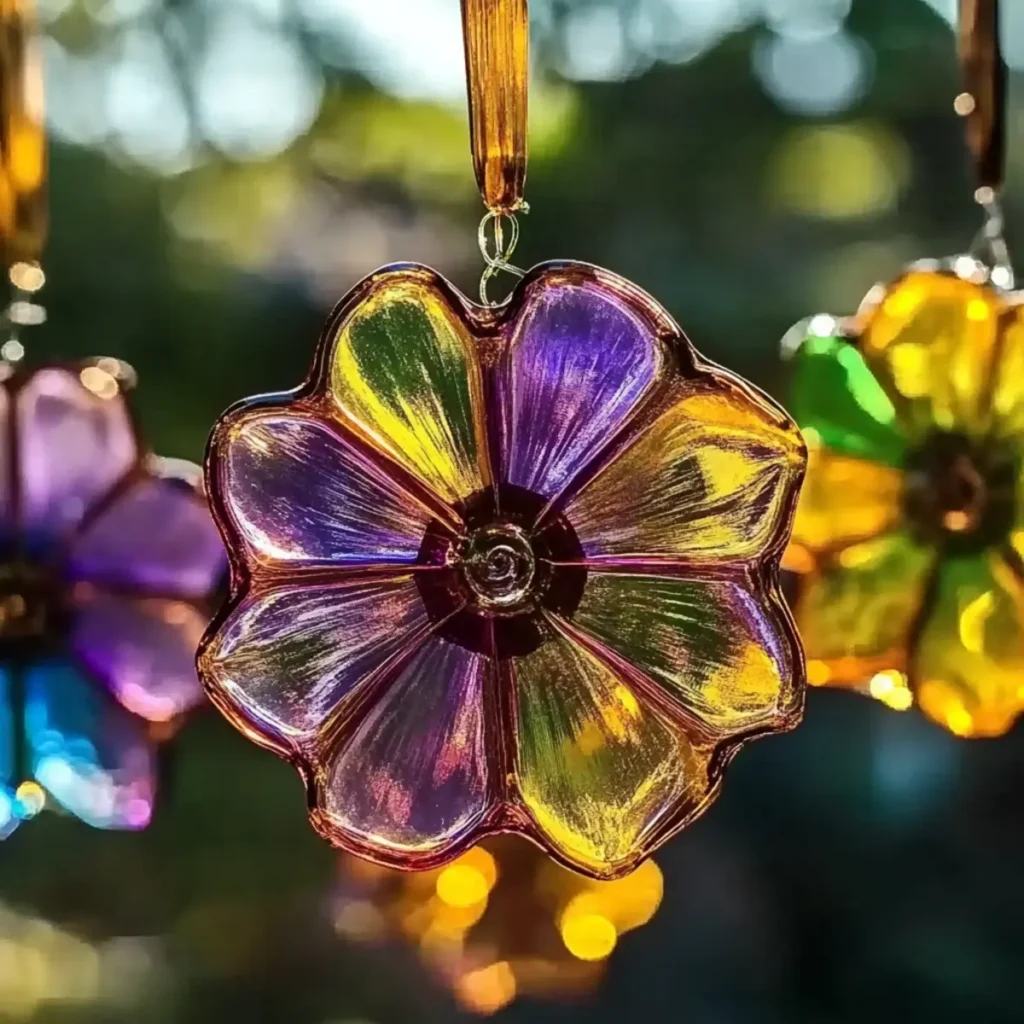
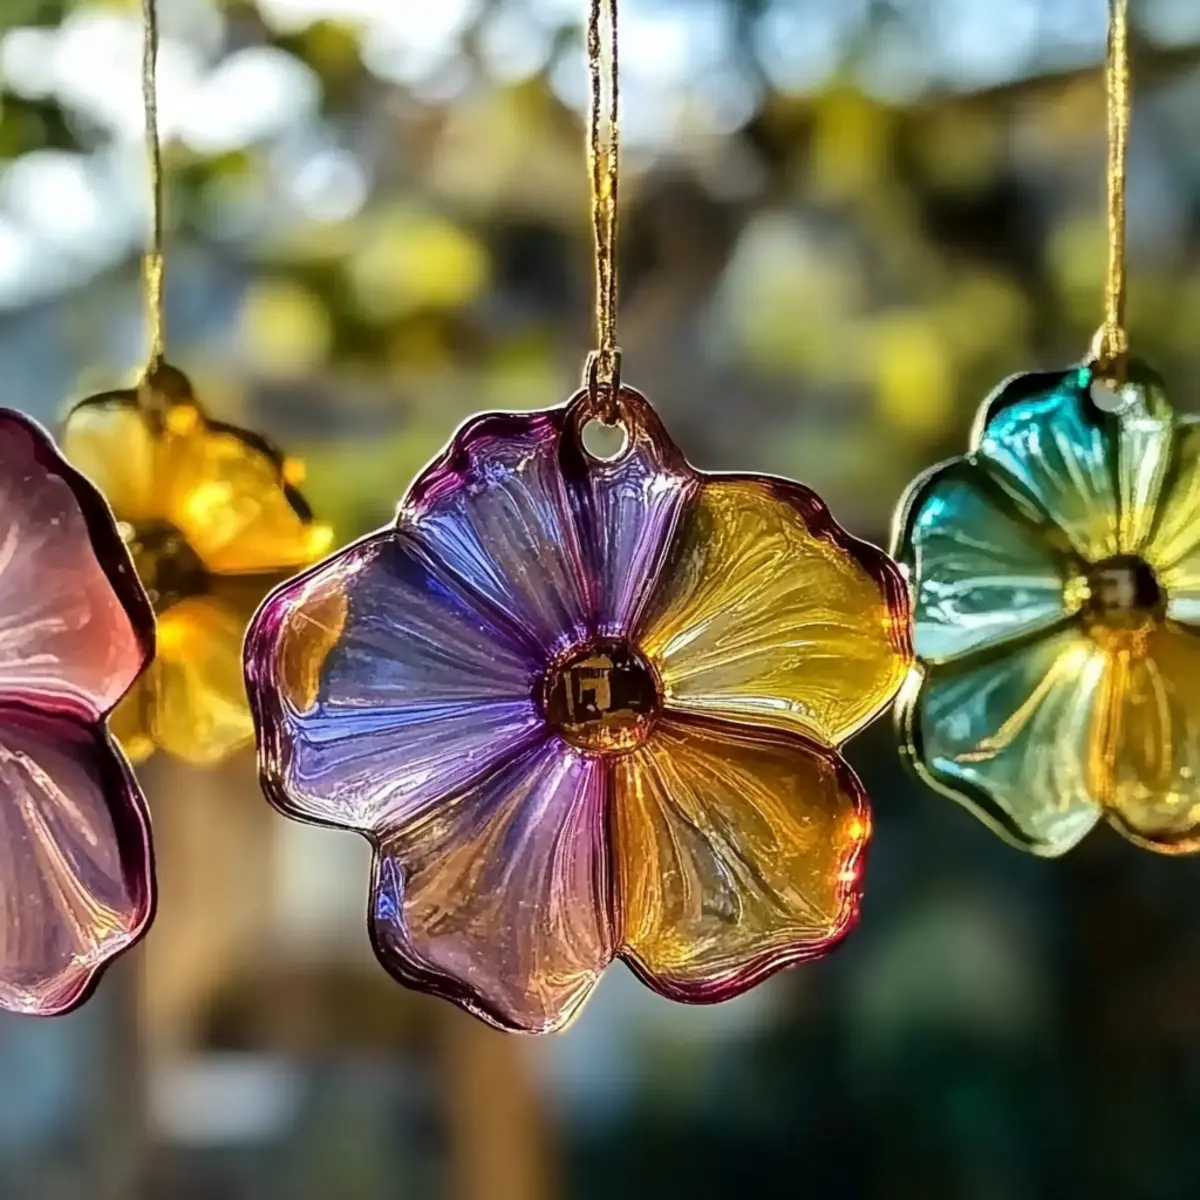
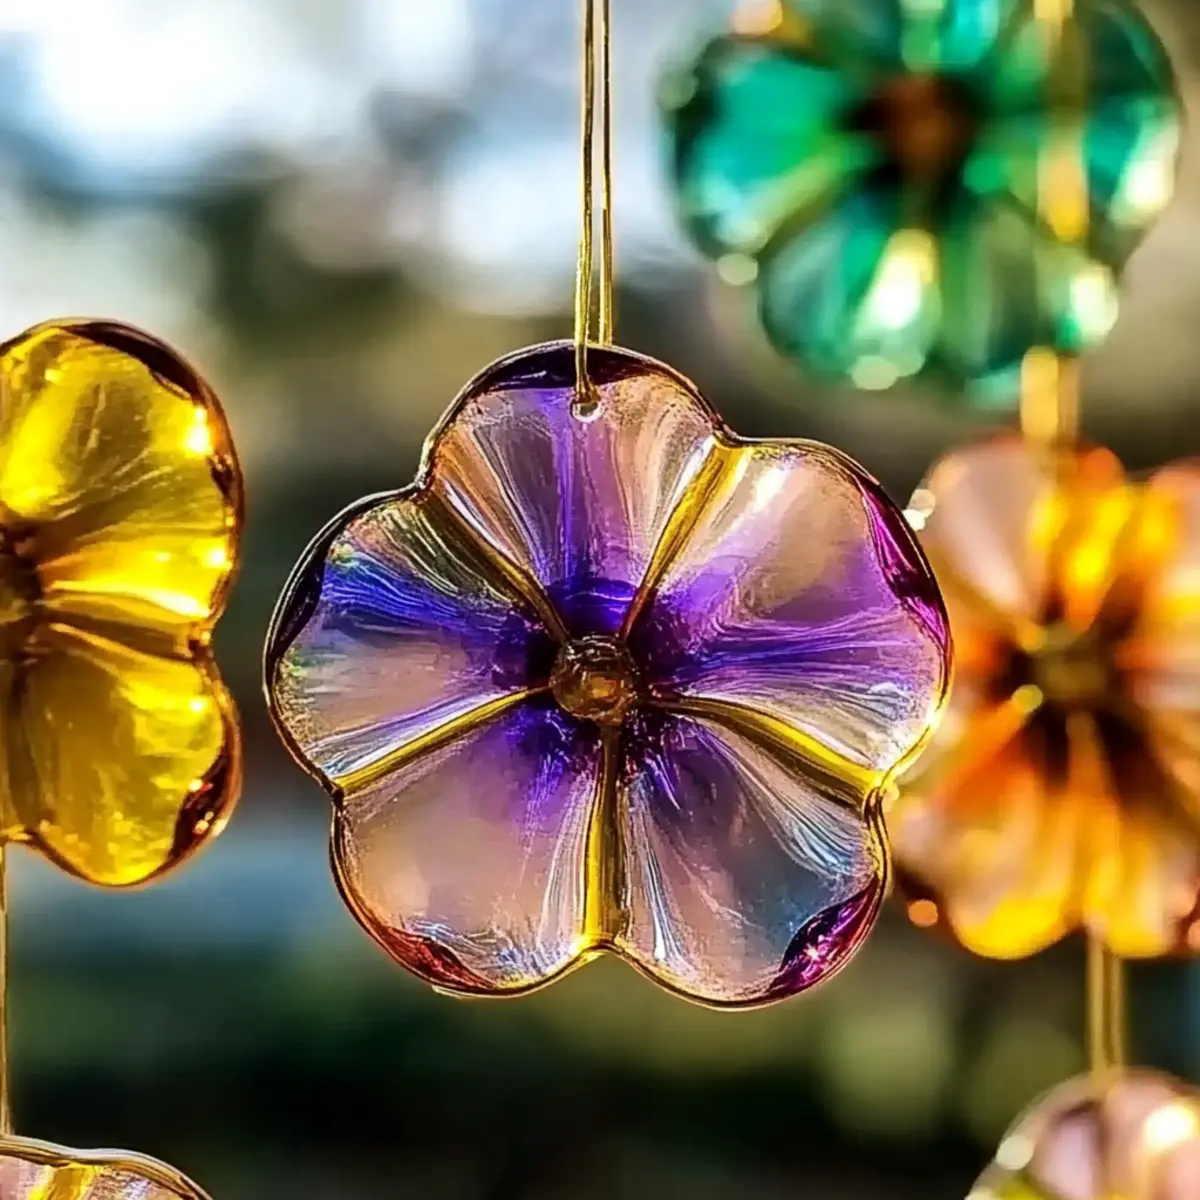
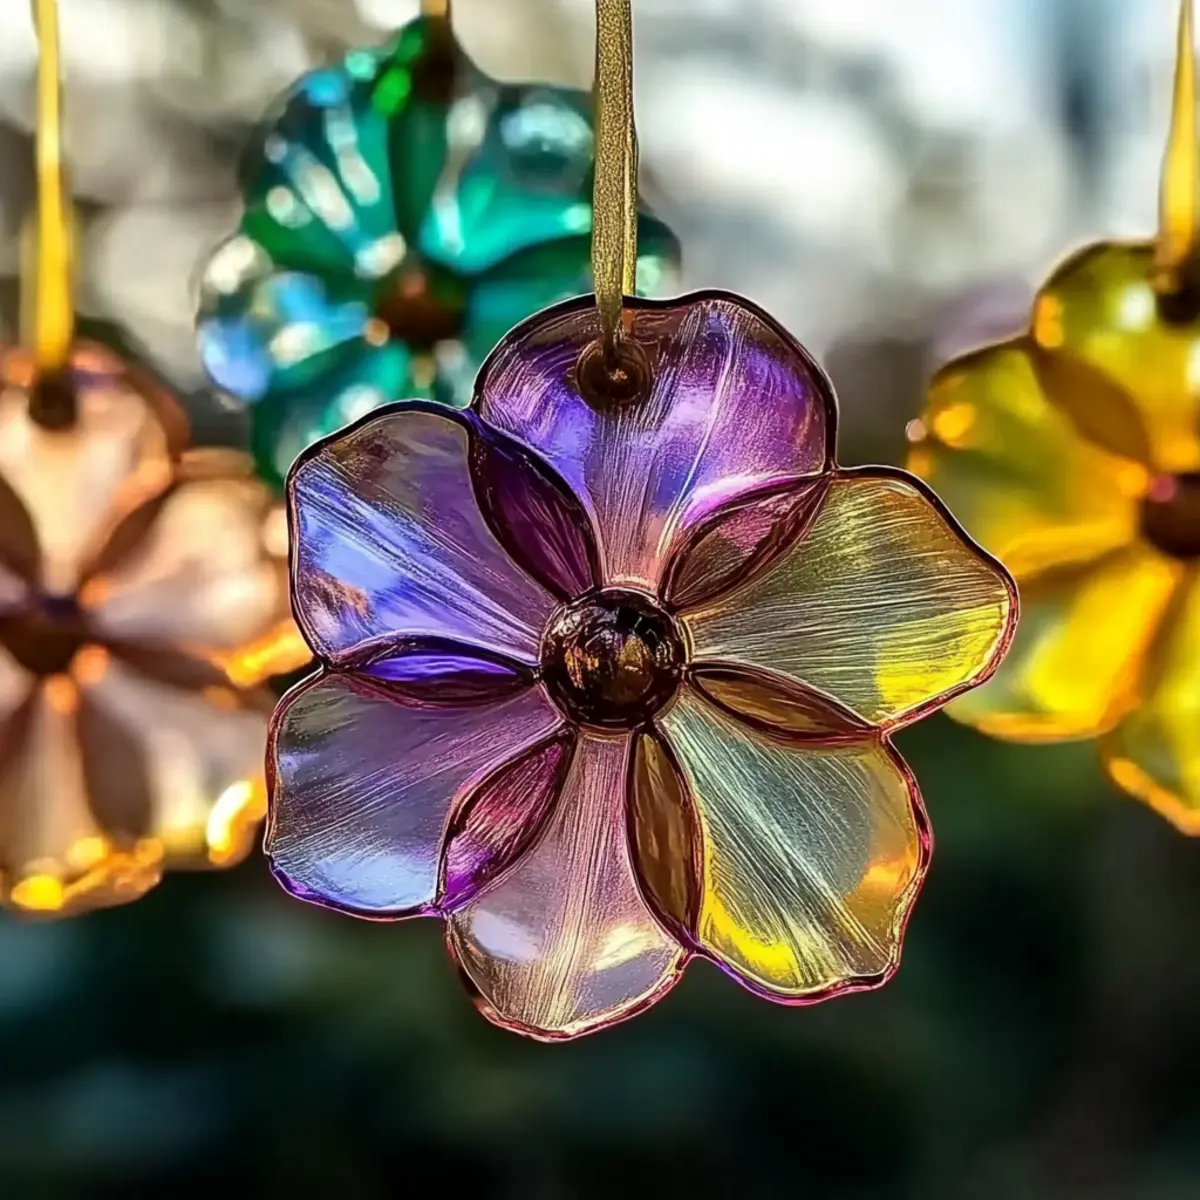
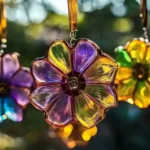
As I was rummaging through my kitchen cabinets last weekend, I stumbled upon a bag of cornstarch that had been collecting dust. Inspired by a burst of creativity (and a touch of spring fever), I decided to turn that humble ingredient into something enchanting. The result? DIY Eco-Friendly Cornstarch Suncatchers! These vibrant, translucent crafts are not just a delightful project for a rainy afternoon; they also serve as beautiful, eco-friendly decorations to brighten up your home.
In just 25 minutes, you can let your inner artist shine and create colorful suncatchers that let the sunlight dance through your windows, casting a rainbow of hues around your living space. Whether you're looking to entertain the kids or add a personal touch to your home decor, join me on this quick and satisfying journey into the colorful world of eco-friendly crafting!
Why DIY Bioplastic Suncatchers Are Amazing?
Brighten your space: These DIY bioplastic suncatchers create vibrant colors, transforming any window into a radiant display.
Quick and easy: With just a few simple ingredients and 25 minutes of your time, you can create these stunning decorations.
Eco-friendly: Made from cornstarch, they are a guilt-free way to show off your crafting skills while being kind to the environment.
Perfect for all ages: This project is great for kids and adults alike, providing a fun activity that sparks creativity.
Endless possibilities: Experiment with shapes, colors, and glitter to make each suncatcher unique, allowing everyone to personalize their creations.
Want more engaging projects? Check out more DIY ideas that will inspire your next crafting adventure!
DIY Suncatcher Ingredients
• Gather your supplies and let's get crafting!
For the Mixture
- Cornstarch - Provides structure and a translucent quality. Substitution: None recommended for best texture.
- Water - Essential for creating a mixture that will solidify into the suncatchers.
- Glycerin (optional) - Makes the suncatchers more flexible. Can replace with additional water if unavailable.
- Vinegar - Adds a slight tang and stabilizes the mixture. Use to taste.
For Color and Texture
- Food Coloring (optional) - Used to color the suncatchers; can be any color of your choice.
For Preparation and Crafting
- Wax paper or parchment paper - Necessary for drying and preventing sticking.
- Saucepan - For cooking the mixture.
- Flat surface for drying - Such as a baking sheet, where the suncatchers will be laid out to dry.
- Scissors - For cutting shapes once the mixture sets.
- String, yarn, or ribbon - For hanging the finished suncatchers.
- Craft knife or hole punch (optional) - For adding a hanging hole to the suncatchers.
Get ready to create beautiful DIY suncatchers that will add a splash of color to your home!
How to Make DIY Eco-Friendly Suncatchers
-
Combine ingredients: In a saucepan, mix together cornstarch, water, glycerin, and vinegar. Stir well to create a smooth blend. This forms the base for your suncatchers-so ensure they're combined fully for the best results.
-
Heat the mixture: Place the saucepan over medium heat. Continuously stir the mixture as it heats until it thickens, which should take about 5 minutes. You'll know it's ready when it resembles a jelly-like consistency.
-
Cool slightly: Once thickened, remove the saucepan from the heat. Allow the mixture to cool for a few minutes, so it's safe to handle but still pliable for shaping.
-
Add color: If you wish to brighten your suncatchers, now is the time to add a few drops of food coloring. Mix thoroughly until the color is evenly distributed throughout the mixture.
-
Pour & spread: On a piece of wax paper or parchment paper, pour the mixture. Use a spatula or the back of a spoon to spread the mixture evenly to your desired thickness, typically around ¼ inch thick for the best effect.
-
Cut shapes (optional): If you want specific shapes, let the mixture set for a moment, then use scissors to cut it into your desired forms. Alternatively, you can leave it in a sheet for a more organic look.
-
Dry completely: Place the wax paper with the poured mixture on a flat surface, allowing it to dry for several hours or preferably overnight until completely firm and dry.
-
Punch holes: Once dry, use a craft knife or hole punch to create holes for stringing. This step is optional but adds a perfect touch for hanging your creations.
Optional: Try experimenting with glitter for a sparkling effect!
Exact quantities are listed in the recipe card below.
How to Store and Freeze DIY Eco-Friendly Suncatchers
Room Temperature: Keep your DIY eco-friendly suncatchers in a dry place away from direct sunlight, ensuring they last for several weeks without degrading.
Fridge: If you live in a humid environment, you can store the suncatchers in the fridge for up to 1 week, wrapped in tissue paper to absorb excess moisture.
Freezer: Freezing is not recommended, as it can compromise the integrity of your suncatchers, causing them to become brittle and lose their beautiful colors.
Reheating: If needed, simply allow them to return to room temperature before displaying again; avoid any direct heat as it may distort their shape.
DIY Bioplastic Variations
Feel free to let your creativity run wild and personalize these charming suncatchers to your heart's content!
-
Sparkle Boost: Add glitter to the mixture for a dazzling effect, creating suncatchers that shimmer in the sunlight.
-
Natural Colors: Instead of food coloring, use natural dyes from blended fruits or vegetables, like beet juice or spinach, to color your suncatchers, making them more eco-friendly.
-
Shape Play: Use cookie cutters or different molds to create unique shapes, turning your suncatchers into whimsical creations perfect for any occasion.
-
Layered Effect: Pour different colored layers into the mixture for a beautiful ombré effect; this adds depth and intrigue to your suncatchers.
-
Fragrant Touch: Incorporate a few drops of essential oils into the mixture, like lavender or citrus, for scented suncatchers that fill your space with a delightful aroma.
-
Textured Designs: Press dried flowers or leaves into the mixture before it sets to create beautiful, nature-inspired patterns.
-
Hanging Variations: Instead of string, use twine or yarn for a rustic touch when hanging your suncatchers, giving them a more organic feel.
-
Seasonal Twist: Change the colors and shapes according to the season-think pastels for spring or warm hues for fall-for decorations that celebrate nature's beauty all year round.
Expert Tips for DIY Suncatchers
-
Avoid Burning: Stir continuously while heating to prevent the mixture from sticking to the bottom or burning, ensuring smooth suncatchers.
-
Color Vibrancy: For vibrant DIY suncatchers, add more food coloring than you think you need; it often fades slightly as it dries.
-
Shape Variety: Use cookie cutters for uniform shapes or let kids freehand their designs; it adds a personal touch and makes crafting more fun.
-
Drying Location: Ensure the suncatchers dry in a warm, dry place to speed up the process and avoid moisture, which can ruin their texture.
-
Flexible Finish: If you used glycerin, your suncatchers will be more flexible; for a stiffer option, omit it, but keep them indoors to extend durability.
Make Ahead Options
These DIY Eco-Friendly Cornstarch Suncatchers are perfect for busy home cooks looking to save time! You can prepare the mixture up to 24 hours in advance-just combine the ingredients as directed in the recipe, cool them slightly, and store the mixture in an airtight container. This helps keep the mixture fresh and avoids drying out. When you're ready to create, simply pour the mixture onto wax paper, shape it, and let it dry completely, which may take several hours or overnight. By prepping the mixture ahead of time, you can enjoy a fun and creative activity with minimal effort, making it easy to fit crafting into your busy schedule!
What to Serve with DIY Eco-Friendly Cornstarch Suncatchers?
These delightful creations bring a splash of color and joy, perfect for brightening any space while you get crafty.
-
Refreshing Lemonade: This tangy drink perfectly complements your crafting session, keeping you refreshed and energized.
-
Herbal Iced Tea: A cool, calming brew that complements the creativity in the air, providing a delightful sip between crafting steps.
-
Fruit Skewers: Colorful and fun, these provide a vibrant snack that mirrors the hues of your suncatchers, making them a tasty, healthy treat.
-
Cheese and Crackers: A crunchy, savory option to balance your sweet creations. As you craft, enjoy a nibble of this timeless snack!
-
Mini Pies: Sweet little bites that will sweeten your crafting experience, these treats add a special touch to your cheerful, creative day.
-
Vegetable Crudité: Fresh, crisp veggies served with a zesty dip enhance your crafting with a healthy crunch that keeps energy levels high.
Imagine sipping on a refreshing drink while crafting, surrounded by vibrant colors and delicious snacks-it's a perfect way to spend your day!
DIY Eco-Friendly Cornstarch Suncatchers Recipe FAQs
How do I know if my cornstarch is fresh?
Absolutely! When selecting cornstarch, check for a fresh, fine texture without any clumps or dark spots. If it has a musty smell or colors like yellow or brown, it may have gone bad and is better off replaced.
How should I store my finished suncatchers?
It's important to keep your DIY eco-friendly suncatchers in a dry place away from direct sunlight to avoid degradation. They can last for several weeks when stored properly in a cool, dry area. If humidity is a concern, consider wrapping them in tissue paper to help absorb excess moisture.
Can I freeze my suncatchers for long-term storage?
Very! Freezing is not recommended for these delicate crafts, as it may cause them to become brittle and lose their beautiful colors. Instead, store them at room temperature for the best results and always allow them to return to room temperature before displaying.
What should I do if my mixture doesn't thicken?
If your mixture isn't thickening, make sure you're stirring continuously while heating. This can take about 5 minutes. If it remains runny, it may need a bit more cornstarch; try mixing a tablespoon of cornstarch with a bit of water to create a slurry, then reincorporate it into your mixture and heat until thickened again.
What if I have allergies?
Make sure to check for allergies to any ingredients, especially if crafting with children. Cornstarch should be fine for most diets, but avoid food coloring if anyone is sensitive to certain dyes. Always confirm with any participants regarding potential allergenic reactions!
Can I use natural dyes instead of food coloring?
Absolutely! For a more organic approach, you can experiment with natural dyes derived from fruits and vegetables, such as beet juice for pink or spinach for green. Just remember that the colors may be softer compared to traditional food coloring, but they add a unique charm to your suncatchers!
Vibrant DIY Bioplastic Suncatchers for Eco-Friendly Fun
Equipment
- saucepan
- Flat surface for drying
- Scissors
- Spatula
- Craft knife or hole punch
Ingredients
For the Mixture
- 1 cup Cornstarch Provides structure and a translucent quality.
- ¾ cup Water Essential for creating a mixture that will solidify.
- 1 tablespoon Glycerin Makes the suncatchers more flexible (optional).
- 1 tablespoon Vinegar Adds a slight tang and stabilizes the mixture.
For Color and Texture
- few drops Food Coloring Used to color the suncatchers (optional).
For Preparation and Crafting
- 1 piece Wax paper or parchment paper Necessary for drying and preventing sticking.
- 1 piece Flat surface for drying Where the suncatchers will be laid out to dry.
- 1 piece String, yarn, or ribbon For hanging the finished suncatchers.
- 1 piece Craft knife or hole punch For adding a hanging hole to the suncatchers (optional).
Instructions
Making the Suncatchers
- In a saucepan, mix together cornstarch, water, glycerin, and vinegar. Stir well to create a smooth blend.
- Place the saucepan over medium heat. Continuously stir the mixture as it heats until it thickens.
- Once thickened, remove the saucepan from the heat. Allow the mixture to cool slightly.
- Add a few drops of food coloring to the mixture and mix thoroughly.
- On a piece of wax paper, pour the mixture and spread evenly to your desired thickness.
- Let the mixture set for a moment, then use scissors to cut it into your desired shapes or leave it as a sheet.
- Place the wax paper with the poured mixture on a flat surface, allowing it to dry for several hours or overnight.
- Once dry, use a craft knife or hole punch to create holes for stringing.


Leave a Reply