
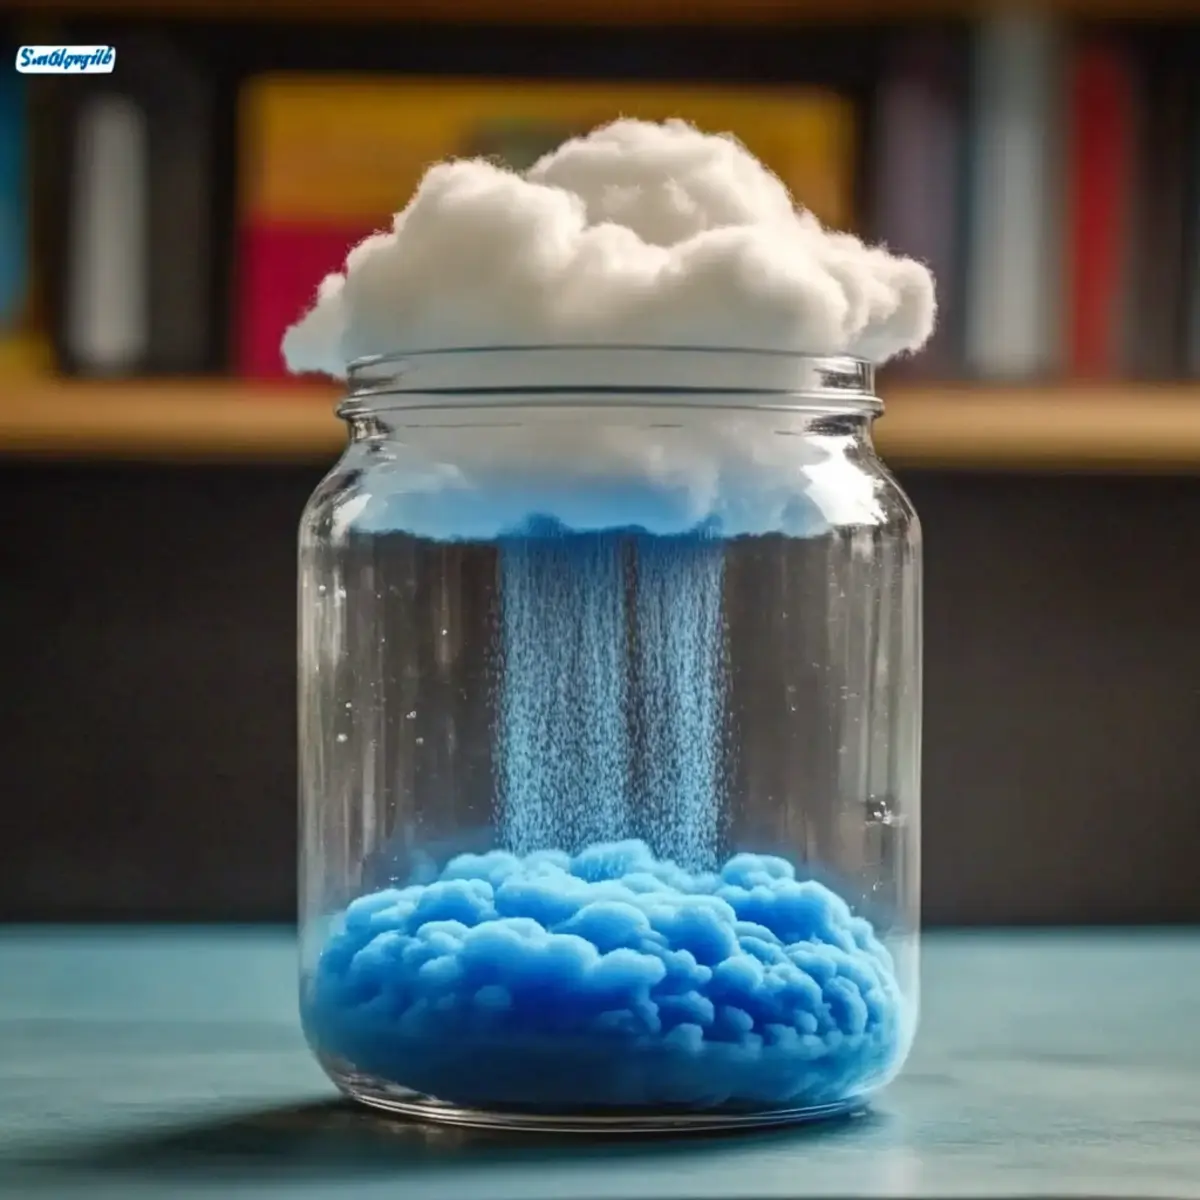
There's something incredibly delightful about watching kids explore the world around them, especially when it involves a little bit of science and a whole lot of fun! 🌈 Today, I'm excited to share a whimsical experiment that transforms an ordinary afternoon into a sensory wonderland: making a rain cloud in a jar! 🌧️☁️✨
In just ten short minutes, you can whip up a fluffy, squishy bubble foam that not only captivates the imagination but also serves as a fantastic educational tool. Picture little hands diving into a cloud-like creation, splashes of blue food coloring dancing through the layers, and curious minds buzzing with questions about evaporation and condensation. This easy recipe is perfect for engaging kids in imaginative play, allowing them to explore both textures and colors while deepening their understanding of the natural world. So roll up those sleeves, grab the foamy shaving cream, and let's make some magic together!
Why is Make a Rain Cloud in a Jar so Fun?
Instant excitement: This interactive recipe sparks joy as kids watch the vibrant colors seep into fluffy foam, mimicking a dynamic rain cloud.
Educational play: It's a hands-on way to explore scientific concepts like evaporation and condensation-learning through fun!
Quick and easy: With just a few household ingredients, you can create this sensory masterpiece in only 10 minutes.
Endless variations: Mix it up by adding glow-in-the-dark food coloring or create a rainbow effect for even more excitement.
Messy delight: Perfect for outdoor fun, allowing kids to explore their creativity without worrying about cleanup.
Bring the joy of sensory play into your home with this delightful project that will not only entertain but educate!
Make a Rain Cloud in a Jar Ingredients
• Let's gather what you need to create this delightful sensory play!
For the Bubble Foam
- Shaving Cream - This foamy type creates the fluffy cloud effect; avoid gel for best results.
- Water - Needed to mix with food coloring and fill your jar.
- Blue Food Coloring - Represents rainwater and adds a magical visual element to the foam.
For Mixing and Displaying
- Clear Jar or Cup - A clear container is essential for mixing and showcasing your rain cloud masterpiece; mason jars work great!
- Small Cup or Bowl - For mixing the food coloring with water before adding it to the foam.
For Application
- Dropper, Straw, or Spoon - Use any of these tools to drop colored water onto the foam, creating a mesmerizing rain effect.
Unleash your creativity and dive into this fun activity, perfect for exploring the wonders of science with kids! 🌈
How to Make a Rain Cloud in a Jar
-
Prepare the Jar: Begin by taking your clear jar or cup. Fill it halfway with foamy shaving cream, smoothing out the top to create a fluffy, cloud-like appearance that'll inspire wonder.
-
Mix Coloring: In a small cup or bowl, combine a few drops of blue food coloring with a small amount of water. Stir gently to blend the colors into a bright, vibrant solution.
-
Add Color to Foam: Using a dropper, straw, or spoon, carefully apply the colored water onto the shaving cream. Watch the magical "rain" effect as the blue water seeps down through the fluffy foam.
-
Explore Concepts: As the kids start diving into their sensory creation, take a moment to discuss scientific concepts like evaporation and condensation, making the activity not just fun, but educational too!
Optional: Consider using multiple colors for a rainbow effect to enhance the sensory experience!
Exact quantities are listed in the recipe card below.
What to Serve with Make a Rain Cloud in a Jar?
Create a magical sensory experience that stretches the imagination and awakens curiosity about the world.
- Outdoor Playtime: Let kids explore the bubble foam in an outdoor space, minimizing mess and maximizing fun with natural surroundings.
- Rainbow Effect: Use multiple colors of food coloring to create a visual feast in the foam. Kids will be mesmerized by the vibrant layers!
- Science Discussion: Pair this activity with a simple science lesson about weather patterns, enhancing their understanding as they play.
- Glow-in-the-Dark Twist: Add glow-in-the-dark food coloring for nighttime fun, transforming this sensory experience into a dazzling spectacle after dark.
- Nature Walk: After the foam fun, take a stroll outside, collecting leaves and observing clouds to deepen their connection with nature.
- Art Supplies: Have paper and crayons on hand to allow children to draw their favorite parts of the activity, blending creativity with science.
- Pajama Science Party: Turn this into a themed evening event with snacks, cozy attire, and activities that revolve around weather and clouds.
- Magical Storytime: Share a storybook about weather phenomena as a cozy conclusion, further enriching their educational experience.
Bubble Foam Variations
Feel free to get creative and tailor this sensory experience to your liking!
-
Rainbow Effect: Use various food colors to create a vibrant, swirling rainbow in the foam, sparking endless fascination.
-
Glow-in-the-Dark: Replace regular food coloring with glow-in-the-dark options for magical nighttime play, illuminating the sensory wonder with a soft glow.
-
Scented Foam: Add a few drops of essential oils to the shaving cream for delightful fragrances like lavender or lemon, enhancing the sensory experience with soothing scents.
-
Texture Twists: Mix in some cornstarch or whipped cream for a different texture, transforming your fluffy cloud into a captivating, creamy delight.
-
Themed Colors: For special occasions, experiment with holiday-themed colors! Use red and green for Christmas or purple and orange for Halloween to make learning festive.
-
Science Exploration: Introduce biodegradable glitter for an extra sensory element while discussing its environmental impacts, merging fun with educational conversation.
-
Seasonal Sensory: Tailor the colors and scents to the seasons; think pastel shades and floral scents for spring or rich reds and spicy scents for autumn, enhancing the seasonal fun.
-
Marble Foam Technique: Use tools like a skewer or chopstick to swirl the colored water through the foam, creating exciting marbled designs for a beautiful visual play!
Bring out the creativity and let your imagination guide you as you explore these delightful variations!
Storage Tips for Cloudy Bubble Foam
Best Used Immediately: Bubble foam is at its fluffiest and most fun right after making. Aim to enjoy it right away for the best sensory experience!
Short-term Storage: If you need to store it briefly, keep it in an airtight container at room temperature for up to 1 day. However, the foam will flatten over time.
Avoid Freezing: This bubble foam recipe is not suitable for freezing, as the texture will not hold up once thawed.
Reheating Considerations: If the foam has lost some puffiness, you can lightly fluff it with a spoon before using, but no heating is necessary.
Make Ahead Options
These Cloudy Bubble Foam for Sensory Play creations are perfect for busy home cooks looking to save time! You can mix the shaving cream and store it in an airtight container for up to 24 hours before use. Just remember, for the best foam quality, wait to add your blue food coloring until you're ready to play, as this helps maintain the cloud-like texture. When it's time to enjoy, simply scoop out the foam, apply the colored water, and watch the magic happen! With a little prep ahead, you can have a delightful, hands-on activity ready for the kids at a moment's notice.
Expert Tips for Your Rain Cloud
-
Use Foamy Cream: Ensure you pick foamy shaving cream, as gel types won't create the desired fluffy cloud effect for your sensory play.
-
Color Concentration: For the most vibrant rain effect, use concentrated blue food coloring. A little goes a long way in creating stunning visuals as you make a rain cloud in a jar!
-
Experiment with Layers: Try layering different colored waters to mimic a multi-colored rainstorm. Kids will love watching the colors interact in the fluffy foam!
-
Avoid Overdoing It: Keep food coloring amounts modest; too much can muddy the colors and lessen the visual impact. Focus on natural, light hues for a magical feel.
-
Cleanup Tips: Set up your sensory station outdoors or in a space that is easy to clean. This way, the messy fun won't dampen your spirits!
Cloudy Bubble Foam for Sensory Play Recipe FAQs
What type of shaving cream should I use?
Absolutely, for the best outcome, you should use foamy shaving cream and avoid gel types. Foamy shaving cream creates that fluffy, cloud-like texture which is essential for the visual and tactile experience of the bubble foam.
How long can I store the bubble foam?
While bubble foam is meant to be enjoyed immediately for optimal fluffiness, you can store it in an airtight container at room temperature for up to 1 day. However, be aware that it will lose its height and texture, becoming flatter over time.
Can I freeze the bubble foam?
No, this bubble foam recipe is not suitable for freezing. If frozen, the foam will lose its airy texture upon thawing, resulting in a less enjoyable sensory experience.
What should I do if the colors mix too much?
If you find that the food coloring is making a muddy mess, don't worry! To enhance the visual effect, try using smaller amounts of food coloring or let each layer settle for a moment before adding the next. Experimenting with frothy layers of different colors can create beautiful contrasts, much like a real rain cloud!
Is this foam safe for pets and young children?
While the ingredients in this recipe are generally non-toxic, it's always best to supervise young children as they play and ensure that they do not ingest any of the materials. Additionally, keep the foam away from pets to avoid any accidental ingestion, especially since some pets may be curious!
Can I make a rainbow effect with the foam?
The more the merrier! To create a rainbow effect, simply mix different colors of food coloring with water separately. Pour them slowly onto the foam one at a time, allowing each color to seep through without mixing too rapidly. This will create a stunning visual display that enhances the sensory play experience!

Make a Rain Cloud in a Jar – The Ultimate Kids’ Experiment!
Equipment
- Clear Jar or Cup
- Small Cup or Bowl
- Dropper, Straw, or Spoon
Ingredients
For the Bubble Foam
- 1 can Shaving Cream Avoid gel for best results
- 1 cup Water Needed to mix with food coloring
- a few drops Blue Food Coloring Represents rainwater
For Mixing and Displaying
- 1 jar Clear Jar or Cup Essential for mixing and showcasing
- 1 cup Small Cup or Bowl For mixing the food coloring
For Application
- 1 Dropper Use to drop colored water onto the foam
- 1 Straw Use to drop colored water onto the foam
- 1 Spoon Use to drop colored water onto the foam
Instructions
How to Make a Rain Cloud in a Jar
- Prepare the Jar: Begin by taking your clear jar or cup. Fill it halfway with foamy shaving cream, smoothing out the top to create a fluffy, cloud-like appearance.
- Mix Coloring: In a small cup or bowl, combine a few drops of blue food coloring with a small amount of water. Stir gently to blend the colors into a bright solution.
- Add Color to Foam: Using a dropper, straw, or spoon, carefully apply the colored water onto the shaving cream. Watch the magical rain effect as the blue water seeps down.
- Explore Concepts: Discuss scientific concepts like evaporation and condensation with the kids while they enjoy their sensory creation.


Leave a Reply